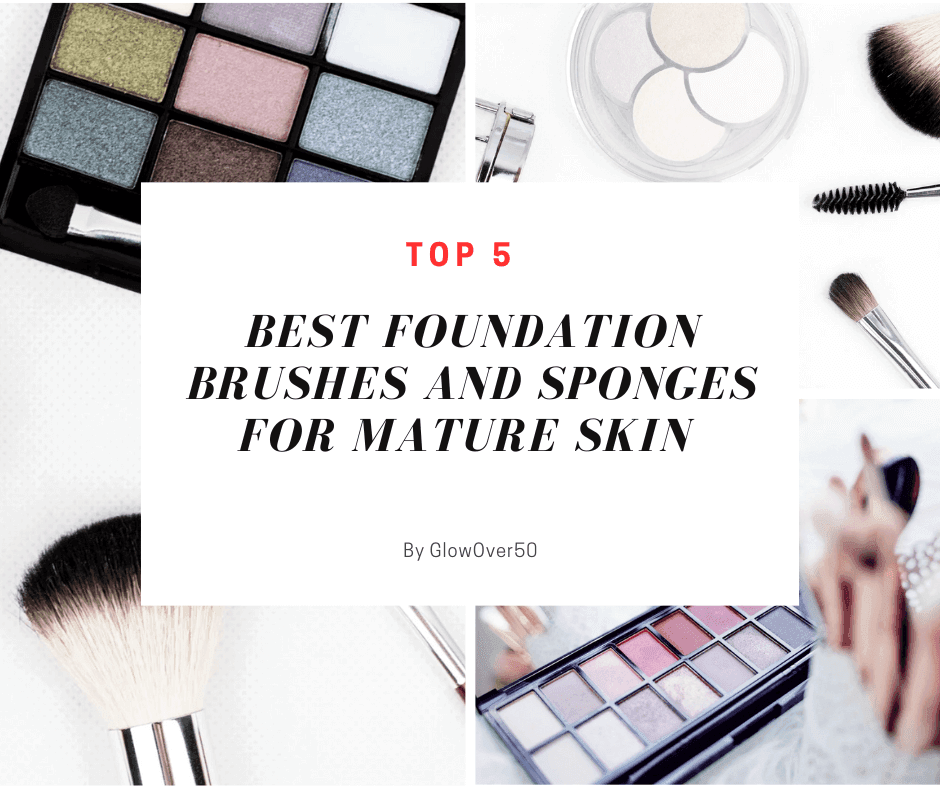
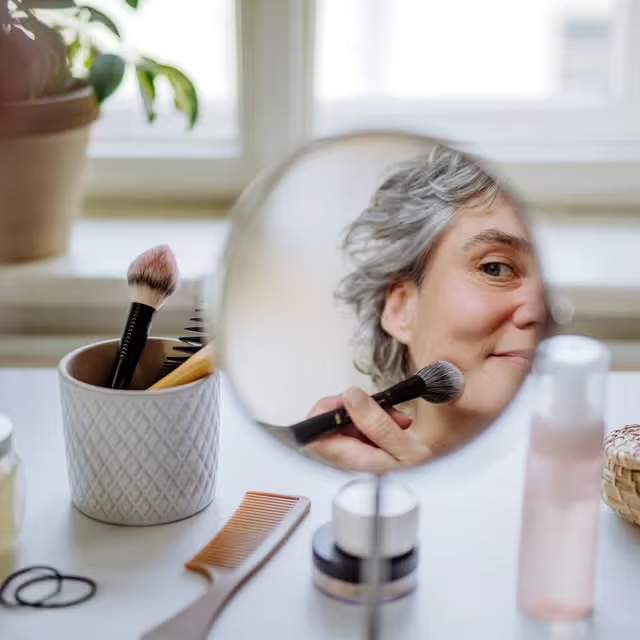
Finding the right foundation is only half the battle for mature skin – how you apply it makes all the difference. If you’ve ever felt your makeup looks dry, settles into fine lines, or appears streaky, the culprit might be your tools. Using the proper brushes or sponges can help foundation that won’t settle into wrinkles glide on seamlessly for a smoother, more youthful look. In fact, makeup artists say using a damp makeup sponge ensures an even, natural finish and avoids emphasizing lines (unlike fingers, which can leave a blotchy, uneven application). The GlowOver50 team has tested countless applicators to find ones that flatter women over 50. Even the most luxurious foundation (see our Top 7 Foundations that Don’t Settle into Wrinkles – Top 2025 Picks) can disappoint if applied poorly, so choosing the right tool is essential.
Before we dive into our top picks, a quick reminder: always start with well-prepped skin. Hydration is key – mature skin tends to be drier, so moisturize and prime to create a smooth canvas. (We cover prep steps in How to Prep Mature Skin for Foundation, and you can find great primer options in our 5 Best Primers for Mature Skin in 2025). Starting with plumped, moisturized skin helps your foundation glide on without clinging to dry patches or settling in creases. Once your skin is ready, the following brushes and sponges will ensure your foundation goes on flawlessly – no tugging, no caking, and no emphasizing wrinkles. Let’s get into the top five tools that over-50 beauty lovers swear by!
January 2026 Update: Tested Foundation Tools That Still Wow
Ladies, it’s 2026, and my makeup brushes have been busy. I retested my favorite foundation tools to see which ones still blend beautifully on mature skin — and which ones didn’t make the cut. These picks still give a soft-focus finish without tugging or settling into lines.
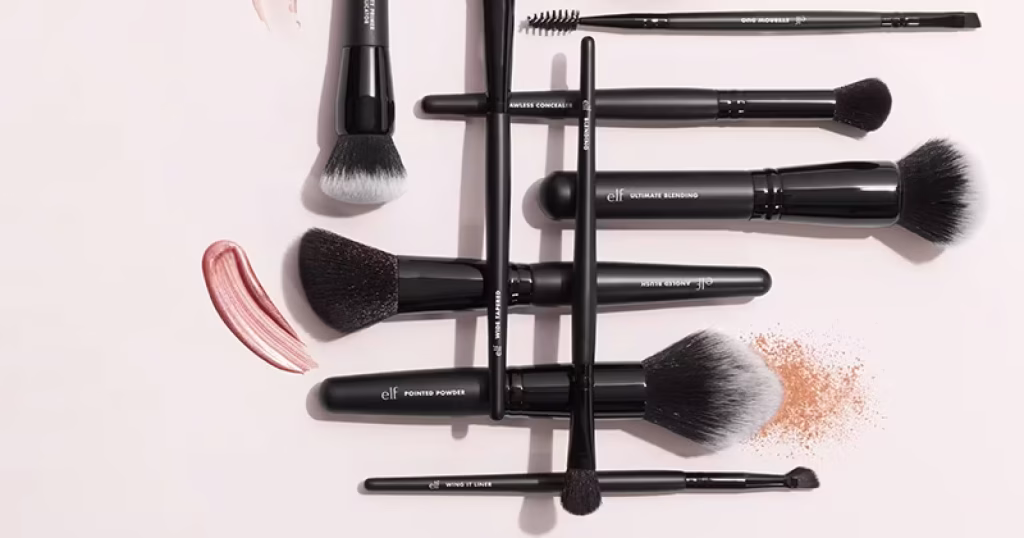
- Makeup Brushes Set – 12 Piece Professional & Beginner Friendly (2026 update):
With ultra-soft synthetic bristles, this brush set applies and blends foundation gently and evenly. I like having multiple face brushes so I can blend without overworking mature skin. Easy to clean, travel-ready with a case, and comfortable ergonomic wooden handles make this a very practical everyday set. - Foundation Brush, EIGSHOW Pro Slanted Brushes: 𝐌𝐚𝐝𝐞 𝐖𝐢𝐭𝐡 𝐂𝐨𝐦𝐟𝐨𝐫𝐭 𝐈𝐧 𝐌𝐢𝐧𝐝 – The total vegan brush is made for expertly blended coverage and a polished finish, which boasts a unique slanted shape. It’s that shape with Silky Bristles that ensures to blend your best match of foundation from light to medium buildable coverage, gives you the even applications.
Pro Tip: Wash your brushes weekly to avoid patchy application, and refresh your sponge every 3–4 months for a streak-free glow. I use this one: 5-in-1 Electric Makeup Brush Cleaner & Dryer Machine

Table of Contents
1. IT Cosmetics Heavenly Luxe Flat Top Buffing Foundation Brush #6

Why It’s Great for Mature Skin
The IT Cosmetics Heavenly Luxe #6 is a flat-top kabuki brush known for its ultra-soft, densely packed synthetic bristles. This brush buffs foundation into the skin effortlessly, creating an “airbrushed” effect that’s ideal for mature skin with texture. Because the bristles are so plush and high-quality, the brush doesn’t scratch or tug on delicate aging skin. Instead, it gently blurs the look of pores and fine lines, allowing foundation to sit smoothly on the surface. The dense bristle design also means you can build coverage in thin layers – perfect for covering age spots or redness without a heavy look. (Many over-50 users find buffing in thin layers is the secret to a foundation that doesn’t settle into wrinkles.) This brush works wonderfully with hydrating liquid or cream foundations, which are recommended for older skin to maintain a dewy glow. The result is an even, skin-like finish that won’t exaggerate lines. Price-wise, it’s a high-end tool (approximately $50), but its durability and performance make it worth the investment for a professional-quality finish at home.

Application Tips
To use the Heavenly Luxe #6, dot your hydrating foundation on your face (or directly dip the brush into a small amount of product). Then use the brush to buff in circular motions, starting at the center of your face and blending outward. The key is to apply light pressure – let the super-soft bristles do the work of spreading and blending the foundation. For areas with more pronounced wrinkles (like laugh lines), you can stipple (pat) the foundation in with the brush rather than sweeping, which deposits coverage without settling into creases. Always ensure your skin is well-prepped; this brush pairs beautifully with a smoothing primer underneath (check out our 5 Best Primers for Mature Skin in 2025 for some great primers that help fill in lines). Because the #6 is densely packed, it picks up a good amount of product – so start with a small dab of foundation and build up if needed. You can even use the residual product on the brush to gently go over areas like the under-eyes or around the nose for a final blend (though for precise concealer placement, you might want a smaller brush or sponge tip).
Cleaning tip: Wash this brush about once a week to keep it in top condition; due to its density, foundation can accumulate in the bristles, and clean bristles ensure the smoothest application. (Dirty brushes can harbor bacteria, which can irritate mature skin, so don’t skip regular cleansing!). With proper care, this brush will maintain its shape and softness for years.

Pros & Cons
Pros:
- Extremely soft, no-tug bristles – perfect for delicate mature skin
- Dense, flat-top shape buffs foundation for an airbrushed finish (fantastic coverage with minimal effort)
- Synthetic, cruelty-free bristles that don’t soak up too much product (more foundation ends up on your skin, not lost in the brush)
- Sturdy build and long handle that’s comfortable for arthritic or shaky hands to grip (helps with control)
Cons:
- High-end price (~$50) – an investment for a single brush
- Dense bristles need regular cleaning (product can build up if not washed weekly)
- Takes a little practice to buff in circular motions for best results (pressing too hard can cause streaks – use a light hand)
- The brush head is somewhat large, so it may be tricky to maneuver into very tight areas like the inner corners of eyes (you may still use a smaller brush or sponge for detail work)
Full Review Coming Soon! (This brush is so beloved that we could write a full review on it. Its ability to make foundation look seamlessly blended is a game-changer for many women over 50. If you’re interested in an even deeper dive, stay tuned on GlowOver50 for a dedicated review.)
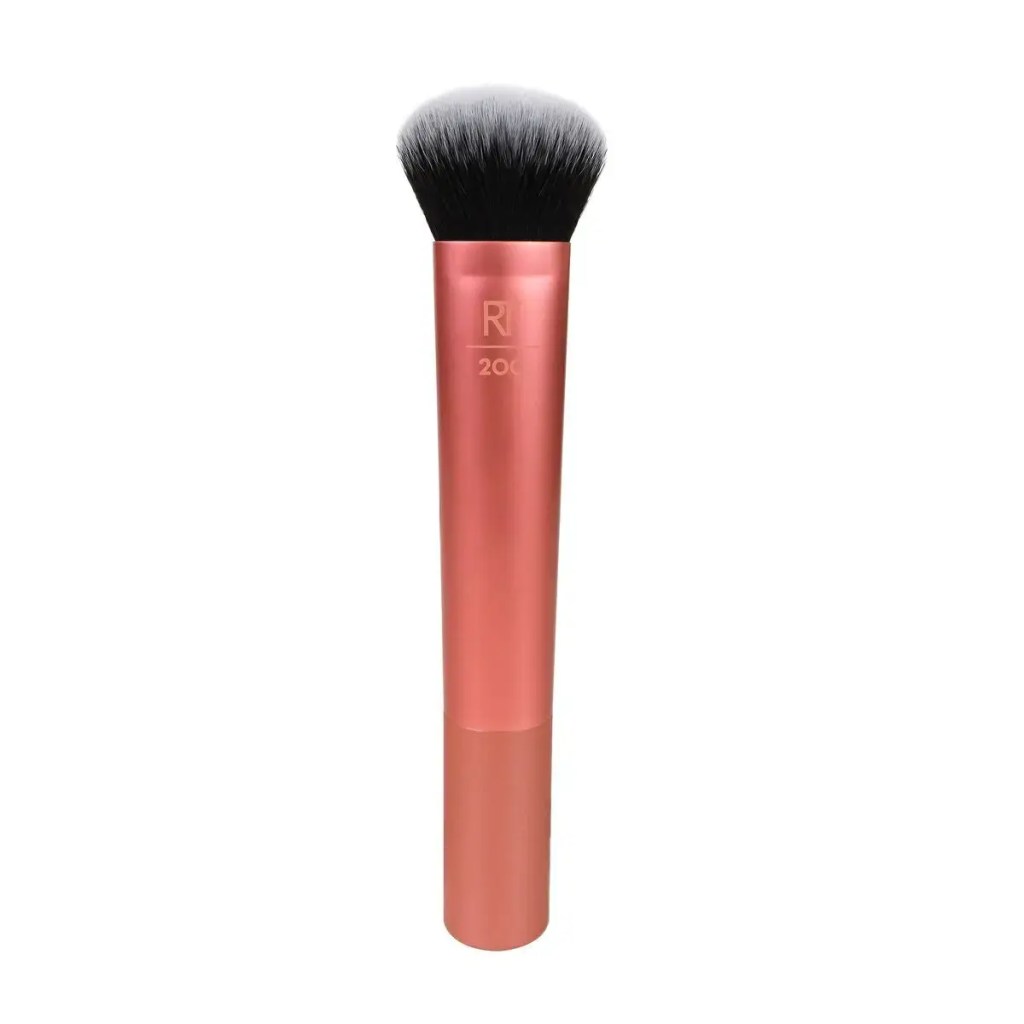
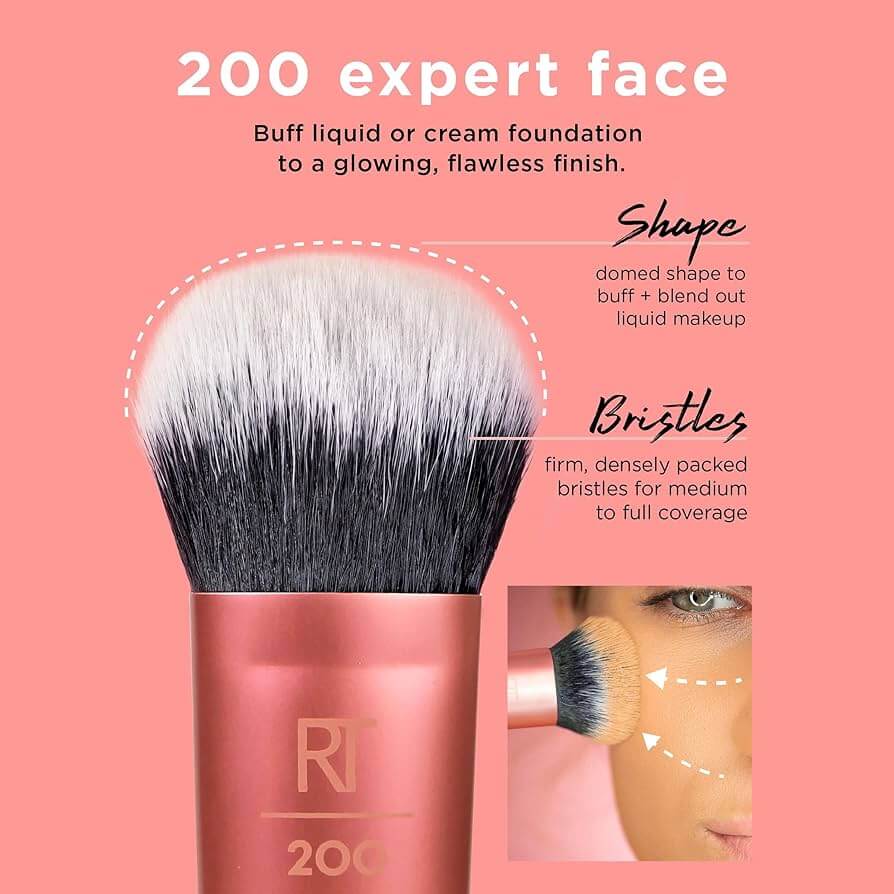
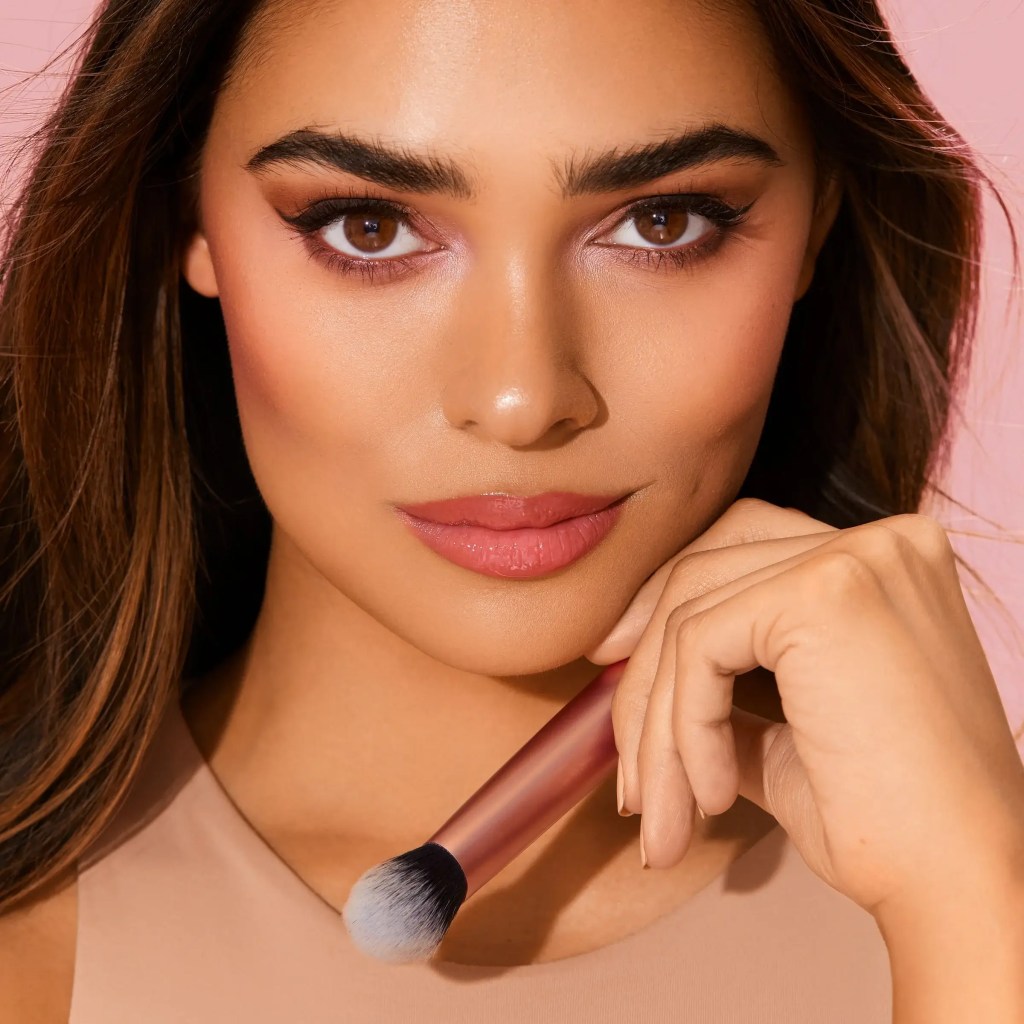
2. Real Techniques Expert Face Brush
Why It’s Great for Mature Skin
If you’re looking for a budget-friendly yet high-performing foundation brush, the Real Techniques Expert Face Brush is a superstar – especially for mature skin. This brush costs around $9, but don’t let the low price fool you. It features tightly packed synthetic bristles with a slightly domed, rounded top. The bristles are firm enough to blend foundation evenly, but still soft on the skin, so they won’t create micro-exfoliation (a concern for dry, older skin). The Expert Face Brush excels at streak-free blending: it’s designed to eliminate those frustrating foundation streaks by allowing you to buff product in small circular motions. Mature skin often has areas of uneven texture (due to fine lines or large pores), and this brush’s shape helps blur imperfections by polishing the foundation into the skin. Users love that it provides excellent coverage with liquid and cream foundations without making makeup look heavy. It’s also a versatile tool – aside from foundation, this brush is great for cream or liquid blush and bronzer application, meaning it can help bring that healthy flush to your cheeks without disturbing the foundation underneath (we’ve rounded up our Best Blush and Bronzer for Mature Skin 2025 if you need product ideas). The size of the brush head is just right: small enough to get around the nose and under eyes, but large enough to quickly cover the face. No tugging, no poking – just smooth blending. For mature-skinned beauty enthusiasts, the Real Techniques Expert Face Brush is proof that you don’t have to spend a fortune to get a great result.
Application Tips
Start by dotting or applying a small amount of foundation on the center of your face (cheeks, forehead) and chin. Take the Expert Face Brush and use gentle, circular buffing motions to blend the foundation outward. The key is to use light pressure and let the brush do the work – its dense bristles will spread the product evenly as you swirl. You can also use a back-and-forth “painting” motion on areas like the jawline or around the nose, then buff out any lines. If you notice any streaks (which is rare with this brush), just keep buffing lightly and they disappear into an even finish. The slightly tapered edges of this brush are great for blending around the nose and under the eyes; you can pinch the bristles slightly to get into tighter corners. For mature skin, less is more: build your coverage in thin layers. Add a bit more foundation to areas that need it and buff again rather than slathering on a thick layer at once. The Real Techniques bristles won’t soak up too much product, so you get nice coverage without wasting foundation.
Pro tip: this brush can double as a blending tool for cream blush or contour – after foundation, dab a bit of cream blush onto your cheeks and use the same brush (you can wipe off excess foundation from it first) to blend in circles. It will merge the blush with your foundation seamlessly, giving a naturally flushed look. If you prefer a very light, sheer base (for example, using a tinted moisturizer), the Expert Face Brush can handle that too: use soft sweeping motions for a lighter touch. Finally, if you like to set certain areas with powder, you can use this brush to buff on a small amount of setting powder in the T-zone. Its soft bristles won’t cake on powder – just remember to tap off excess first. (For detailed techniques on setting makeup without exaggerating wrinkles, see How to Apply Setting Powder for Mature Skin in 2025 – a light touch is all you need!)
Pros & Cons
Pros:
- Affordable (around $9) and widely available – a great value for the quality
- Soft, dense bristles provide streak-free, even coverage without irritating the skin
- Multi-purpose: can be used for foundation, cream blush, bronzer, or even to buff setting powder (less tools to buy!)
- Bristle size and shape are ideal for both large areas and small nooks of the face – very user-friendly design
- Easy to clean and holds up well over time (no significant shedding reported with proper care)
Cons:
- The brush is dense; if you prefer an ultra-light whisper of foundation, you might need to use an extra-light hand or a duo-fiber brush instead (dense brushes can build coverage quickly)
- Handle is a bit thick (Real Techniques’ signature design) – comfortable for most, but if you have very small hands you might find it a tad chunky to hold
- It doesn’t come with a cap or case – if you toss it in a makeup bag, the bristles can splay unless you store it carefully
- As with any brush, if not washed regularly, product buildup can occur which may reduce its performance (oils from foundation can accumulate, so weekly cleaning is recommended)
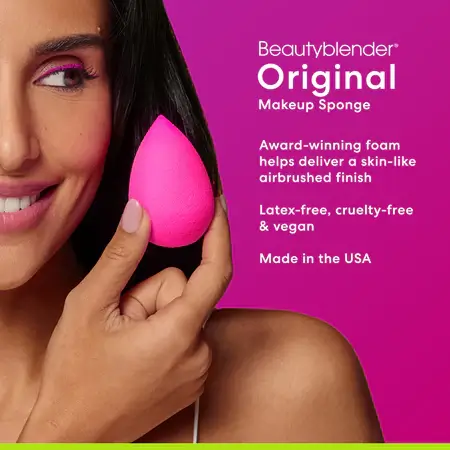
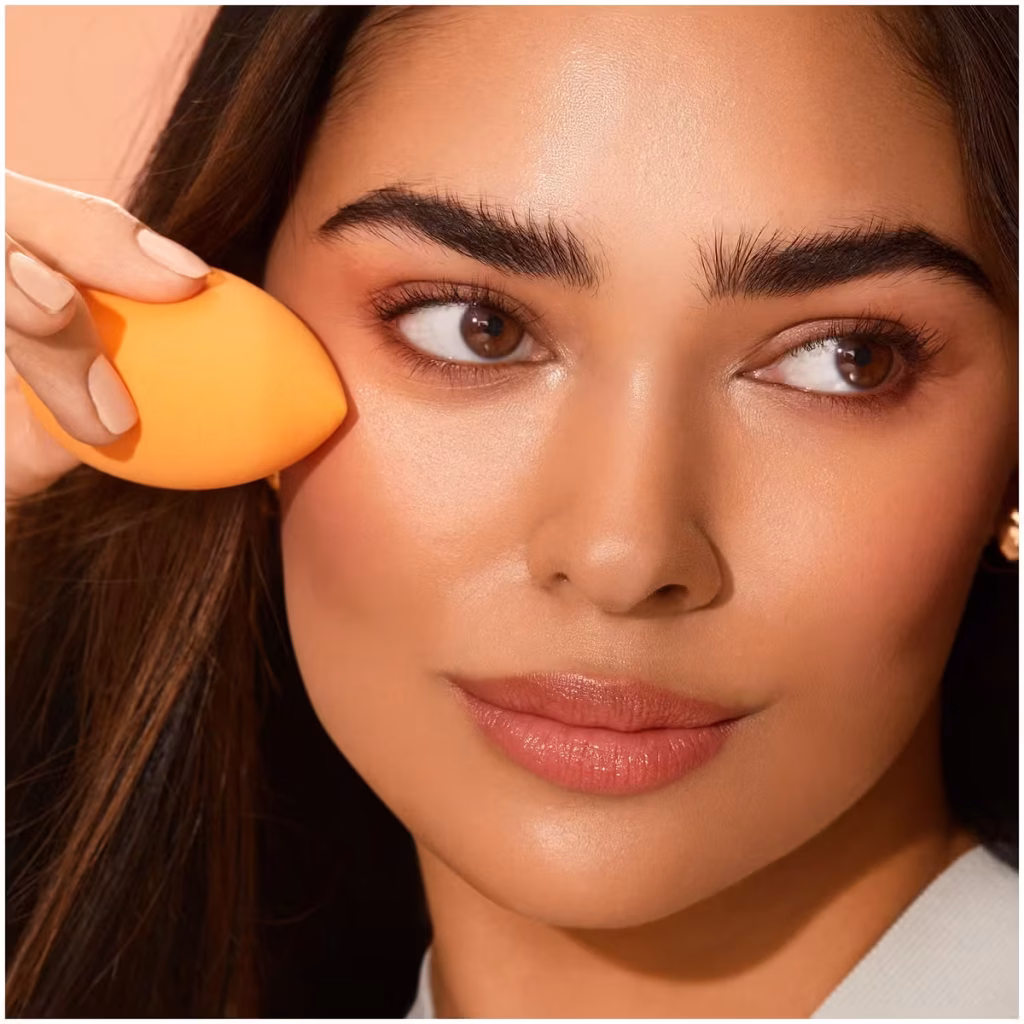
3. Beautyblender Original Makeup Sponge
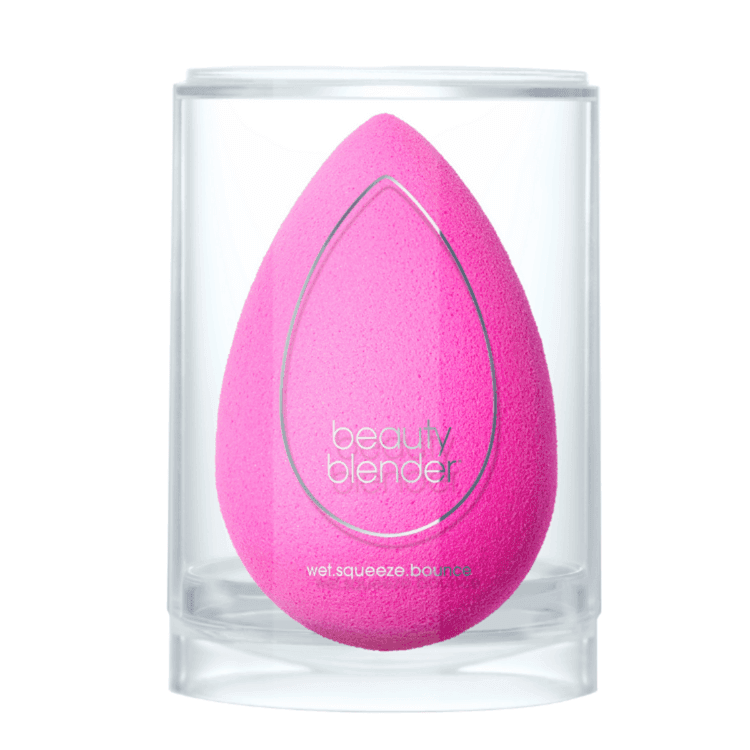
Why It’s Great for Mature Skin
The Beautyblender needs no introduction – this iconic pink sponge has a cult following among makeup artists and everyday users alike, and it’s especially beneficial for mature skin. When used damp, the Beautyblender provides a flawless, dewy finish that can make dry or lined skin appear plumper and more radiant. The sponge’s unique aqua-activated material expands and becomes super soft when wet, allowing it to “bounce” foundation into the skin rather than rubbing over it. This bouncing technique means no brush streaks at all, and it presses foundation into pores and fine lines in a good way – effectively blurring them rather than allowing product to sit on top and emphasize texture. The Beautyblender is fantastic for sheer, buildable coverage: it tends to pick up excess product, so you won’t accidentally apply too thick of a layer (which is a common issue that leads to caking on mature skin). In fact, blending with a damp sponge helps create a smooth, natural finish without settling into wrinkles – a major plus for those of us concerned about foundation creasing. The pointed egg-like shape of the Beautyblender also makes it versatile: the broad end quickly covers larger areas of the face, while the pointed tip can get into creases around the nose or blend under the eyes. Many over-50 makeup lovers find that using a Beautyblender can make almost any foundation look better on their skin – it’s like an instant filter or smoothing tool. It works with liquids, creams, and even stick foundations that you’ve sheered out. One of the best parts is how gentle it is: the sponge texture is soft and cushiony, so it’s very kind to skin that might have lost some elasticity. There’s no pulling or dragging – just a gentle pounce. Dermatologists even recommend makeup sponges like this for mature skin application, with one expert specifically citing the Original Beautyblender as a top pick for older women. The main downside is the price: about $20 for a single sponge, which is pricy considering it needs regular replacement. However, for many, the flawless results are well worth it.
Application Tips
Always use the Beautyblender damp for best results. Run it under water and squeeze out the excess until the sponge is expanded and slightly squishy (it should be damp, not dripping). A damp sponge ensures it won’t soak up all your foundation and it helps impart that dewy finish. Place small dots of foundation on your face (or dot onto the back of your hand and pick up from there). Then, use the Beautyblender in a bouncing (stippling) motion to press the foundation into your skin. Avoid dragging the sponge; instead, tap it repeatedly and gently over the skin. You’ll notice the coverage goes on very evenly and there are zero streaks. For areas with fine lines (around the eyes or mouth), use the pointed tip of the sponge to lightly dab foundation or concealer there – this precision helps prevent excess product from collecting in those creases. You can also use the sponge to blend out foundation on tricky areas like the nose folds or between the brows. If you need more coverage, add another thin layer of foundation and bounce the sponge again until you reach desired coverage.
The Beautyblender is also excellent for blending concealer: apply your concealer under the eyes or on age spots, then use the tip of the sponge to tap it out seamlessly (for reference, our Best Concealers for Mature Skin 2025 list has some great options that work beautifully with this technique). Another tip: after applying all your cream products (foundation, concealer, even cream blush), take a clean, slightly damp Beautyblender and do one more pass of bouncing all over your face. If you’re unsure what counts as “cream steps” vs “powder steps,” here’s my makeup layering routine in the right order. This final step picks up any excess product sitting on the skin and melds everything together – a trick makeup artists use to achieve that second-skin look and to ensure nothing is creasing. Finally, keep your sponge (not sure which concealer formula suits you? see my guide on choosing concealer)
clean: wash it with a gentle soap after each use or every few uses at minimum. Dermatologists warn that sponges can harbor bacteria and cause breakouts or irritation if not cleaned. A clean sponge not only is better for your skin health, but it also performs better (a gunked-up sponge won’t blend as nicely). With proper care, a Beautyblender sponge can be used for a few months before needing replacement. Always air-dry it completely to prevent any mildew. Treat your Beautyblender well, and it will reward you with years-off-your-face foundation results!

Pros & Cons
Pros:
- Seamless, dewy finish: virtually eliminates streaks and helps foundation not settle into fine lines(the bouncing technique leaves an even layer of product)
- Gentle, cushiony application – no tugging on skin at all (great for skin with less elasticity)
- Pointed shape allows access to small areas (under eyes, around nose) and broad end makes quick work of cheeks/forehead
- Excellent for sheer, buildable coverage – prevents heavy-handed foundation mistakes by naturally limiting product on the skin
- Multi-use: works for foundation, concealer, cream blush/bronzer, even skincare or primer application if desired
Cons:
- Needs to be cleaned often and replaced regularly (wears out over time). Can harbor bacteria if not cleaned, which is a concern for any skin – especially mature skin that might be more sensitive
- Pricey for a sponge (~$20 each), given that it’s not a long-term tool like a brush. The cost adds up if you replace it every 3-6 months
- There is a slight learning curve if you’re new to sponges – figuring out the right dampness level and bounce technique (but it’s easy with practice)
- Can sheer out full-coverage foundations more than a brush would (this is a pro or con depending on your preference; if you want maximum coverage, you might need to apply an extra layer or use the sponge just to finish after using a brush)
- The bright pink color can stain with foundation over time, which isn’t a functional issue but can make the sponge look less appealing (note: Beautyblender sells cleansers that help remove deep stains)
4. Real Techniques Miracle Complexion Sponge

Why It’s Great for Mature Skin
The Real Techniques Miracle Complexion Sponge is often called the “affordable dupe” for the Beautyblender – and it indeed delivers similar benefits at a fraction of the price (approximately $6 per sponge, and it often comes in multi-packs for even better value). For mature skin, this sponge is a fantastic tool to achieve a smooth, youthful foundation finish without spending a lot. Like the Beautyblender, the Miracle Complexion Sponge is designed to be used damp, turning soft and bouncy to help makeup melt into the skin. One unique feature is its shape: it has a pointed tip and a flat edge on one side. The flat edge can be great for pressing foundation into larger areas or for techniques like “baking” under the eyes with setting powder (if you ever choose to do that sparingly), while the precision tip is good for corners and detail work. For mature skin, the flat side is handy because you can use a gentle rolling or patting motion to quickly cover areas like the cheeks with a thin, even layer – this helps if you want to avoid over-applying product. The material of the RT sponge is latex-free foam and feels slightly denser than a Beautyblender when wet, but still very soft. It provides that same airbrushed, no-streak finish, helping to blur pores and fine lines by pressing foundation in rather than sweeping it on top. Many women over 50 love this sponge because it leaves a bit of a glow (since you’re using it damp) and prevents foundation from looking dry or cakey. If you have very dry skin or dry patches, a sponge like this can be more forgiving than brushes, as it won’t catch on flaky bits – in fact, it can add a touch of moisture as you apply. The Miracle Complexion Sponge works wonderfully with all types of foundation, from a light tinted moisturizer to a full-coverage liquid. It’s also excellent for blending tinted moisturizers on mature skin with SPF (for days when you want a lighter look – see our Best Tinted Moisturizers for Mature Skin for some top picks). Since it’s an affordable tool, you can replace it more often without guilt, which is good because sponges perform best (and are most hygienic) when they’re in good shape. Overall, this tool proves you can achieve a flawless foundation over 50 without breaking the bank.
Application Tips
Use the Miracle Complexion Sponge damp for best results. Soak it in water and squeeze it out thoroughly – you’ll notice it expands in size. Apply your foundation in small dots on the face or dip the sponge into a bit of foundation that you’ve placed on the back of your hand. Just like with any makeup sponge, use tapping/bouncing motions to apply. You can alternate between the sponge’s different surfaces: try using the rounded base or the flat side for the larger areas of your face like the cheeks, forehead, and chin. The flat side is especially helpful for pressing foundation into areas with larger pores or where you want a really smooth finish – you can sort of press and roll with the flat edge to lay down the product, then bounce to blend it out. Use the pointed tip around the nose, inner eye corners, and along the laugh lines to ensure foundation doesn’t pool in those areas. One neat trick with the RT sponge: because of that flat edge, it’s great for cleaning up makeup mistakes – for instance, if your concealer creases, you can dampen the flat side and gently press it under the eye to remove excess product and re-smooth. Similarly, after applying foundation, if you see any area where product has settled (like in a deeper wrinkle), take the tip of the damp sponge and lightly dab it out. The sponge will lift the extra product, leaving a more even finish (one of the big advantages of sponge application!). If you prefer a bit more coverage, don’t fully saturate the sponge with water – a slightly less damp sponge will absorb less product and deposit more on the skin. As always, build up coverage in thin layers. With the RT sponge, you can also apply a cream contour or blush by dabbing the product on and bouncing the sponge to blend – it gives a very natural result. Now, for setting your makeup: while mature skin doesn’t usually need heavy powder, if you want to set certain areas, you can use the dry flat edge of the sponge to press a tiny amount of translucent setting powder onto areas like the under-eyes or nose (press, don’t drag, to avoid moving the foundation). This technique keeps the dewy look elsewhere but locks in the makeup where you tend to get shine or creasing. Remember to wash the sponge often (every few uses at least). A little gentle cleanser or baby shampoo works to remove foundation stains – just massage it, rinse, and air dry. Since it’s inexpensive, many users replace the RT sponge every 1-2 months to ensure optimal softness and cleanliness. Keep an eye out for any tearing; if the sponge starts to rip or crumble, it’s time for a new one. With these practices, the Miracle Complexion Sponge will be a trusty ally in achieving flawless foundation on mature skin daily.
Pros & Cons
Pros:
- Great value: budget-friendly price with performance comparable to higher-end sponges (you can buy 3-4 RT sponges for the cost of one Beautyblender)
- Provides a smooth, dewy finish that’s very flattering on mature skin (minimizes the look of pores and fines lines by pressing product in)
- Unique shape with flat edge increases versatility – makes application fast and even, and helps in reaching tricky areas
- Soft when damp, gentle on the skin – won’t tug or irritate even dry, delicate areas
- Easy to replace regularly due to low cost (which means you’re more likely to always have a fresh, bouncy sponge – better hygiene and results)
Cons:
- Like all sponges, it requires frequent cleaning and eventual replacement (even though it’s cheaper, it’s still an ongoing expense and maintenance task)
- Some users find it slightly less durable than the Beautyblender – with heavy use it might develop tears a bit sooner (the material is a tad less dense)
- Can absorb a bit of product (especially if you don’t wet it enough) – dampening properly is key to avoid foundation waste
- The finish is slightly less full-coverage than a brush; if you want a very full, opaque foundation look, you may need to layer or use this sponge just for final blending
- The bright orange color can stain, and over time sponges may start to look dingy even when clean (purely cosmetic con, but worth noting)
5. e.l.f. Ultimate Blending Brush
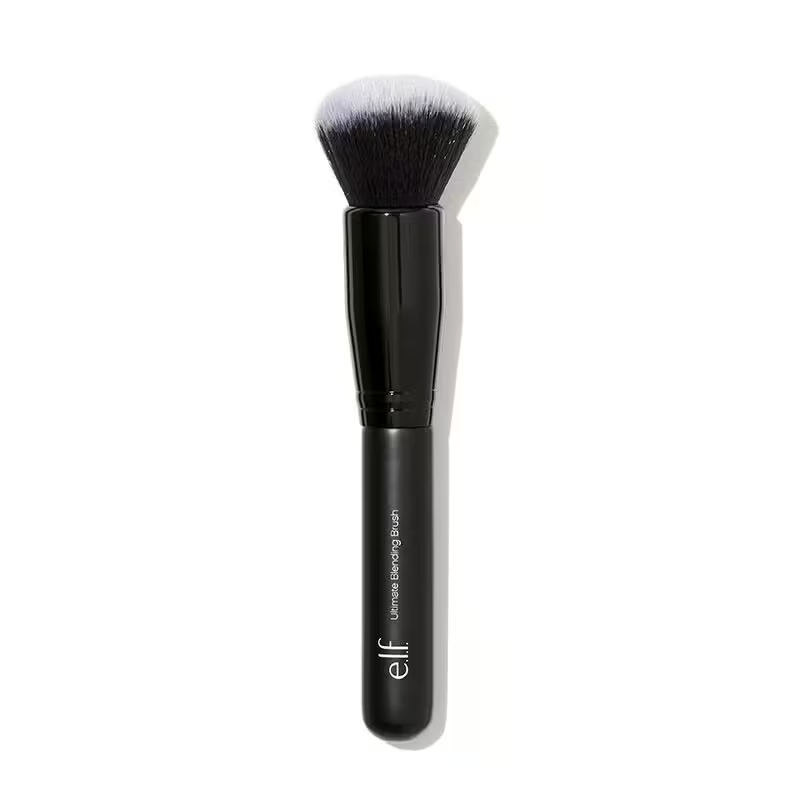
Why It’s Great for Mature Skin
The e.l.f. Ultimate Blending Brush proves that you don’t need to spend big to get beautiful results. Priced around $7, this brush is a steal – and it’s especially friendly for those of us with mature skin on a budget. Don’t let the price tag fool you: the Ultimate Blending Brush has a large, domed brush head with plenty of soft, synthetic bristles. They are not overly dense nor too sparse – just the right balance, which allows the brush to glide nicely and evenly deposit product. For aging skin, this means you can apply foundation without harsh streaks or micro-scratches. The bristles feel plush and gentle, so you won’t get that rough sensation that some cheaper brushes have. In fact, many users compare this e.l.f. brush favorably to far more expensive counterparts. It’s excellent for achieving a light-to-medium coverage foundation look – perfect for enhancing your complexion without masking it entirely (which often looks more youthful). Because the bristles aren’t extremely tightly packed, the brush can lay down a thin, even layer of foundation that you can build as needed. This helps avoid the dreaded cakey look on mature skin; instead, you get a natural, second-skin finish. The slightly larger size of the brush head means you can apply your base quickly and blend it out in a breeze – a nice perk if you like a quick, no-fuss routine. Another benefit: this brush is versatile beyond foundation. It works nicely to buff in cream or powder foundation, and you can even use it for a light dusting of finishing powder or to blend the edges of your blush/bronzer. Its soft-touch handle is comfortable to hold, and the lightweight design makes it easy to maneuver around the face without putting pressure on the skin (important for mature skin, where tugging can accentuate sagging). For those looking to curate a budget-friendly makeup kit, the e.l.f. Ultimate Blending Brush is a must-have – it’s one of the best affordable foundation brushes for mature skin that still delivers a flattering finish. Also, because it’s so affordable, you can grab two – one for foundation and one for say, blending your cream blush – and still spend less than a single high-end brush! Pair this tool with a quality yet budget-friendly foundation (like those in our 5 Best Drugstore Foundations for Mature Skin in 2025 list) and you’ll have a winning combo that keeps both your skin and wallet happy.
Application Tips
The e.l.f. Ultimate Blending Brush is very easy to use, even if you’re a beginner. Pump or dab a bit of your foundation onto the center of the face. Because this brush has a slightly larger head, you might find it easiest to start at the center (where you need the most coverage) and blend outward. Use short, circular buffing motions to spread the foundation. The brush’s soft, flexible bristles really shine with this technique – you’ll see the product diffuse nicely without much effort. If you prefer, you can also use a stippling motion (lightly dabbing the brush) on areas where you want to maintain coverage, then do gentle circles to blend edges out. This brush’s dome shape works well around the curves of the face; you can tilt it to use the edge of the brush for areas like around the nose or under the eyes. One thing to note: since the bristles aren’t ultra-dense, if you use too much foundation in one go, you might see some streaks initially – the fix is simple: keep buffing lightly and they will disappear, or apply less product and build up. The goal is thin layers. You can always add a bit more foundation to the brush and buff again on areas that need extra coverage (for example, sun spots or uneven patches). Less pressure is more – press too hard and the bristles splay, which can cause a streak; a light touch keeps the bristles doing their job uniformly. Because the e.l.f. brush also plays well with powders, you can swirl it in a pressed powder foundation and buff that over your liquid foundation very lightly to set it (only if you want extra coverage – many with mature skin skip this to avoid a dry look). It’s also fantastic to do a quick final once-over: after all your makeup is on, take a clean Ultimate Blending Brush and give your face a quick soft buff. This can ensure everything (foundation, blush, etc.) is merged together with no harsh lines. If you notice any excess product sitting in lines (say a bit of foundation in a deep wrinkle), use the edge of the brush in a flicking motion or grab a clean damp sponge to lightly lift it – the brush itself is better for distributing product than picking it up. Lastly, maintain your brush by washing it regularly. While the price is low, the better you care for it, the longer it will last without shedding. Many users report that with gentle cleansing, this brush holds up well. If down the line the bristles start to feel less soft or you see shedding, don’t hesitate to replace it – it’s low-cost and e.l.f. continuously improves their brushes, so you might love the newer one even more. All in all, using this brush should feel like a breeze – it’s forgiving and user-friendly, making foundation application for mature skin a quick, pleasant step in your routine.

Pros & Cons
Pros:
- Ultra-affordable (around $7) – amazing quality for the price, making it accessible for all budgets
- Soft, flexible bristles that blend foundation evenly without irritating or tugging the skin
- Dome-shaped, medium-density brush head is ideal for a natural, light-to-medium coverage finish (helps avoid heavy, settled makeup)
- Great for multi-tasking: can be used with liquids, creams, or powders – effectively making it a 3-in-1 face brush
- Lightweight and easy to handle, which can be helpful if you have any joint pain or weakness in the hands (it doesn’t require vigorous motion to get a good result)
Cons:
- Not as dense as some higher-end brushes, so if you want full coverage quickly, you may need to layer or spend a bit more time buffing
- Durability is a slight concern – with very frequent use and washing, the brush may shed a few bristles or the ferrule (the metal part) might loosen over time. (It’s inexpensive, so replacement isn’t a big issue, but it’s a trade-off)
- The brush head is somewhat large, which is efficient for overall face but less precise for small areas (you might still need a tiny brush for detailed concealing or to get into deep facial folds)
- e.l.f.’s quality control can occasionally be hit or miss – most brushes are great, but rarely one might have a faint chemical smell out of the package or minor shedding initially. (Washing before first use typically fixes this, and these instances are not common.)
- Doesn’t come with a cap or case for travel, so protect it in your makeup bag to maintain the bristle shape
Quick Comparison Table: Top Foundation Brushes & Sponges for Mature Skin
For a handy overview, here’s a side-by-side comparison of our top five foundation application tools. Use this table to quickly spot which tool might fit your needs best:
| Product | Price | Type | Finish Effect | Coverage | Best For | Key Benefits |
|---|---|---|---|---|---|---|
| IT Cosmetics Heavenly Luxe #6 Brush (Buy Now) | ~$50 | Brush (Flat Top Kabuki) | Natural, airbrushed skin-like finish | Medium to Full (buildable) | Normal to Dry Skin (great for aging skin needing coverage) | Ultra-soft bristles that won’t tug; buffs foundation to blur pores and wrinkles; minimal streaking due to dense, high-quality bristles |
| Real Techniques Expert Face Brush (Buy Now) | ~$9 | Brush (Dense Oval) | Natural to Satin finish (no streaks) | Light to Medium (buildable) | All Skin Types (especially combo or textured skin) | Soft, firm bristles provide streak-free blending; versatile for foundation & blush; easy to control around facial contours |
| Beautyblender Makeup Sponge (Buy Now) | ~$20 | Sponge (Egg-shaped) | Dewy, radiant finish (when damp) | Light to Full (buildable in layers) | Dry or Combination Skin (anyone wanting glow) | Damp application adds hydration; presses foundation without settling into lines; adaptable tip for fine areas; pro makeup artist favorite |
| Real Techniques Miracle Complexion Sponge (Buy Now) | ~$6 | Sponge (Teardrop with flat edge) | Dewy to Natural finish (when damp) | Light to Medium (buildable) | All Skin Types (great for quick, even application) | Flat edge speeds up blending; provides smooth coverage that won’t emphasize wrinkles; very gentle and forgiving on skin |
| e.l.f. Ultimate Blending Brush (Buy Now) | ~$7 | Brush (Domed Blending) | Natural finish (your-skin-but-better) | Sheer to Medium (buildable) | All Skin Types (ideal for sensitive or beginner users) | Super affordable; soft, airy bristles glide over skin for an even layer; no harsh lines, easy to achieve a subtle, flawless look |
Notes: None of these tools have SPF (be sure to wear sunscreen under your makeup!). All brushes listed use synthetic bristles, which are typically best for liquid/cream foundation and are cruelty-free. The sponges are made of latex-free foam. Each tool can work with most foundation formulas, but remember to tailor your choice to your skin’s needs: for instance, drier skin may prefer the added moisture of a damp sponge, whereas oilier skin might like the controlled application of a brush.
Join the GlowOver50 Newsletter ✨
Stay in the loop with my latest makeup tips, skincare secrets, and honest product reviews — all tailored for women over 50. Subscribe today and keep that gorgeous glow going!
FAQ – Foundation Application for Mature Skin
What foundation won’t settle into wrinkles?
The best foundations that won’t settle into wrinkles are typically lightweight, hydrating formulas that don’t dry down too matte. Look for keywords like “moisturizing” or “serum foundation” or those containing ingredients like hyaluronic acid. These provide flexibility and moisture so they move with your skin instead of cracking into lines. Sheer to medium coverage liquids or cream foundations are often ideal – they can blur fine lines rather than spackle over them. A couple of tips: always apply in thin layers, building coverage only where needed, and prep your skin well with moisturizer and primer so the foundation has a smooth base. We’ve compiled some of our favorites in our Top 7 Foundations that Don’t Settle into Wrinkles – Top 2025 Picks. Using the right application tool also helps; for example, bouncing a damp makeup sponge over your foundation after applying can pick up any excess product and prevent it from sitting in creases. Remember, a foundation that advertises itself as “wrinkle-blurring” or “radiant” is usually formulated to be more forgiving on mature skin.
Which foundation is best for dry, aging skin?
For dry, mature skin, the best foundation is one that offers hydration and a radiant finish. As we age, our skin loses moisture, so foundations with added hydrators (like hyaluronic acid, glycerin, or even oils) can keep skin looking plump and dewy. Avoid extremely matte or powder-based foundations, as these can make dry skin look even drier and amplify fine lines. Instead, opt for a liquid or cream foundation that specifically mentions words like “moisturizing”, “luminous”, or “hydrating” on the label. Tinted moisturizers or serum foundations can be fantastic for dry skin because they combine skincare with coverage – they even out your tone while quenching dryness. If you don’t need heavy coverage, a tinted moisturizer with a dewy finish can be your best friend (check out our Best Tinted Moisturizers for Mature Skin for some lovely lightweight options). Also, consider using a primer for dry skin (something illuminating or smoothing) to lay down a hydrated base – this can make any foundation apply more smoothly on parched skin. Specific product examples? Many women over 50 rave about hydrating foundations like IT Cosmetics CC+ Cream, Bobbi Brown Intensive Serum Foundation, or Giorgio Armani Luminous Silk because they add glow and don’t cling to dry patches. Ultimately, the best foundation for dry, aging skin is one that keeps your skin looking like skin – just more radiant and even-toned – and doesn’t dehydrate it further throughout the day.
Is liquid or powder foundation better for over 50 skin?
Generally, liquid foundation is better for mature skin over 50 than powder foundation. Liquids (and creams) tend to be more forgiving on fine lines and dryness – they move with the skin and can provide a bit of moisture or glow. Powder foundations, especially those with matte finishes, can settle into wrinkles and often make the skin look drier or duller by the end of the day. That being said, there are some finely milled mineral powder foundations that can work on mature skin, typically if you have a bit more oil or if applied very sheerly. If you do prefer a powder foundation (or need to use one for ease), look for formulas described as “luminous” or “hydrating” powders, and avoid heavy full-coverage powders. A smart compromise many makeup artists use: apply a liquid foundation for that smooth base, then lightly set only the T-zone with a translucent powder to reduce shine (this prevents an all-over dry look but controls creasing in oily areas). When using powder products on mature skin, less is more – a sheer dusting is usually sufficient. And always ensure your skin is well-moisturized before any foundation. If you need recommendations for setting products that work with mature skin, see our roundup of the Best Setting Powders for Mature Skin – these tend to be finely milled and less prone to caking. In summary, most over-50 beauties find liquids or creams give a more flattering, skin-like finish, whereas powders are to be used sparingly for touch-ups or setting.
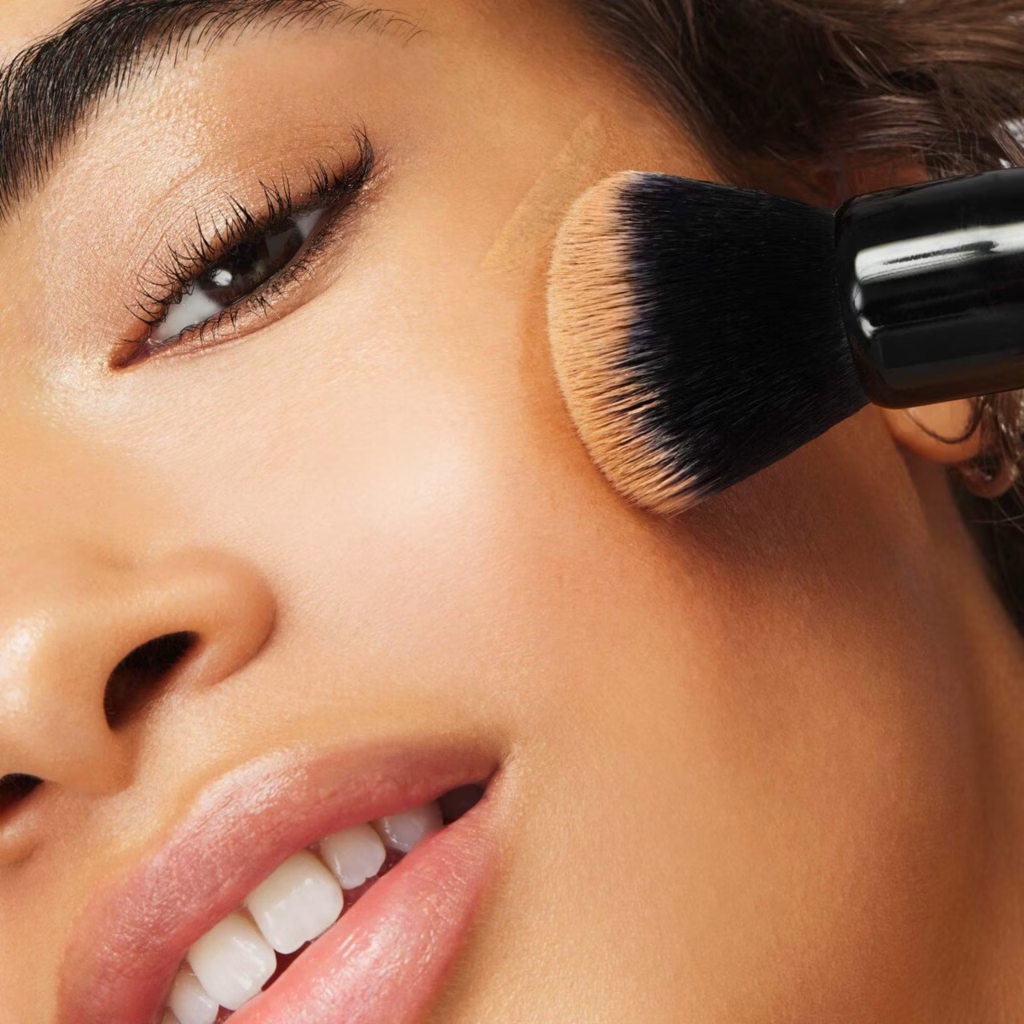
What’s the best brush to apply foundation on mature skin?
The best brush for applying foundation on mature skin is one that has soft, synthetic bristles and a shape that allows for blending without pulling. Many makeup artists recommend a dense buffing brush or kabuki brush for mature skin because it can really work the foundation into the skin for an even finish. For example, brushes like the IT Cosmetics Heavenly Luxe Flat Top (#6) or the Sigma F80 Flat Kabuki are excellent – they have very soft bristles that feel gentle and they create that airbrushed effect by buffing foundation in thin layers. Another great option is a rounded or dome-shaped brush (like the Real Techniques Expert Face Brush or e.l.f. Ultimate Blending Brush we mentioned above). These allow you to do both circular buffing and stippling. The key qualities to look for: soft (won’t irritate or micro-exfoliate dry skin), reasonably dense (so it doesn’t leave streaks), and not too small (so you can cover the face without harsh lines). Some women also like duo-fiber stippling brushes for a very light application – duo-fiber brushes (like the MAC 187S Duo Fiber Face Brush) have wispy ends that can give a very sheer finish if you want just a light wash of foundation that won’t settle much at all. Ultimately, the “best” brush also depends on your preferred foundation formula: if you use very liquidy, serum-like foundations, a brush with a slight taper or a paddle brush might help “paint” it on thinly. If you use cream or thicker liquids, a kabuki or buffing brush works wonders. From our top picks, if we had to choose: the IT Cosmetics Heavenly Luxe and Real Techniques Expert Face are top contenders – they give great results on mature skin without streaking or caking. And always remember, technique matters too: use gentle motions and let the brush do the work, as pressing too hard can cause streaks or push makeup into lines.
Is a sponge or brush better for aging skin?
It truly depends on personal preference – both Brushes and Sponges can work beautifully on aging skin, and in fact, many makeup pros use a combination of both. Here’s a breakdown: Makeup sponges (like the Beautyblender or Real Techniques sponge) are fantastic for a dewy, seamless application. They’re often praised for mature skin because when used damp, they add a touch of hydration and ensure makeup isn’t sitting on top of the skin. As noted earlier, using a sponge can prevent that blotchy, uneven look and help avoid accentuating lines. Sponges are also great for sheer layering; they naturally pick up excess, so you’re less likely to overdo it. However, sponges can soak up a lot of product (less of an issue if damp) and need to be kept very clean to avoid any bacteria or irritation. Brushes, on the other hand, can give you a bit more coverage and precision. A soft brush can lay down a thin layer without pulling moisture from the skin – for example, a flat foundation brush glides over the skin and keeps more product on the face rather than in the sponge. Brushes are better if you want to build up coverage in certain spots or if you prefer not to wet a sponge every time. The caveat is that a wrong type of brush (very stiff or rough bristles) can cause streaks or even minor irritation. For aging skin, a high-quality synthetic brush is usually best to avoid any bristle roughness. Many find that using a brush to apply and roughly blend, then using a damp sponge to finish is the magic combo. The brush places the product where you want it, and the sponge gives that final seamless meld with the skin. If you have very dry skin, you might lean toward the sponge for the added moisture and forgiving finish. If you have very oily areas or need more coverage, you might favor a brush. In summary: neither is categorically “better” – it’s about what finish you like. Sponges = dewy, natural, lightweight, Brushes = polished, buildable, controlled. Try both methods (or even together) and see which gives you the look you love with your skin. There’s no age limit on either tool!
How do I avoid streaky foundation on mature skin?
Streaky foundation can be a nuisance at any age, but on mature skin it can be especially frustrating. To avoid streaks, first make sure you’re using the right tool and technique. As mentioned, a good dense brush or a damp sponge tends to minimize streaks. If you see streaks with a brush, it often means you might be using too much pressure or product – try using a lighter hand and buff in small circular motions. If streaks persist, bounce a damp sponge over the area to smooth them out. Prepping your skin helps too: apply a primer after moisturizing to give foundation something to grip evenly (a smoothing primer can fill tiny crevices, so foundation glides uniformly). Our Avoid Common Foundation Mistakes on Mature Skin guide points out that one big mistake is not blending enough – so take a little extra time to blend, blend, blend. Work in thin layers of foundation; it’s easier to get an even application with thin layers than one thick one. Also consider your lighting – blend your foundation in good natural light if possible, so you don’t miss areas. Another tip: use downward strokes or buffs on fine facial hair areas. On mature skin, we often have soft peach fuzz; blending downward helps lay that hair flat so you don’t get foundation catching and streaking on them (especially around the cheeks or jaw). If you’re using a sponge and still see unevenness, make sure the sponge is damp enough and you’re using a stippling (patting) motion, not wiping. Streaks can also be a sign that your foundation formula isn’t meshing well with your skincare or primer – for example, an oil-based moisturizer with a water-based foundation might cause slipping. Ensure your moisturizer/primer has fully sunk in and choose compatible formulas. Finally, after application, double-check problem areas: sometimes a quick gently tap with your finger or a final buff with a clean brush can erase any minor streaks. With the right prep, tools, and patience, you can definitely achieve a streak-free, flawless look. And if all else fails, a light mist of setting spray and a pat with a sponge can often magically remove small streaks and set everything in place nicely.
Which brush gives an airbrushed finish for mature skin?
For that coveted “airbrushed” finish on mature skin, a flat-top kabuki brush or a high-quality buffing brush is usually the go-to. These brushes have dense bristles that allow you to really polish the foundation into the skin, resulting in a smooth, diffused look. One of the most famous is the Sigma F80 Flat Kabuki brush – it’s often praised for giving an airbrushed effect because its bristles are very densely packed and cut flat at the top, so you can buff in circular motions and it leaves no lines behind. The IT Cosmetics Heavenly Luxe #6 (which we featured as our #1 pick) is another shining example – it buffs on foundation in such a seamless way that the skin looks perfected but not heavy. A newer contender that many love is the BK Beauty 101 Contoured Foundation Brush (designed by a makeup artist specifically with mature skin in mind); it has an angled, slightly convex shape and super-soft bristles that hug the curves of the face, laying down product evenly – many over-50 vloggers swear it makes their foundation look airbrushed. Additionally, duo-fiber brushes (with two levels of bristle length) like a MAC 187 can give an airbrushed sheer finish by lightly feathering out the product – this is great if you want a very thin veil of foundation. But if “airbrushed” to you means full, flawless coverage without looking cakey, stick to the kabuki-style brushes. Remember, the trick is not just the brush but also the technique: use small circular motions, occasionally changing direction, and don’t stop blending until every edge is invisible. You can even lightly buff without additional product at the end, just to perfect the blend. One more tip: some people lightly mist their brush with a bit of setting spray or water before buffing in the final layer – this can mimic the effect of a damp sponge and really make the finish extra smooth. With the right brush in hand (and one or two minutes of blending), you’ll get that soft-focus, airbrushed look that helps your complexion appear younger and radiant.
Flawless foundation over 50 is absolutely achievable! It comes down to the right product + the right tool + the right technique. We hope this guide introduced you to some game-changing brushes and sponges that can elevate your makeup routine. Each of these top 5 tools has its own strengths, but all share a common goal: helping your foundation look natural and beautiful on mature skin – never heavy or settling.
Remember, makeup is a personal journey. You might find you adore the finish a sponge gives, or you might become a devotee of a particular brush – or like many of us, you’ll use a combination to get the perfect result. Don’t be afraid to experiment; with a bit of practice, you’ll figure out what method makes you feel like your most fabulous self.
Finally, always start with well-prepped skin and take your time blending. A well-blended foundation can take years off, bringing a fresh, glowy look to your face. And if you’re still searching for that holy-grail foundation or want to tweak your application routine, we have plenty of resources on GlowOver50 to help – from choosing the right foundation formula to setting it in place for all-day wear. (If you’re unsure where to begin with picking a foundation, check out our guide on How to Choose the Right Foundation for Your Skin for useful tips specifically tailored to mature skin needs.)
Have you tried any of these foundation tools? I’d love to know your experience – do you have a favorite brush or sponge that makes your foundation look flawless? Or any personal tips for a perfect application on mature skin? Let’s chat about it! Drop a comment below with your favorites or any questions. Sharing our tips and tricks is what this community is all about. Here’s to putting our best (and most beautiful) face forward – at any age!