Hello, beautiful! If you’ve ever spent time perfecting your makeup only to have it settle into fine lines or turn cakey by noon, you’re not alone. I’ve been there, too – looking in the mirror mid-day and thinking, “What went wrong?” The truth is, makeup order matters for mature skin more than ever. In fact, top makeup artists agree “for mature skin, the mantra is little and layered”. That means using the right products in the correct order of makeup application – and not piling on more than needed – to get a smooth, radiant result. Today, I’m sharing the exact makeup layering routine for women over 50 that I swear by. It’s like we’re chatting over coffee, and I’m spilling all my over-50 beauty secrets! When redness is part of the problem too, I use this step-by-step routine for covering redness and rosacea after 50 without looking cakey.


By following this friendly step-by-step guide, you’ll learn how to layer makeup on mature skin so it looks fresh, not heavy. We’ll cover everything from prepping your skin (and whether to use primer before or after sunscreen on mature skin), through foundation and concealer, all the way to the finishing touches. Along the way I’ll highlight a few of my favorite products (with links to full reviews on GlowOver50) and fixes for common issues like foundation caking or settling into wrinkles. Let’s get glowing! And if you’re not sure whether a matte or dewy base is more flattering after 50, my guide on matte vs dewy makeup on mature skin breaks it down step by step.
Table of Contents
Why the Order of Makeup Application Matters for Mature Skin
You might be wondering, does makeup order matter for mature skin? Absolutely, girlfriend! Think of your makeup like building a house – you need a solid foundation (pun intended) and the layers have to go on in the right sequence. As our skin changes in our 50s and beyond (hello dryness, delicate texture, and those character lines), applying products in the wrong order can emphasize problems instead of solving them. Here’s why order is everything:

- Each Layer Preps for the Next: Skincare creates a plumped, smooth canvas so makeup glides on instead of grabbing onto dry patches. Primer then blurs and fills fine lines, helping foundation and concealer apply evenly. If you skip or mis-order these, foundation can “catch” on flaky areas or settle straight into creases. As Allure’s makeup-artist guide for mature skin explains, proper skin prep is the best way to get a smooth foundation application—especially for texture and dryness.
- Creams Before Powders: A golden rule at any age, but crucial for mature skin – always apply your liquids/creams before any powders. If you dust on powder too early and then try to put a cream (say, a creamy blush) on top, it’s a recipe for caking and patchiness. By sticking to the right makeup layering order for mature skin, you ensure each product melts into the one beneath it. This prevents that dry, cakey buildup that tends to age us.
- Thin Layers = Less Caking: When products are applied in a thoughtful order, you can use thinner layers and blend well, rather than slapping on too much. For instance, putting concealer on after foundation means you’ll use less (since your foundation has already provided some coverage) – preventing product overload under the eyes. One pro makeup artist puts it perfectly: “For mature skin, the mantra is little and layered… Start with good prep, use hydrating formulas, and always apply in good light with the right tools.” The Cleveland Clinic’s anti-aging skincare guidance also reinforces that a routine doesn’t have to be complicated—less can be more, and that idea carries beautifully into makeup layers too.
- Prevents Common Makeup Mishaps: Ever wonder why makeup looks cakey on mature skin or seems to highlight wrinkles? Often, it’s not just the products at fault but how we put them on. Using the wrong order (or skipping steps) can cause pilling, creasing, or makeup “sliding off” later. For example, applying foundation on unmoisturized skin can make lines look more pronounced and cause foundation to crack. Or neglecting primer might mean your foundation sinks into pores and lines by lunchtime. Simply tweaking the order in which you apply things can prevent makeup caking on mature skin and keep it looking fresh longer. (No more foundation disappearing into those smile lines by noon!)
In short, the makeup order for women over 50 can make or break your look. But don’t worry – it’s not about using a million products or complex techniques. It’s about smart sequencing and a few pro tricks to work with your skin, not against it. As a 50-something beauty lover, I’ve tested this routine on myself and can promise it truly makes a difference.
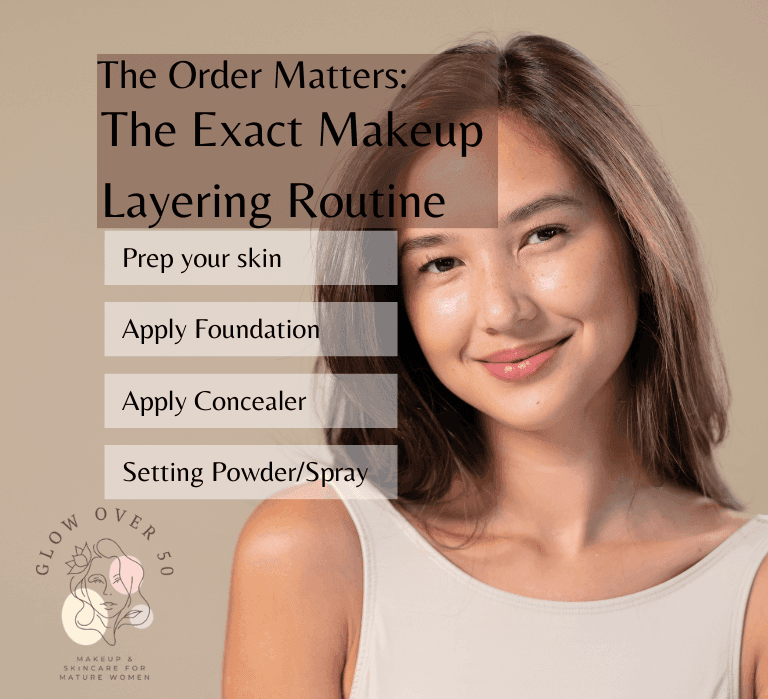
Before we dive in, here’s a sneak peek at the makeup layering order we’ll be using:
- Prep Your Skin: Skincare first (cleanse, moisturize, SPF) and then primer to smooth and grip.
- Foundation: Even out your complexion with a light layer of foundation (hydrating, mature-skin friendly formula).
- Concealer: Add extra coverage only where needed (spots, under-eyes) after foundation.
- Setting Powder: Lightly set key areas (T-zone, under-eyes) with a finely milled translucent powder to prevent creasing.
- Blush/Bronzer: Apply your blush and bronzer – creams go on before any powder, powders go on after setting powder.
- Optional Finishes: Add a touch of highlighter (optional) and set everything with a hydrating setting spray for a dewy finish.
Easy, right? Now let’s break down each step in detail, with tips and product suggestions to make it foolproof!
Step-by-Step Makeup Layering Routine for Mature Skin
Step 1: Prep Your Skin with Skincare (Moisturizer & Sunscreen) and Primer
The first step in any base makeup routine for mature skin doesn’t even involve makeup – it’s all about skincare prep. Never underestimate the power of a good canvas! Mature skin tends to be drier and less elastic, so prepping properly will dramatically improve how your makeup lays. Here’s how to get your skin ready:

- Cleanse and Moisturize Start with a gentle cleanse to get a fresh slate (especially if it’s morning and you have leftover night creams, etc.). Then apply a rich, hydrating moisturizer and let it sink in for a few minutes. Hydrated skin is plump skin, which immediately makes fine lines less visible and helps foundation glide on instead of clinging. I like to use a moisturizer with ingredients like hyaluronic acid or ceramides to really plump up my skin. If you have a bit of extra time or your skin is very dry, you can even layer a hydrating serum underneath and/or gently press a few drops of facial oil on top of your moisturizer for added dew. Think of it as “feeding” your skin so it’s nice and bouncy. As Healthline’s anti-aging routine guide explains, as we age, dead skin cells aren’t replaced as quickly, which can lead to dullness and dryness – so locking in moisture is key every day.
- Apply SPF (Sunscreen) Yes, you still need sunscreen! Every. Single. Day. UV damage is a big culprit in premature aging, and at our age we’re protecting what we’ve got. Primer before or after sunscreen on mature skin? Always apply sunscreen after your moisturizer but before any makeup primer or foundation. Sunscreen is your last skincare step. Go for a lightweight, broad-spectrum SPF 30 or higher that plays nicely under makeup (many newer mineral SPFs are formulated to be non-greasy and won’t pill under foundation). Give your sunscreen a couple of minutes to absorb. This not only protects your skin, but it can act like a gripping base for makeup in itself. (I sometimes use a slightly tacky sunscreen as a quasi-primer!) If you’re curious, the rule of thumb dermatologists give is skincare first, then makeup – so sunscreen is the final step of skincare before we move on.
- Now, Primer Once your moisturizer and SPF are settled, it’s primer time. Should older women use primer before foundation? In my experience – absolutely! A good primer is a game-changer for mature skin. Primer creates a smooth, even surface and helps makeup last longer. It’s like spackling a wall before paint – it fills in uneven texture (large pores, fine lines) so your foundation doesn’t. In fact, using a primer often means you can use less foundation overall, since it prevents foundation from sinking into pores or wrinkles. For mature skin, I always choose a hydrating or line-blurring primer over a heavy mattifying one. Look for words like “hydrating, smoothing, blurring” on the label. These will have ingredients like hyaluronic acid, glycerin, or silicone blends that plump up and “fill” lines for a bit. (Hydrating primers can even temporarily plump fine lines – a nice perk for us!)
My personal routine: I take a pea-sized amount of primer and apply it primarily to my T-zone, around the nose, and pat gently under my eyes, basically anywhere I have noticeable pores or texture. You don’t necessarily need to slather it all over like a moisturizer – focus on problem areas, then blend out. Let it set for a minute. The result should feel like a silky, even film on the skin, not tacky. If it’s a hydrating primer, your skin may just feel like it has a smoother moisturizer on.
Product Spotlight – Primer
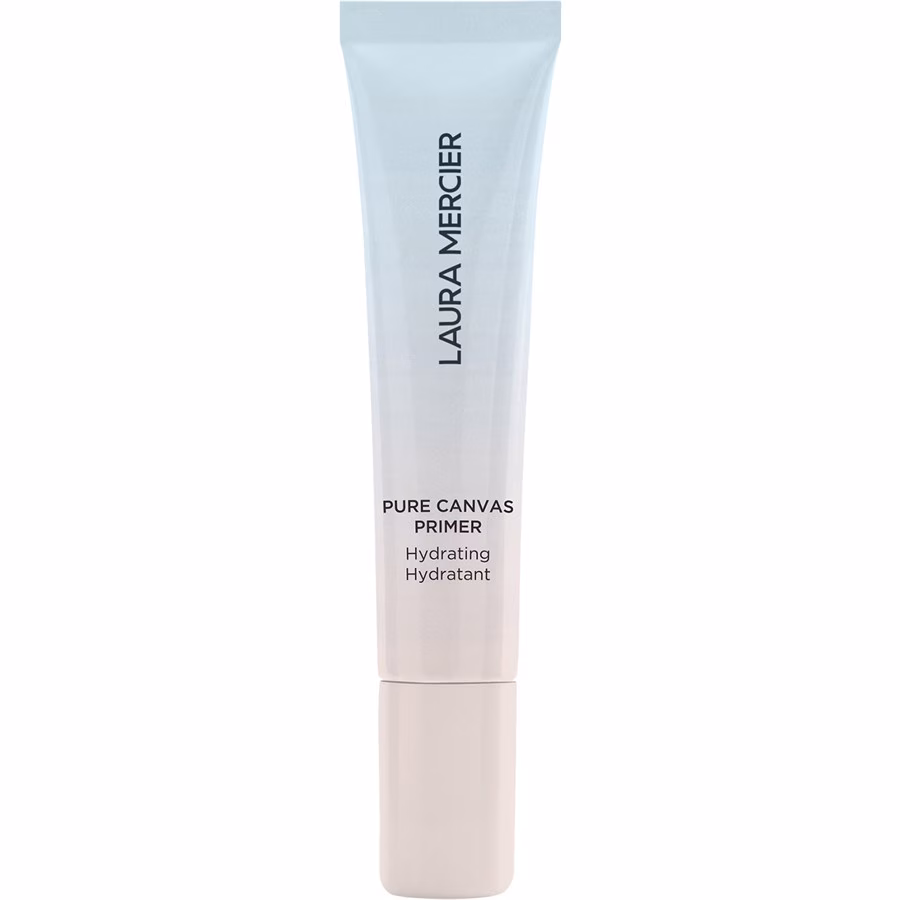
One of my go-to primers is Laura Mercier Pure Canvas Hydrating Primer because it lives up to its name – it hydrates the skin while providing a smooth base for makeup. In my experience, this primer never exaggerates dry patches; instead it gives a slight dewy cushion that makes foundation glide on (no patchiness!). I did a full review on it – in short, it’s flawless, hydrated skin in a bottle (you can read the full breakdown in my Laura Mercier Hydrating Primer review if you’re curious).

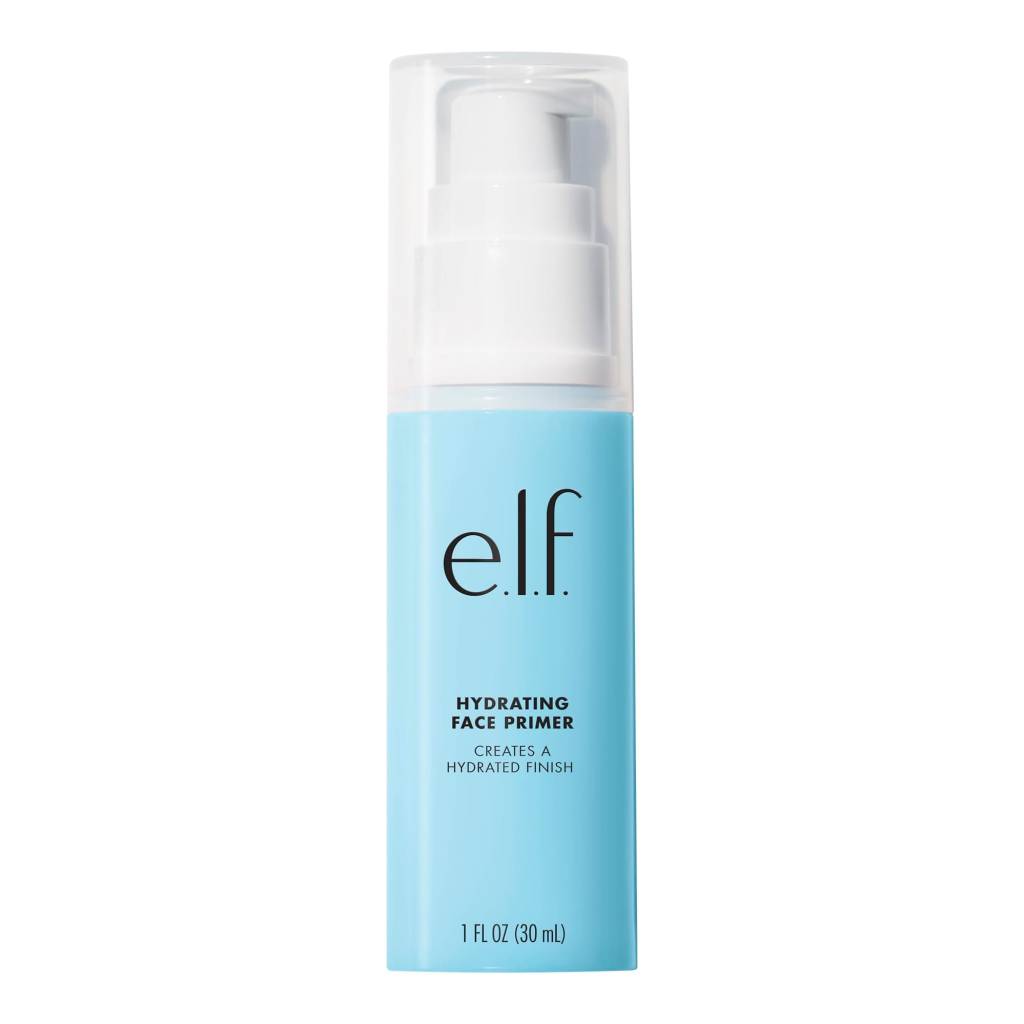
For a budget-friendly option, I also love the e.l.f. Hydrating Face Primer. It’s under $10 and creates a smooth, dewy canvas for foundation while keeping skin hydrated. (See my e.l.f. Hydrating Primer review for details – it impressed me despite the low price!). Whether you splurge or save, a hydrating primer for mature skin will help keep your makeup from “drinking up” moisture from your skin and settling into lines.

And if you’re still unsure about primers or how to choose one, I’ve written a handy guide – Primer 101: Do Older Women Need Primer? – that demystifies it all. (You can also peek my roundup Best Primers for Mature Skin in 2025 if you want quick options.)
Quick Tip: Give your primer a minute or two to set before moving on to foundation. This little pause lets the primer do its work blurring out pores and gripping onto your next layer. Meanwhile, you can dampen your makeup sponge or set out your foundation and concealer.
By properly prepping with moisturizer, SPF, then primer, you’ve set the stage for success. Your skin should feel supple and lightly “blurred,” not greasy or tight. Now onto the fun part – foundation!
Step 2: Apply Foundation – Even Out Your Base Lightly
Now that your skin is prepped and primed, it’s time for foundation – the step that evens out your complexion. The key for mature skin is to choose the right foundation formula and apply it sparingly in thin layers. Remember, we want coverage, but we don’t want to mask our skin or have product settling into wrinkles. Here’s how to master foundation on mature skin:


- Choose a hydrating, skin-like foundation Formulation matters so much here. Look for words like “hydrating, moisturizing, luminous, glow, serum foundation, radiant finish.” Foundations marketed for mature or dry skin usually fit the bill (avoid ultra-matte or heavy full-coverage foundations – they tend to emphasize texture and can look mask-like). Some of my personal favorites are lightweight, buildable foundations that have a natural or dewy finish. For example, Charlotte Tilbury Beautiful Skin Foundation is a lovely medium-coverage formula with a radiant finish – it’s infused with hyaluronic acid and gives a youthful dewy glow without settling in my fine lines. When I tested it for my Beautiful Skin foundation review, I loved how creamy and moisturizing it felt (it actually made my dry winter skin look more alive!). On the luxury end, Pat McGrath Labs Skin Fetish Foundation is another gem – it has a serum-like texture that’s ultra lightweight and “line-blurring,” meaning it diffuses the look of wrinkles for a soft-focus effect. I was skeptical of the hype, but in my Pat McGrath foundation review I noted how it didn’t settle into wrinkles and kept my skin hydrated through the day. Whatever brand you choose, just ensure it’s meant to “look like skin” once applied – we want your complexion to still have a gentle radiance, not a flat matte mask.
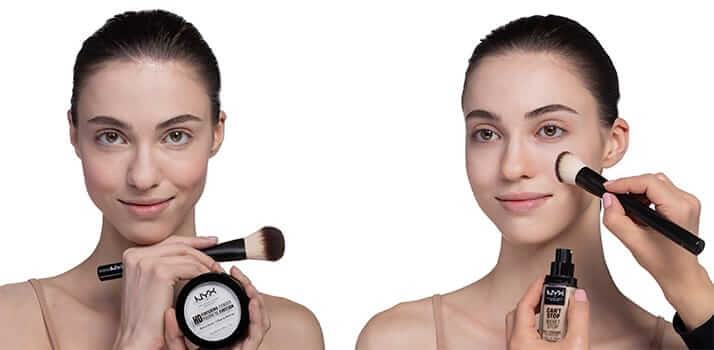
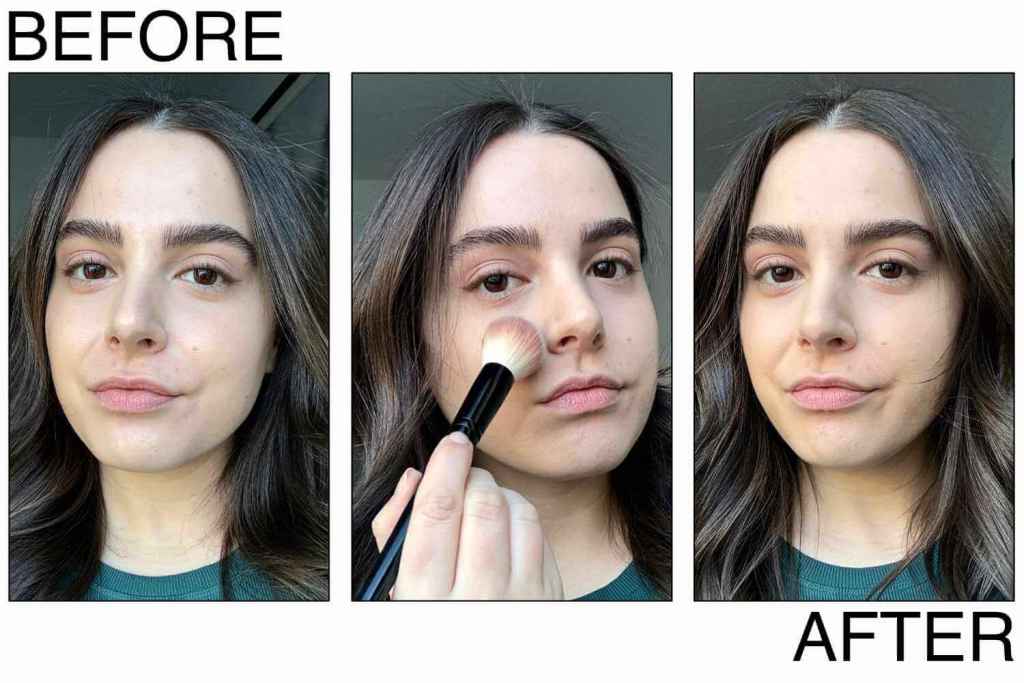
- Apply in thin layers (and blend, blend, blend!) When it comes to how to layer foundation on mature skin, less is more. Start with a small amount – like one pump or a pea-sized dollop. Dot it around your face (forehead, nose, cheeks, chin), then blend outward. I prefer using a damp makeup sponge for mature skin because the added moisture helps sheer out the foundation and prevent it from sitting on top of skin or looking heavy. Using a damp BeautyBlender or sponge gives a dewy, seamless finish as it presses the product in and absorbs any excess. Alternatively, a flat foundation brush can also work if you prefer a bit more coverage – one pro tip from artist Jaime Perez is that a flat brush lays down a thin layer without pulling moisture from the skin (unlike some fluffy brushes). He even suggests using a flat brush plus a Q-tip to remove any excess that might pool in lines – a genius hack! Personally, I often do a combo: spread the foundation with a brush, then bounce a damp sponge over it to perfect the blend.

- Build coverage only where needed. After your first sheer layer, take a look. You should see a more even skin tone, but perhaps a few spots (like a bit of redness on cheeks, or a sun spot) might still peek through. Rather than slathering another thick layer everywhere, just build a little extra foundation on the areas that need it. This could be around the nose, on the cheeks, or wherever you have discoloration. Add a half-pump more if needed and use your sponge/brush to gently stipple (dab) more coverage on those areas. By keeping the rest of your face a thinner layer, you avoid a cakey overall look. Over-50 foundation tip: focus on the center of the face for coverage (where we often have redness or discoloration) and keep the perimeter lighter. This gives a more natural blend into the neck and looks like you’re not wearing heavy makeup at all. Remember, we can always add a touch more where needed, but it’s hard to fix if you apply too much at once. A common mature skin mistake is over-applying foundation, which can amplify wrinkles and create a cakey finish. Avoid that by building up slowly and blending well.
- Don’t forget to check your neck/jaw We all know this, but it bears repeating: blend your foundation slightly past your jawline so you don’t have a line of demarcation. With thin, well-blended layers, you should have an imperceptible transition. If needed, you can even take the residual product on your sponge and pat it over your ears or down your neck a bit (especially if there’s a color difference). A seamless blend = a more youthful, real-skin look. At this stage, your face should look even-toned, with a gentle radiance (or soft satin finish, depending on your foundation). No fine lines should be screaming “hey, foundation’s collected here!” – if you do see any product settling in a crease (commonly smile lines or forehead lines), here’s a quick fix: take a clean Q-tip and lightly swipe out the excess product from the line (I do this in my smile lines often). This removes buildup without messing up the rest. Then take your sponge or brush and just pat over that area to re-blend. This little trick ensures you don’t leave a ton of makeup in your deepest creases, which would only get worse over time. Remember, we want to soften the look of lines, not erase them with spackle.
Product Spotlight – Foundation
I have to shine a light on two favorites that consistently give me a your-skin-but-better finish:
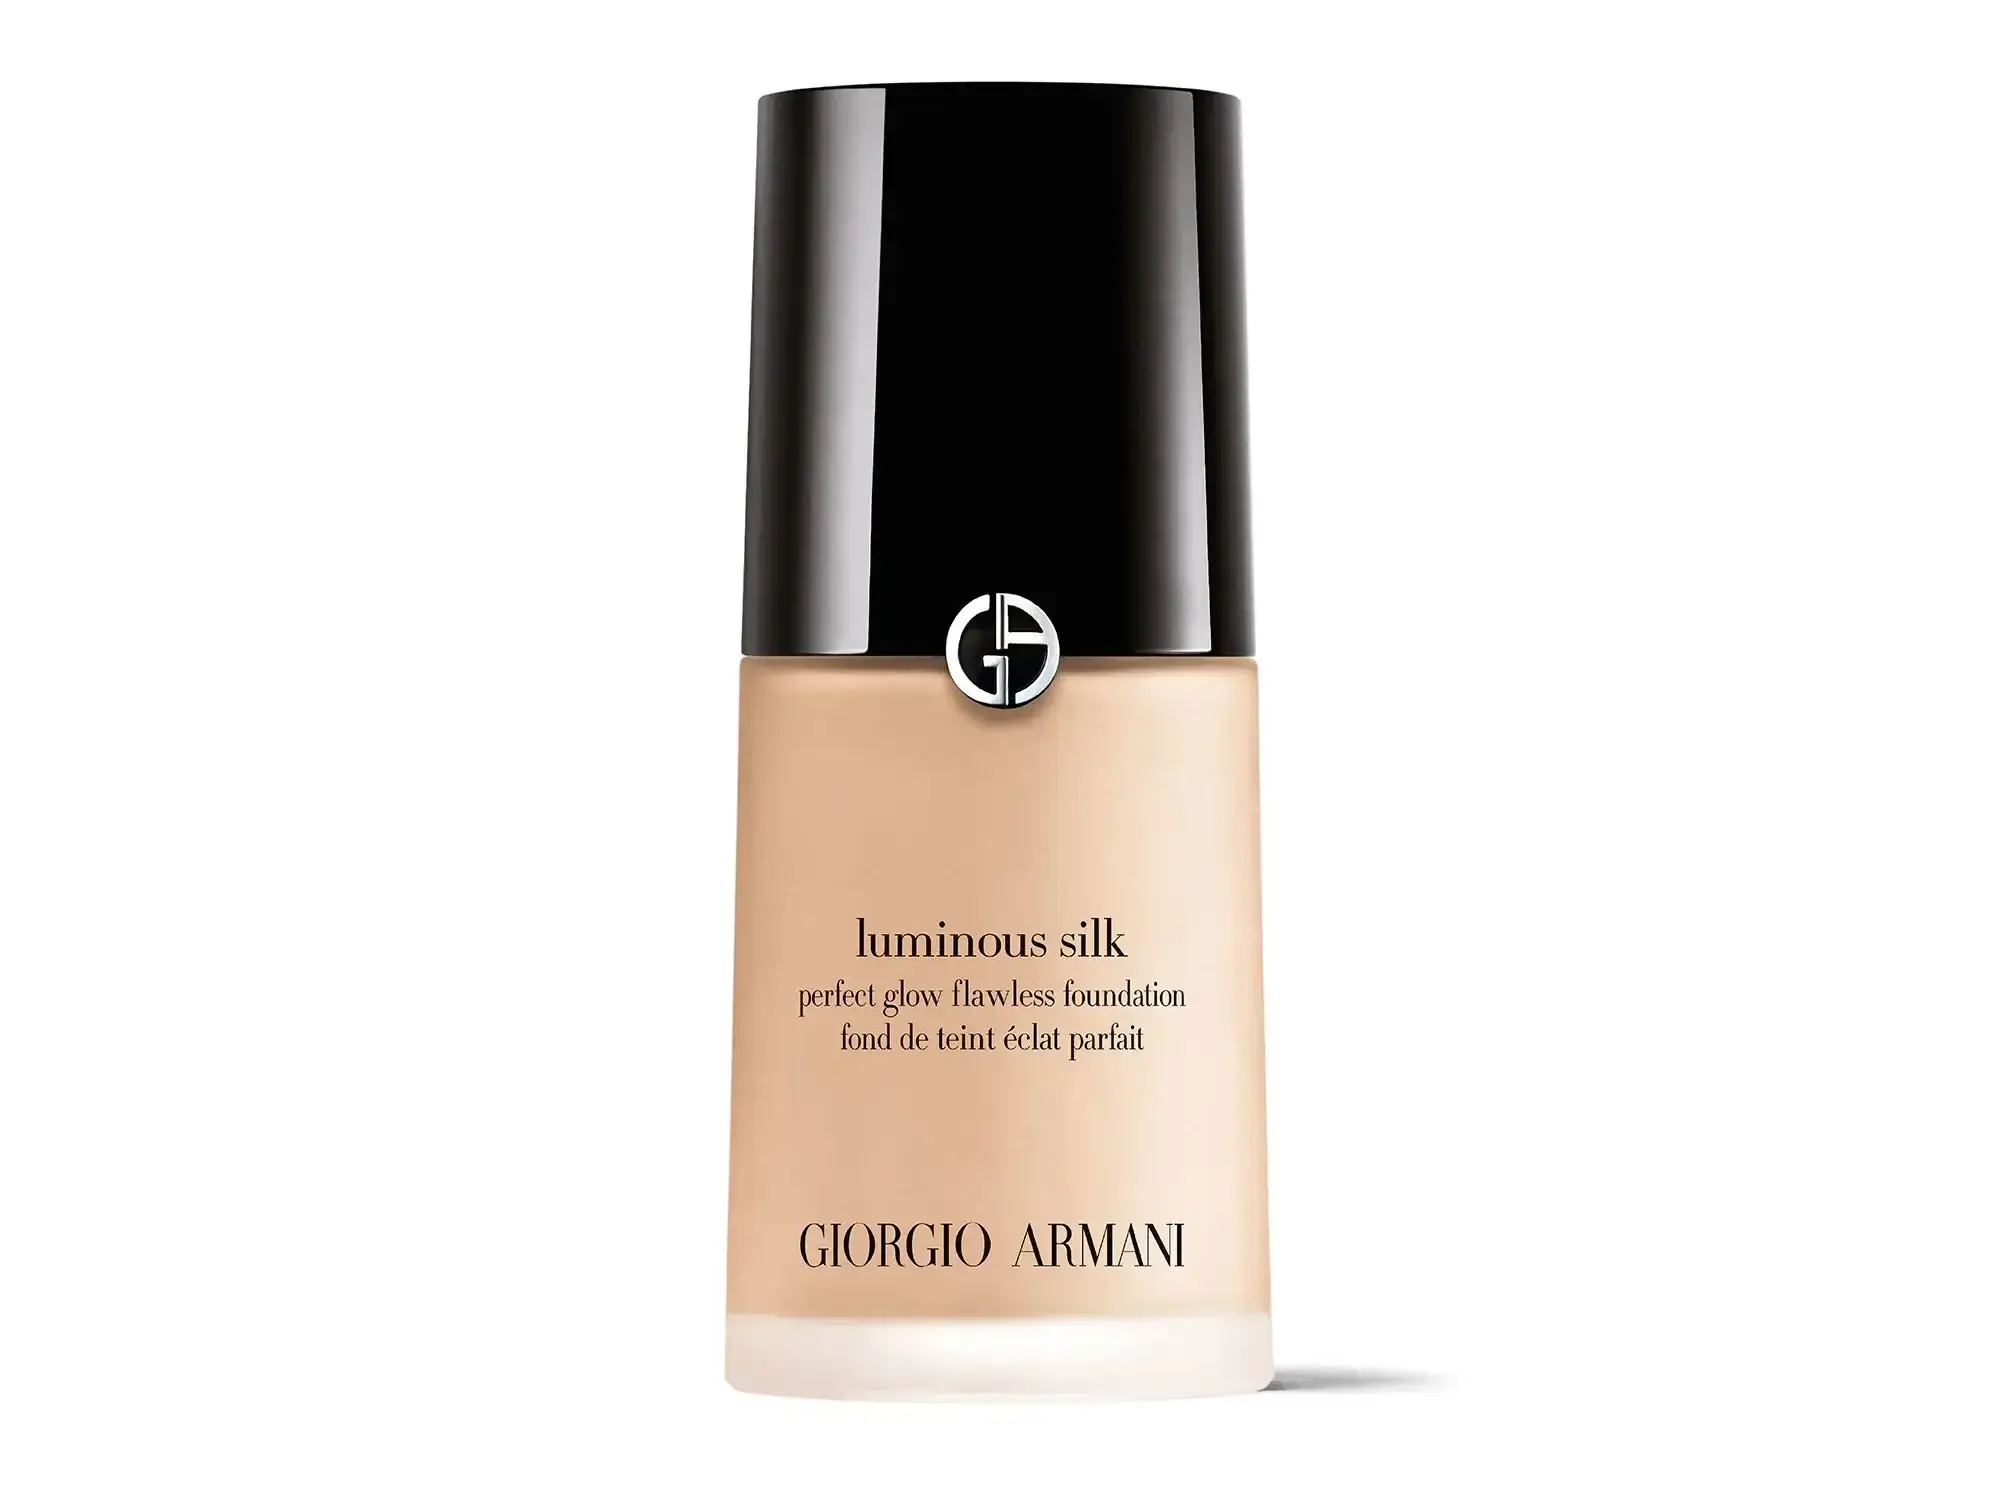
Giorgio Armani Luminous Silk Foundation – This is a cult classic and for good reason. It has a silky, soft-focus finish that makes your skin look like it’s glowing from within. The coverage is sheer-to-medium and very buildable, so it never looks heavy. It’s one of those foundations that doesn’t settle into wrinkles and just blurs them out when paired with the right prep. I wear it on days I want to feel a little fancy – the formula truly gives a polished yet natural look. (I did an in-depth test in my Armani Luminous Silk review and found it holds up beautifully on mature combo skin – it’s pricey but still one of my top luxury picks.)

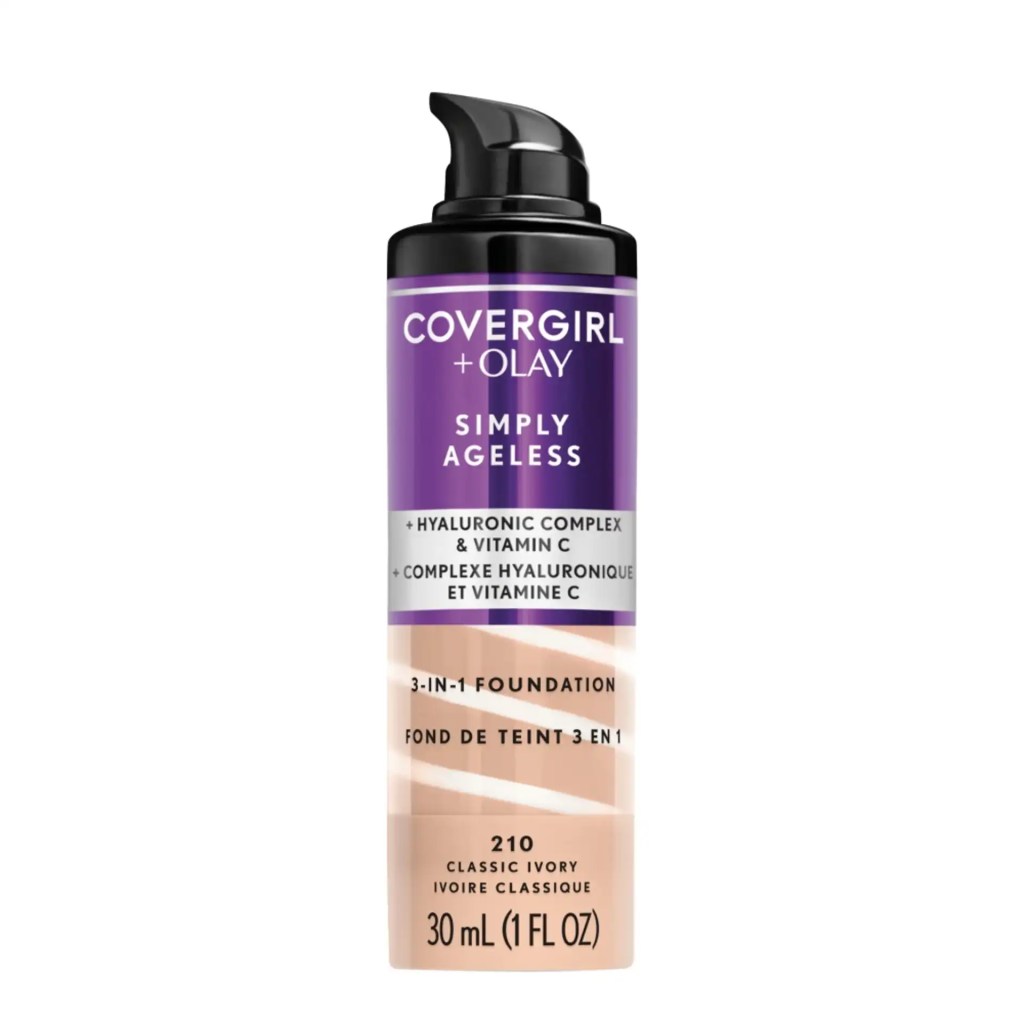
COVERGIRL & Olay Simply Ageless 3-in-1 Foundation – On the affordable end, this one has stolen my heart for everyday wear. It’s designed for mature skin with anti-aging ingredients and hydration, plus it has SPF 28 built in. The coverage is light to medium and very natural (never mask-like). I love that it combines skincare + foundation; it actually helps nourish the skin while evening it out. In my Simply Ageless foundation review, I noted it checks all the boxes – hydration, wrinkle-reduction, sun protection, and a smooth finish. It’s a fantastic drugstore foundation for mature skin if you want something budget-friendly that performs well. I reach for this on casual days when I want a quick, one-and-done base that I know won’t settle into my laugh lines.

(For more foundation ideas, you can also see our roundups like Top Foundations That Don’t Settle into Wrinkles and the Best Foundations for Mature Skin (2025 Guide) – I’ve tested so many to find the winners!)
Step 3: Apply Concealer (After Foundation) Only Where Needed
When we were younger, we might have smeared concealer everywhere like war paint before foundation. But for mature skin, the strategy is different. Apply concealer after foundation, and only use it in targeted areas. This way, you use way less product (preventing caking) and you can precisely cover spots that foundation didn’t. Here’s the game plan for concealer on mature skin:

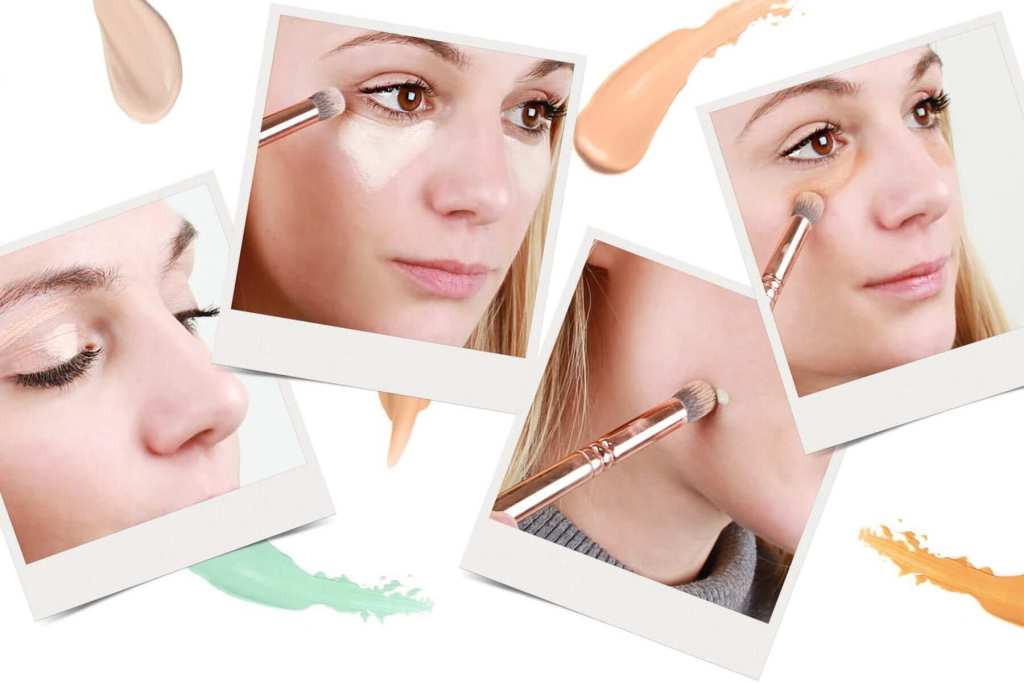
- Less is more, especially under the eyes. The under-eye area is often where we turn to concealer – to brighten dark circles or hide discoloration. But it’s also where heavy concealer can crease the most since that skin is thin and (let’s be real) has fine lines. The key is to use a lightweight, creamy concealer and only a tiny bit. I dab just a couple of small dots in the inner corner of my under-eye (where darkness is usually worst) and maybe one at the outer corner, then tap it out with my ring finger or a small damp sponge. Focus on the inner half of the under-eye; that avoids loading product right into crow’s feet on the outer edge. A great mature-skin hack from makeup pros: use a color corrector first on very dark areas, then a thin layer of concealer on top. For instance, a tiny bit of peach or bisque corrector in the inner corner can neutralize blue tones, so you need very little concealer over it. If you’re dealing with serious under-eye darkness, this trick works wonders (peachy tones cancel blue). But if that’s too much fuss for daily, just use a concealer with a slight peach tone. And remember, hydration under the eyes is crucial – a dab of eye cream before makeup can keep concealer from drying out in that area.
- Dot concealer on spots, not entire areas. After foundation, you might still see a prominent age spot, a bit of melasma, or redness peeking through around the nose. Instead of adding more foundation all over, take a tiny brush or your finger and pinpoint concealer only on the spots that need extra coverage. Tap it on gently and blend the edges so it fades into your foundation. I call this the “spot check” – you’re basically inspecting and touching up only the blemishes or discolorations that bother you. Common areas: a dot around the nostrils (they can appear reddish-blue on many of us), some on an age spot on the cheek or hand, a touch on a broken capillary. Because your foundation is already doing 80% of the work, you’ll find you need much less concealer than you might think. This prevents that heavy, all-over concealer mask that can crack later.


- Pat, don’t rub, and avoid tugging. Use a gentle touch when blending concealer, especially under the eyes. I like to pat it in with my ring finger (the weakest finger, so it naturally is gentler) or use a small fluffy eyeshadow brush to softly buff edges. You want to merge the concealer into the foundation seamlessly. If you see any creasing starting, just pat it out quickly before setting with powder. Also, give creamy concealer a minute to set on its own – many modern concealers are self-setting to a degree (meaning they dry down a bit). If yours is one of them, you might find you don’t even need to powder it. Allure’s guide to applying foundation on mature skin also recommends avoiding thick, drying concealers on mature skin, and opting for hydrating ones that give coverage without looking cakey.
At this point, step back and admire your base. You should see an even, bright face where you still shine through (you likely still have some natural skin texture – that’s normal and good! Skin is supposed to look like skin). We haven’t applied any color yet, so you may look a bit pale or “flat,” but that’s okay – blush and bronzer are coming up to fix that. Most importantly, your foundation and concealer should NOT look heavy. If you’re seeing cakiness or it looks like makeup sitting on top of skin, two possibilities: either the formulas might be too heavy/dry for you, or perhaps too much was applied. You can fix slight cakiness by spritzing a bit of hydrating mist or setting spray and pressing the sponge gently to re-melt the makeup – a trick that often salvages an over-powdered or over concealer-ed area.
Product Spotlight – Concealer
I’d be remiss not to mention at least one concealer that’s fantastic for mature skin. One I keep reaching for is Maybelline Instant Age Rewind Eraser Concealer. It’s a drugstore gem that’s been around forever, and it’s popular for a reason – the formula is thin, fluid, and does not crease much on me at all (with a light set of powder). It has a sponge tip applicator that actually applies a nice thin layer. I use the Brightener shade or a Light shade for under my eyes and it really “erases” the fatigue without a heavy look. Plus it has a bit of Haloxyl (an ingredient meant to help with under-eye circles over time).


We did a roundup of best concealers for mature skin in 2025 here on GlowOver50, highlighting hydrating, smoothing concealers – that list is a great resource if you’re hunting one that won’t settle. A couple of high-end picks I love: Tarte Shape Tape Ultra Creamy (the Ultra Creamy version, not the original; it’s formulated not to be as dry as the original Shape Tape) and NARS Radiant Creamy Concealer. Both offer great coverage with a satin finish and are popular for not creasing on well-prepped skin.
(For a deep dive into choosing and using concealer on older skin, check out our guide on how to choose concealer for mature skin (no creasing tips) – it’s packed with advice on formula and technique.)
With concealer done, your base coverage is complete. Congrats – the hardest part is over, and you used a light hand! Now, it’s time to set that makeup so it lasts, and add back some dimension with blush/bronzer.
Step 4: Set with a Lightweight Powder (Only Where Needed)
Ah, the eternal question: do you need setting powder on mature skin? The answer is sometimes. The trick is to use powder strategically and choose the right kind. Gone are the days of heavy “baking” or powdering your whole face into a matte mask (please don’t do that, it will age us instantly!). Instead, we’re going to lightly set the areas that actually need it – usually the T-zone and under-eyes – and leave the rest looking naturally glowy. Here’s how to lock in your makeup without settling into lines:

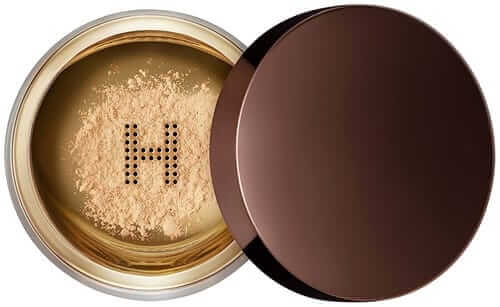
- Use a finely milled translucent powder. Not all powders are created equal. For mature skin, you want a lightweight, silky powder that is truly translucent (or a slight tint that matches your skin) and ideally with a soft-focus finish. Steer clear of heavy, talc-heavy powders that look chalky, or those with a lot of glitter/shimmer which can highlight texture. Some of my favorites are the classic Laura Mercier Translucent Loose Setting Powder (there’s a reason it’s a cult fave – it sets without caking) and the beautiful Hourglass Veil Translucent Setting Powder review (which has a whisper of luminosity that doesn’t read as shiny, just alive). I reviewed it and noted it delivered a silky, airbrushed finish on my 50+ skin. If you prefer pressed powders, look for those labeled “finishing powder” or “blurring powder” – like IT Cosmetics Bye Bye Pores Pressed (it’s great for reducing shine and blurring pores without a dry finish). The key terms are translucent, sheer, light, blurring.
- Apply powder with a small, soft brush. Instead of a big fluffy powder brush that dusts powder everywhere, I like to use a smaller domed brush (like a setting brush or even a tapered blush brush) so I can precisely place the powder. Dip lightly, tap off excess, and then press or pat the powder onto the areas you want to set. Don’t vigorously buff – that can disturb your foundation. I usually set in these spots:
- Under the eyes: I very gently press a tiny bit of powder right where I applied concealer (usually inner corner under eye and a touch at outer corner) to prevent creasing. Use minimal powder here – too much can make that area look dry.
- The sides of my nose and smile lines: those areas can crease or get a bit shiny, so I set them to “lock” the foundation in place. Press powder into the crease of your smile lines to prevent them from eating your foundation later.
- The forehead center: I have combination skin, so I blot a bit of powder between my brows and center forehead where I tend to shine. If you’re drier, you might skip this.
- Chin: a light dusting on the center of the chin helps keep it from fading or looking oily.
Everywhere else, I often skip powder – for example, on the high points of cheeks where I want to keep a slight sheen, I leave it powder-free so I don’t dull the glow. This selective powdering technique keeps the overall look skin-like. As one of our GlowOver50 articles says, “you worry that powder will exaggerate fine lines or make your face look dry,” but if applied correctly, a light setting powder can be a game-changer – it’s about choosing the right powder and using it sparingly.
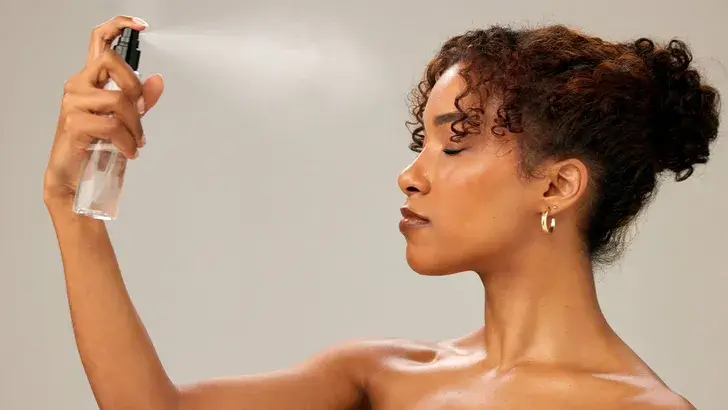
- Consider a setting spray for extra hold (and hydration). If you’re very dry or just powder-averse, you can almost skip powder and opt for a hydrating setting spray to set your makeup. Or do both: set key areas with a touch of powder, then do a couple spritzes of setting spray to take down any powderiness and add longevity. Setting sprays formulated for hydration or glow can merge the layers of makeup together, giving a more seamless finish. I personally love doing a quick mist of something like MAC Fix+ or Urban Decay All-Nighter (the Ultra Glow version) after powder – it removes the “powdery” look and gives a subtle dew back to the skin while locking makeup in. If you’ve accidentally over-powdered, a mist like this is your best friend to revive the skin’s radiance. As a rule, sprays should be the final step after all powders and color products. So I’ll mention it here, but you can do it at the very end of your routine too.

Now, one thing to note: if you used a cream blush or bronzer (some people prefer creams on mature skin for their dewiness), you would actually apply those before doing this setting powder step. Recall our rule – creams and liquids first, then powders. So if you plan to use a cream blush, skip ahead, apply that right after foundation/concealer, and then powder afterward. In this guide, I’ll describe using powder blush/bronzer for simplicity, but feel free to swap for creams if you love them (just adjust the order accordingly).
Common Question: What if my face is very dry – can I skip powder entirely? Yes, you can. If you have dry mature skin and you used long-wear or self-setting foundation and concealer, you might not need powder. The only caveat is your concealer under the eyes might crease without a tiny bit of setting. In that case, try a blurring under-eye powder (there are some made just for that area) or even pat a tiny bit of your face powder only under eyes and leave the rest of the face dewy. Many women over 50 tell me they fear powder, but using a microfine one just in key spots can actually prevent makeup from creasing and extend wear without aging the appearance. It’s all about a light hand.
For example, the best setting powders for mature skin in 2025 list features silky powders that are designed not to cake – one of those could change your mind about powder (they certainly changed mine when I hit 50).
Product Spotlight – Setting Powder
One powder I have to rave about is the Hourglass Veil Translucent Setting Powder review. I mentioned it earlier – it’s just magical on mature skin. It’s so finely milled it almost feels creamy, and it has light-reflecting particles that give an airbrushed, flawless finish without looking dry at all. Whenever I use it, my makeup stays put all day and I swear my skin looks smoother (like a soft-focus lens effect). In my review, I noted it was the ultimate flawless finish for mature skin – truly lives up to that.

It is a high-end product, though. On the drugstore side, I also enjoy the Maybelline Fit Me Loose Finishing Powder. It offers a natural matte finish that sets well – I use it sparingly and it does the job for shine control.
And one more shout-out: IT Cosmetics Bye Bye Pores Pressed Powder – excellent for blurring pores on my nose and doesn’t turn chalky; as the name suggests, it really makes pores look practically invisible.
(For a tutorial specifically on powder application for older skin, see how to apply setting powder for mature skin (2025 guide) – it breaks down techniques and has more tips on avoiding the dreaded crepey look.)
With our makeup now lightly set, we’ve preserved the work we did and given it longevity. The skin should still have some life – if you gently touch your cheek, it shouldn’t feel tacky with foundation; it should have a soft finish. And hopefully, you can smile without instantly seeing foundation collecting in your smile lines (if so, a tiny dab more powder there or a setting spray can help).
Now, it’s time to add color and dimension back to the face so we don’t look like a one-tone wonder. Let’s move to blush, bronzer, and a touch of glow!
Step 5: Add Blush and Bronzer (Bring Back Dimension)
After laying down foundation and concealer, our complexion can look a bit flat or all one tone. Blush and bronzer are our best friends to bring some healthy color back and subtly contour the face. On mature skin, a well-placed blush can literally take years off – it gives that fresh, lifted look. Bronzer adds warmth and gentle definition (and who doesn’t love a sun-kissed touch?). The key with both is to choose flattering formulas and apply with a light hand, building up slowly. Here’s how I do it:


- Opt for cream or satin-finish powders. One question I often get is “cream or powder blush for mature skin?” Honestly, both can work beautifully; it depends on your preference and skin type. Cream blushes are lovely if you have drier skin or want a dewy finish – they melt into the skin and look very natural, almost like a flush from within. You would apply cream blush before any setting powder, tapping it on the cheeks and blending edges (either with fingers or a brush/sponge). Powder blushes are great too, especially if you’ve set your face with powder. Just choose powders that have a satin or glowy finish rather than ultra matte (a bit of sheen looks more skin-like). Many modern powder blushes are finely milled and even have moisturizing ingredients, so they don’t look dusty on the skin. Whichever you use, avoid overly glittery or frosty blushes, as shimmer can emphasize texture on cheeks. A subtle sheen is fine, but chunky shimmer – not so much. Byrdie experts note that cream textures tend to be more moisturizing and flattering on mature skin, and I agree – I find myself reaching for cream blush often because it’s quick and forgiving.
- Smile and apply to the apples (then lift). I apply blush by first giving a soft smile – see those fleshy “apple” parts of your cheeks? That’s where I tap the color initially. For a lifting effect, I then blend upwards and slightly outward toward the temples (think of aiming the color toward the top of your ear). This placement gives a gentle lift and avoids having too much color low on the face. Keep the blush generally above the line of your nose (too low can drag features down). Also, don’t go too close to the nose with the brightest color – concentrate on the outer apples. On mature skin, placing blush slightly higher on the cheekbones can create an impression of a lifted face. A technique I love is draping a bit of blush across the bridge of the nose as well (very lightly) – it gives a youthful, sun-kissed look like you’ve been out in gentle sun. In fact, one makeup artist shared that after blush on cheeks, she takes the residual and crosses it over the nose for a faint sun-kissed effect. I do this with pinky-peach tones and it’s super flattering!
- Blend well – no racing stripes. Use a fluffy blush brush for powders or your fingers/sponge for creams to really blend out the edges of your blush. We want a wash of color, not a 1980s streak. If you overdo it, don’t panic: take your foundation sponge (with a bit of leftover product on it) and dab over the blush – this will diffuse and tone it down. Start with a light application; you can always add more if needed. Build until you have a natural flush. For reference, on my light-medium skin I usually dip once, tap off, apply, then maybe dip again if I want a tad more. It’s easier to build up than to remove excess.
- Bronzer: the warmth and slight contour. Bronzer can really bring warmth and a subtle sculpt to mature faces, which sometimes lose a bit of natural color. I use bronzer right after blush (some do it before – it’s up to you, but I like to see the blush placement first then add bronzer). Use a fluffy brush and a bronzer that’s not too orange or too dark. Sweep it lightly in the classic “3 shape” – along the temples/forehead hairline, into the hollow of cheeks (right under your blush, but keep it soft, not a harsh stripe), and then along the jawline. Basically, hit where the sun would naturally kiss your face: forehead, cheekbones, nose, chin. Tip: Also run a touch of bronzer down your neck so everything matches and you don’t have a pale neck with a warmer face. Bronzer on mature skin should be applied with a light touch to avoid looking muddy. If you’re nervous, try a sheer, buildable bronzer or even a slightly deeper face powder as bronzer for a subtle effect. Cream bronzers are wonderful too for a seamless look (just like with cream blush, apply before setting powder and blend well). Celebrity artists often prefer creams for a natural contour on older clients – Tim Quinn says cream and gel bronzers add warmth and contour that looks effortless and natural on mature skin. So don’t shy away from cream sticks or liquids if that’s your jam.
After blush and bronzer, you should see your face come alive. A pop of rosy or peach on the cheeks makes you look healthy and youthful. A touch of bronzer warms up sallow tones and can even make your face appear a bit more defined (without harsh contouring). Check in the mirror: Do you have a nice balance of color? Does anything need blending? I sometimes take a clean brush and do a quick swirl over the edges of where blush meets bronzer meets highlight to ensure no distinct lines.
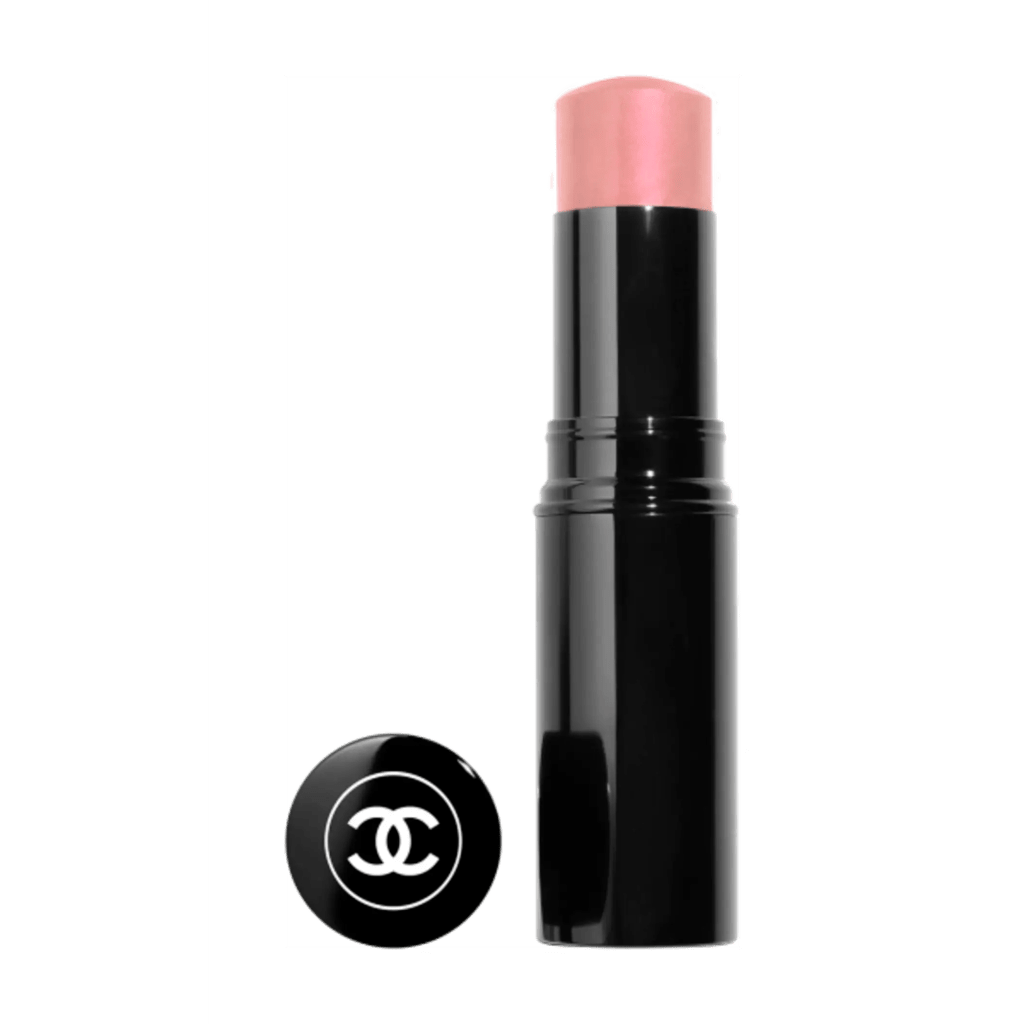
Product Spotlight – Blush/Bronzer: I absolutely adore the look of a cream blush on mature skin. One of my favorites is Bobbi Brown Pot Rouge (or any cream in a rosy hue) – it gives that hydrated flush. But a specific product I must mention is the CHANEL Baume Essentiel Multi-Use Glow Stick. This one’s more of a highlighter/blush hybrid, but it’s a glow-giver that I fell in love with. When I tested 15 highlighters for mature skin, the Chanel glow stick kept sneaking back into my routine – it gave me a real lift with no chunky sparkle, just a dewy sheen. I even wrote about it in my “Over-50 Glow Diary” because it was such a stand-out for adding that youthful radiance. I’ll often dab it on the top of my cheekbones after blush to get a lit-from-within effect (since it’s a cream, I do this before setting spray and after powder – and it still sits nicely).

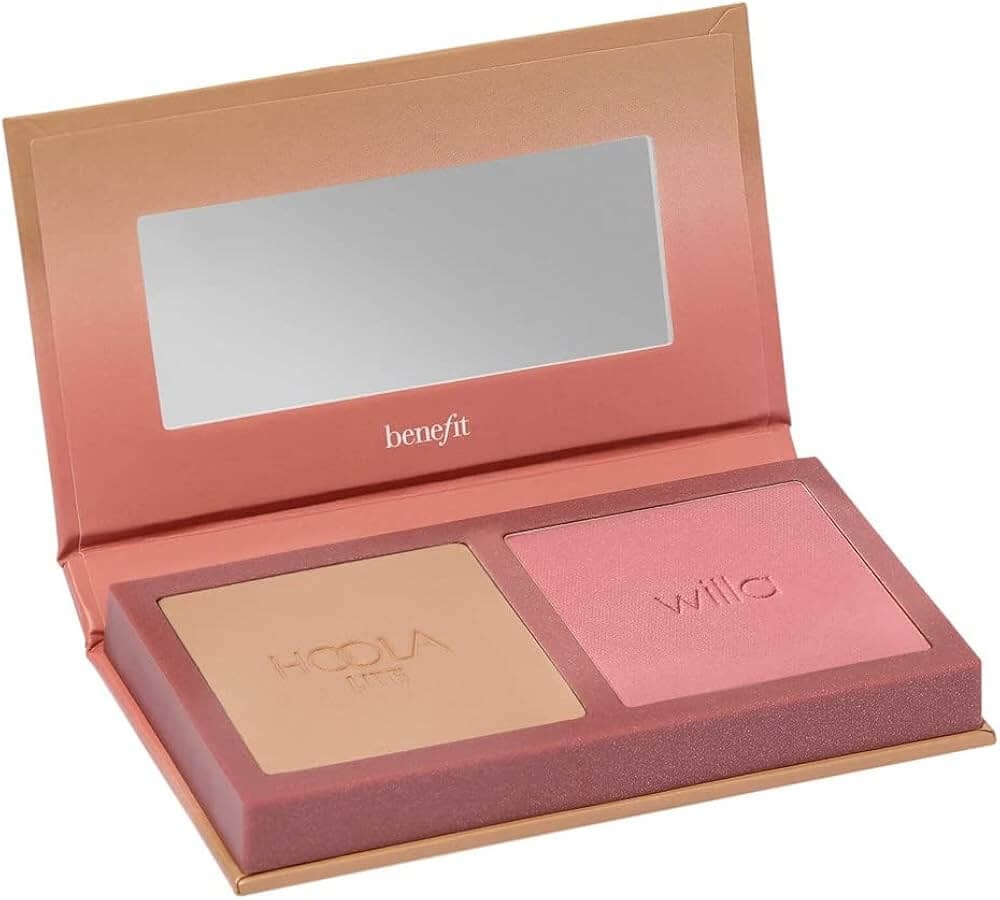
As for bronzer, I’m a fan of Benefit Hoola Lite for my coloring (it’s a lighter bronzer that isn’t too orange or muddy). And the Fenty Beauty Sun Stalk’r bronzers are great because they’re smooth and come in various undertones. If you need recommendations, see our Best Blush and Bronzer for Mature Skin (2025) roundup – we talk about which formulas flatter 50+ skin and don’t emphasize texture. It really helped me find blushes that don’t feather or sink into pores as some shimmery ones can.

Now, blush and bronzer are done. You might choose to add a subtle highlighter on the top of cheeks for extra glow – that’s optional, especially if you used a glowy blush or the Chanel stick I mentioned. If you do highlight, choose something with a fine, pearlescent sheen (champagne or rose gold tones tend to flatter most mature skin without looking stark). A tiny dab on the upper cheekbones, bridge of nose, Cupid’s bow – just for a little oomph. But be cautious with highlighter if you have a lot of texture; sometimes a glowy blush does enough.
At this point, our base makeup routine for mature skin is almost complete! Your skin should look like a enhanced version of itself – even-toned, a natural flush, softly set in place. The layers we applied were in the optimal order: skincare → primer → foundation → concealer → powder → blush/bronzer. Following this makeup layering routine, you’ve effectively avoided the pitfalls (caking, creasing) and brought out the best in your mature skin.
Step 6: Finishing Touches – Setting Spray (and Lips & Eyes)
Technically, our layering routine for the face makeup is done, but I’d like to quickly mention the finishing steps that complete the look, as they do interplay with our base: I tested 10 setting sprays to find which lock makeup in place without drying out mature skin.
- Setting Spray: I highly recommend a final mist of setting spray, especially if you used any powder. This helps all the layers meld together and adds that little extra insurance that your makeup will last. For mature skin, I prefer hydrating or glow-enhancing setting sprays (rather than pure matte ones). A couple of spritzes, then let it air dry (or fan yourself) – you’ll notice it can take away any powdery residue and make the skin look more skin-like again. It’s a trick to make makeup without settling into wrinkles – by slightly re-dampening the surface and then setting it, it prevents that dry, cracked look around lines. As Byrdie explains, you can use powder where you need control and finish with a mist for that seamless “melted” look. I often use Urban Decay’s All Nighter (the classic for longevity) but they have a newer Ultra Glow version that’s great for drier skin. Or even just a thermal water mist or one of those cucumber waters can do the trick if you don’t need longevity but want dew. Pro tip: If you really want to prevent any creasing, you can spray a little setting spray on your sponge and lightly press it under the eyes or around smile lines – this can lock those areas in without adding extra powder.
- Brows, Eyes, Lips: These steps aren’t part of the “layering order” of face makeup, but to complete your look you’d now apply your eye makeup, do your brows, and put on lipstick or gloss. Generally, you can do eyes either before foundation (some do this to avoid fallout issues) or after the base like we did here. I usually do a simple eye look after I finish my face. Feel free to add mascara, a soft eyeliner, or whatever makes your eyes pop. For lips, mature lips often love a creamy, moisturizing lipstick to prevent feathering (plus maybe a lip liner to help it stay in place). A shade that complements your blush ties everything together. (We have a great article on the Best Lipsticks for Mature Skin – Shades and Formulas That Don’t Feather if you need ideas – I live by some of those recommendations daily.)
One more thing: Check in different lighting. If possible, before you head out or finish up, take a look at your makeup in natural light (by a window) or a bright bathroom light. This helps you see if everything is blended and not too heavy. Sometimes what looks great in a dim bedroom lamp might reveal unblended bronzer in sunlight – we’ve all been there! A magnifying mirror can be both scary and helpful – I use one to double-check that I didn’t miss blending along my jaw or that product isn’t creased up somewhere. Quality brushes and a magnifying mirror really can make a difference for a flawless finish.
Phew, that was a lot of detail – but I hope you found these steps helpful! To summarize, by layering your makeup in the right order and taking a light-handed approach, you’ll achieve a radiant result that enhances your mature skin instead of fighting against it. It might feel like a lot of steps written out, but in practice this routine only takes me about 10 minutes (maybe 15 if I’m really pampering myself).
Before we wrap up with some FAQs and a handy comparison of products, here’s a handy comparison table of some top mature-skin base products I’ve mentioned (and a few others I love). This gives you a quick overview of their finish, coverage, SPF, and benefits side-by-side so you can see which might fit your needs.
Comparison Table: Top Foundations & Base Products for Mature Skin
To help you choose the right foundation or base, here’s a comparison of six tried-and-tested products that work wonderfully on mature skin. I’ve worn all of these and can vouch for their performance (full reviews of each are available on GlowOver50 – just click the product name). Let’s see how they stack up:
| Product (Full Review) | Finish | Coverage | SPF | Key Benefits for 50+ Skin |
|---|---|---|---|---|
| Pat McGrath Sublime Perfection Foundation (Line-Smoothing Luxury) | Natural Satin (Soft-focus glow) | Medium (buildable) | None | Line-blurring “Diamond Powder” diffuses wrinkles; hydrating, serum-like formula that feels weightless (no caking). |
| Giorgio Armani Luminous Silk Foundation (Honest Review After 50) | Luminous Satin (radiant) | Sheer to Medium (buildable) | None | Lightweight silky formula that looks like real skin; soft-focus effect that flatters texture and pores. |
| Charlotte Tilbury Beautiful Skin Foundation (Over-50 Glow Test) | Dewy Radiant | Medium (buildable) | None | Hydrating glow that keeps mature skin looking fresh; great when you want radiance without settling. |
| bareMinerals Complexion Rescue (Tinted Moisturizer) (Review) | Dewy (fresh) | Sheer to Light | 30 | Hydration + SPF 30 for everyday; forgiving finish that stays skin-like and comfortable. |
| COVERGIRL + Olay Simply Ageless 3-in-1 (Foundation Review) | Natural Satin (slight dew) | Light to Medium | 28 | Mature-skin friendly hydration + coverage; includes SPF 28; easy daily base that doesn’t look heavy. |
| Revlon Age Defying 3X Foundation (Mature Skin Must-Have) | Natural (soft) | Medium to Full | 20 | Great when you want more coverage without feeling thick; includes SPF 20 and still wears comfortably. |
(All of the above foundations are formulated to be friendly to mature skin, but remember to always moisturize and prime first for best results! The links will take you to my full reviews on GlowOver50 for an in-depth look at each.)
As you can see, there’s no one-size-fits-all — whether you want a dewy sheer tint or a line-smoothing medium coverage foundation, there are stellar options. And crucially, all of these avoid the major pitfalls (caking, settling, drying you out) when applied with the routine we’ve outlined.
Join the GlowOver50 Newsletter!
Stay in the loop with my latest makeup tips, skincare secrets, and honest product reviews — all tailored for women over 50. Subscribe today and keep that gorgeous glow going!
Before we finish, I’ve compiled some frequently asked questions that I often hear from readers about the makeup order for mature skin and related issues. Hopefully, these will answer any lingering questions you have on the topic!
FAQ: Makeup Layering for Mature Skin
What is the correct makeup order for mature skin?
Q: What is the correct makeup order for mature skin?
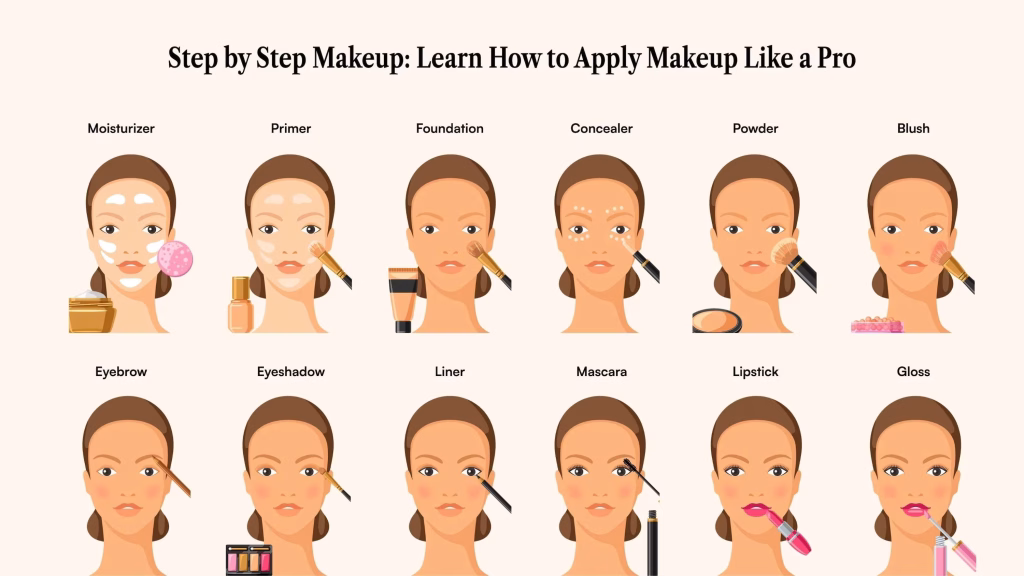
A: The ideal makeup order (after skincare) is: Primer → Foundation → Concealer → Light Setting Powder → Blush/Bronzer → Highlighter (optional) → Setting Spray. Eyes and lips can be done either before or after base, but I typically do them last. The main thing is to apply creams and liquids first, then powders. For example, put on your moisturizer and primer before foundation, do foundation before concealer, and apply any cream blush/bronzer before setting powder. This sequence ensures each layer blends into the next without caking. By following this makeup layering order for mature skin, you’ll create a smooth, long-lasting look. Remember: prep well, then thin layers of complexion products, set lightly with powder, and add your color (blush/bronze) on top. This exact routine is what I use daily to keep my makeup from settling into fine lines or looking overdone. If you’re following this order on redness-prone skin, my guide on how I cover redness and rosacea after 50 shows exactly how I keep it light and skin-like
Should older women use primer before foundation?
Q: Should older women use primer before foundation? Do I really need it?
A: In most cases, yes — a primer is highly recommended before foundation for older women. Primer creates an even base and helps foundation “grip” better, which means it’s less likely to slip into wrinkles or emphasize pores. Think of it as a smoothing layer; many primers today have hydrating and blurring ingredients specifically for mature skin. If you’ve noticed your foundation isn’t sitting right — maybe it’s settling into fine lines or looking patchy — a primer can make a huge difference. If you’re unsure where to start, check out Primer 101: Do Older Women Need Primer? — it breaks down how primers help mature skin and which types might suit your needs.
Do I apply primer before or after sunscreen on mature skin?
Q: Do I apply primer before or after sunscreen on mature skin?
A: Great question! The rule is: sunscreen goes on before primer, always. Think of sunscreen as the final step of your skincare, and primer as the first step of your makeup. So your morning order would be: cleanse → serum (if using) → moisturizer → sunscreen → primer → foundation, etc. Sunscreen needs to bond with your skin to be effective, and putting it on after primer could reduce its efficacy (and might make your primer slide off). So definitely apply that SPF after your moisturizer and give it a minute to sink in. Then layer your primer on top of the sunscreen, and proceed with foundation. In short, primer goes on after sunscreen, not before.
How can I prevent my makeup from caking or creasing on mature skin?
Q: How can I prevent my makeup from caking on mature skin or settling into wrinkles?
A: The struggle is real, I know! To prevent caking, the key is hydration, thin layers, and strategic setting. Make sure you exfoliate gently once or twice a week — sloughing off dead skin helps makeup go on smoothly instead of clinging to flakes. Hydrate your skin really well before makeup (moisturizer + maybe a primer with glycerin) — plumped skin is less likely to look cakey. Then, apply foundation in light layers, and build up only where needed. Avoid dumping a thick layer on all at once. Use a damp sponge to keep the finish dewy and meld the product into your skin. For creasing: Primer is your friend, and using less product in lined areas helps. Set those areas with a touch of fine powder to lock them, but not so much that it looks dry. Finally, a spritz of setting spray can prevent cakiness by melting any powder residue and keep makeup flexible throughout the day.
Do I really need to use setting powder on mature skin?
Q: Do I really need to use setting powder on mature skin? I’m afraid of it looking dry.
A: You’re not alone — many of us over 50 have a love/hate with powder! The answer is you may not need powder everywhere, but a little can be very useful in key spots. I recommend at least setting your under-eye concealer with a very light dusting of translucent powder to prevent creasing. The trick is the type of powder: choose one made for mature or dry skin — often labeled “finishing veil” or “light reflecting.” If you truly have very dry skin, you might skip powder on cheeks or outer face, and just set the center or where makeup usually fades. If you need recommendations, peek at best setting powders for mature skin.
How do I layer my makeup without it settling into wrinkles?
Q: How do I layer my makeup without it settling into wrinkles?
A: The key is the preparation and the thinness of each layer. Start with a line-filling primer after moisturizing. Then apply foundation with a damp sponge to press it in well. Avoid applying too much product around wrinkle-prone areas (like laugh lines). After foundation, check those wrinkle areas — if you see any collecting, sheer it out right then. Then set only those specific areas with a blurring, finely milled powder. Finally, finish with setting spray so everything stays flexible and doesn’t dry-crack. And remember, less product = less settling.
Why does my foundation look cakey or dry on my mature skin?
Q: Why does my foundation always end up looking cakey or dry on my mature skin?
A: There could be a few culprits: skin prep, foundation formula, or application technique. If you’re not moisturizing enough (or exfoliating gently), foundation can cling to dry patches and look cakey. Matte or heavy foundations can also emphasize texture. Applying too much product is another big one — try using less and building only where needed. And watch the powder: too much powder can make even a great foundation look dry. If that’s been happening, set only where you truly need it and finish with a hydrating mist.
Final Thoughts
Makeup is an art, but it’s also deeply personal. The best makeup routine for dry mature skin (or any mature skin) is ultimately one that makes you feel beautiful and comfortable. Don’t be afraid to experiment with different formulas within this layering framework. Now that you know how to layer makeup on mature skin correctly, you have a solid foundation (pun intended!) to play and customize.
And hey, makeup should be fun! I find doing my makeup almost meditative — it’s “me time” that I cherish. So enjoy the process. Put on some music, have a cup of tea, and practice this makeup layering routine over 50 on a weekend when you’re not rushed. You’ll be amazed how a few small technique changes (like the order of application) can solve those frustrating makeup issues we used to blame on “getting older.”
Finally, if you have any of your own tips or questions, I’d love to hear them. Makeup is a journey, and we glow better together when we share what we learn.
Have you tried any of these layering tips or products? I’d love to know your experiences — feel free to drop a comment below with your favorite tricks or go-to products for your over-50 makeup routine. Let’s help each other glow!
Cheers to looking fabulous at any age!