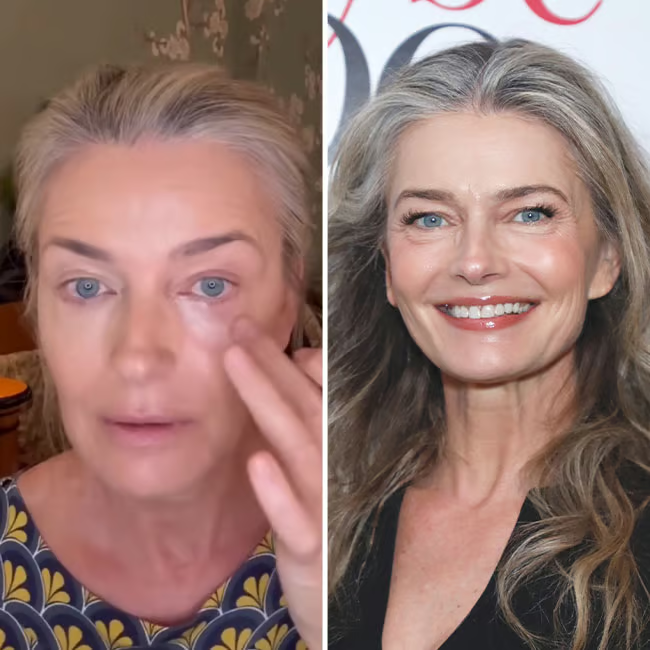
Why Highlighter After 50 Is a Game-Changer
When we reach our 50s, our skin can start looking a bit duller and less firm than it used to. That’s where a great highlighter becomes our secret weapon for bringing back that youthful glow. A touch of luminizer on the high points of the face can exaggerate cheekbones for a more lifted, energized appearance, or subtly make your complexion look like you just had a facial. In other words, the right highlighter is like a mispritz your brush lightly with setting sprayi face-lift in a bottle (without any surgery or needles)! And don’t worry—“no sparkle” doesn’t mean no shine. The best formulas give a soft radiance that catches the light without settling into lines.
December 2025 Update!
This winter my skin has been so much drier than usual, and I noticed my highlighters just weren’t sitting the way they normally do. So over the last few weeks, I started testing two new “glow prep” products under my highlighter — and honestly, the difference has been huge. My skin looks smoother, softer, and far more radiant, even on those cold mornings when everything feels tight and dull.
These are the two new products I’ve been loving this December:
3% Hyaluronic Acid Serum (Korean Skincare)
I’ve been using this right after cleansing, and it has become my winter lifesaver. The 3% hyaluronic acid gives my skin a deep, bouncy layer of hydration, while the ceramide NP (20,000 ppm) helps strengthen my skin barrier so makeup doesn’t cling to dry patches. It also has Acetyl Hexapeptide-8, which gently softens fine lines — perfect when you’re applying cream or liquid highlighter. My skin feels plumper, smoother, and much more comfortable in the cold.
Lune+Aster RealGlow Primer
After the serum, I’ve been applying this primer, and it gives the most beautiful soft-focus glow. It’s light-diffusing, subtly radiant (no shimmer), and it smooths over texture so my highlighter melts into the skin instead of sitting on top. The vitamin E adds extra moisture for winter, and the apple seed extract gives a healthy, brightened look. It’s one of those primers that instantly makes mature skin look fresher and more awake.

As a seasoned makeup lover, I’ve fully embraced glow over 50—but I’ve learned to be picky. Chunky glitter or frosty shimmer is a no-go now, because anything too sparkly can magnify my fine lines and pores. Instead, I gravitate towards refined pearlescent creams and silky powders that create a lit-from-within sheen. A good highlighter should make you look healthy and radiant, not like a disco ball. When done right, a bit of well-placed glow can lift your whole face, making your eyes look brighter and your smile more alive. (Who doesn’t love hearing “You look so rested!” even when you’re running on little sleep?)
How I tested: I spent several weeks swiping and buffing 15 different highlighters—ranging from luxury sticks to bargain powders—onto my 50-something skin. To give each product a fair shot, I kept the rest of my makeup consistent. I prepped my face with moisturizer and a smoothing primer (because yes, Primer 101: Do older women need primer?) and applied a light base of my go-to foundation from the Best foundation for mature skin list. By starting with an even, hydrated canvas, I could truly judge what each highlighter was doing for my complexion. I looked at finish (did it give a dewy sheen or settle into wrinkles?), pigment (obvious glitter vs. subtle glow), texture (creamy? powdery? accentuating texture?), and wear time on my mature combination skin.
Let me tell you, not all of these hyped highlighters played nice with mature skin. Some cult-favorite powders ended up looking a tad frosty on me, emphasizing pores I didn’t know I had. One gorgeous-looking palette turned my cheeks into a mirror—yikes, too metallic for my taste. A few liquid formulas faded by lunchtime or got patchy on my dryer areas. And anything with big sparkle particles? Straight to the bottom of my list. But don’t worry—I won’t dwell on the duds. Instead, I’m here to celebrate the winners that truly impressed me.
After all that testing, I narrowed it down to 7 standout highlighters that gave me real “lift” without the sparkle. These gems made my skin look fresh and glowy, never glittery. Most of them are higher-end (I do love my luxury makeup!), but I’ve also included a couple of drugstore delights that rival the pricier picks. From creamy sticks to lightweight liquids and one magical powder, each of these earned a spot in my makeup bag for different reasons. Below, I’ll share why each product is fantastic for mature skin, how I like to apply it for the best results, and a quick honest rundown of pros and cons. By the end, you’ll know exactly which highlighter might be your new holy grail for that youthful glow.
Table of Contents
My Top 7 Highlighters for a Lifting Glow (No Glitter in Sight)
So grab a cup of coffee (or a glass of wine, no judgment!) and let’s dive into the glowing details. I’m spilling all the tea on these fabulous seven highlighters and how they can work for you. Get ready to embrace your glow over 50—with zero glitter and 100% confidence!
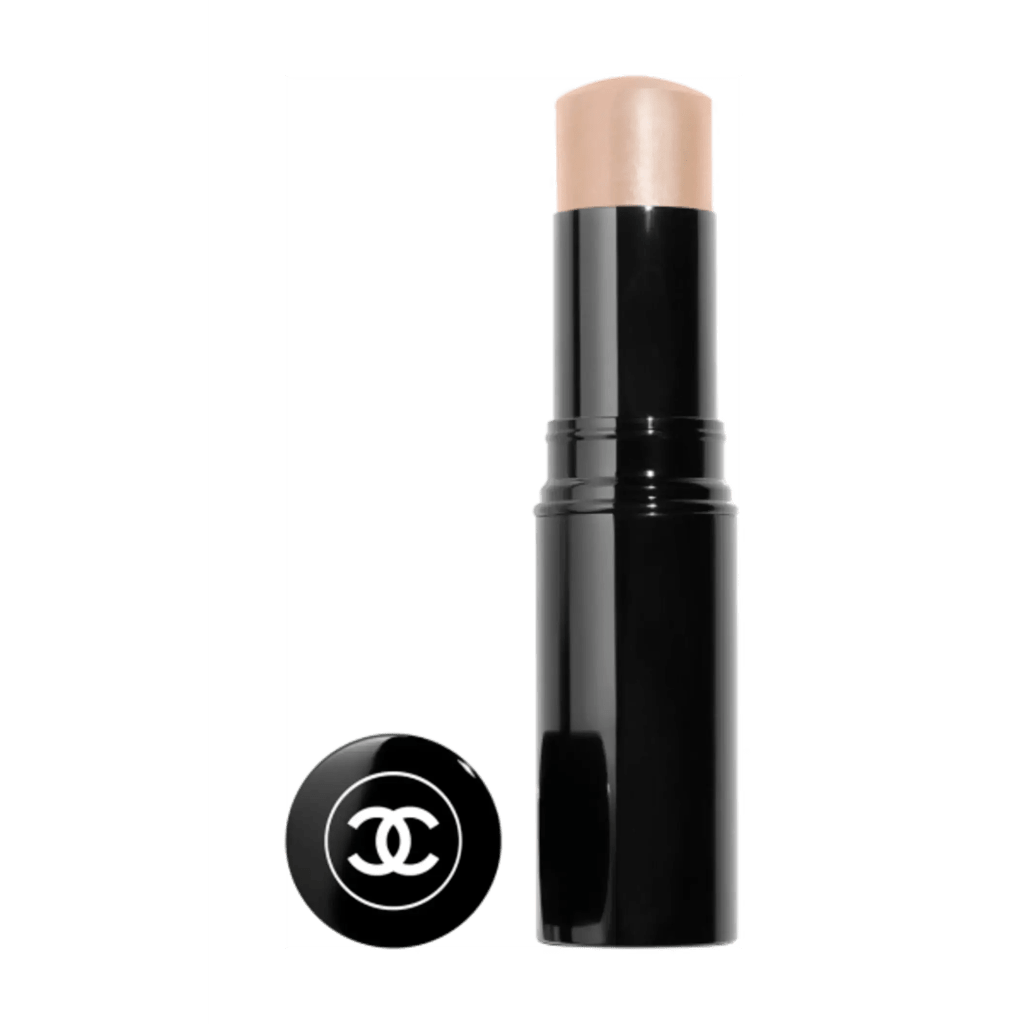
CHANEL Baume Essentiel Multi-Use Glow Stick
Why It’s Great for Mature Skin
This elegant twist-up balm from Chanel is pure magic for mature skin. The Baume Essentiel Glow Stick delivers a gorgeously natural radiance that looks like your skin, just better. The formula is a lightweight cream that melts in upon contact, leaving a dewy sheen that doesn’t emphasize texture or lines. Unlike many powder highlighters, this balm has no visible sparkles – it gives a sheer, glossy finish that mimics a youthful glow (think “slightly sweaty from a spa session” in the best way).
I love that it’s hydrating too; it contains emollient ingredients (like jojoba oil and shea butter) that keep my cheekbones looking plump and moist, never dry or flaky. The glow is very refined – even in sunlight, it just looks like healthy skin, not makeup sitting on top. On my over-50 skin, the Baume Essentiel doesn’t settle into crow’s feet or highlight my pores. It’s also fragrance-free and feels comfortable on my sensitive skin. If you’re someone who fears highlighter because of glitter, this Chanel stick will ease your mind. It delivers that coveted lit-from-within dewiness that reads as “skin” rather than “shimmer,” instantly enlivening a dull complexion. It’s versatile too – I dab it on bare skin on no-makeup days for a subtle freshness, or layer it over foundation for a more pronounced glow when I’m doing full glam.
Application Tips
To apply, I swipe the stick directly on the high points of my face after foundation but before any setting powder. A little goes a long way, so I start with one gentle swipe on each cheekbone and a tiny dab on the bridge of my nose. Then I use my fingers to pat it in. The warmth of my fingertips really helps the balm meld seamlessly with my skin. You can also use a damp makeup sponge to gently press it in if you prefer – the goal is to avoid rubbing, which can disturb your foundation. One of my favorite tricks is to tap a bit above my brows (on the outer forehead) and at the cupid’s bow of my lips for an all-over youthful sheen.
The Baume Essentiel layers well; if I want extra glow for an evening out, I’ll apply one layer, let it sit a minute, then add a second light layer on the very tops of my cheekbones. Because it’s a cream, you don’t want to powder over it (that would dull the shine). Instead, I set the rest of my face lightly with a translucent powder from the Best Setting Powders for Mature Skin list, avoiding the highlighted areas. This way I stay glowy in the right spots and softly matte where I need it. The stick format makes touch-ups a breeze – though honestly, I rarely need to reapply since the dewiness lasts pretty well throughout the day. For extra longevity, you can layer a tiny bit of a coordinating powder highlighter on top, but I usually skip that to keep the finish super skin-like.

Pros & Cons
Pros: Natural dewy finish with no sparkle; hydrating balm texture (great for dry or mature skin); eafasy portable stick; doesn’t settle into lines; fragrance-free and non-irritating.
Cons: Pricey (it’s Chanel, after all); dewiness can fade a bit by end of day (moderate longevity); not ideal for very oily skin (might feel a touch sticky on super oily days); limited shade range (mostly sheer tones that may not visibly show on very deep skin).
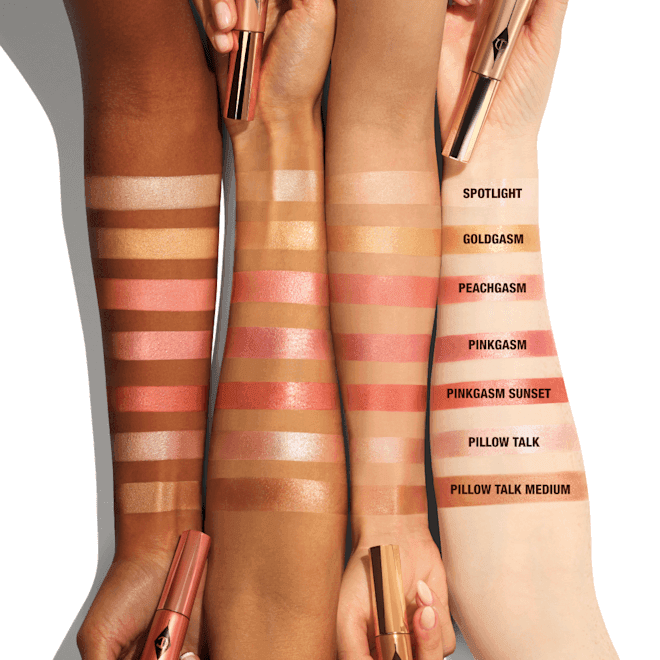
Charlotte Tilbury Hollywood Beauty Light Wand

Why It’s Great for Mature Skin
Charlotte Tilbury’s Beauty Light Wand is a cult favorite, and now I see why—it gives an instant lift and glow to my cheekbones with minimal effort. In winter I stick to creams/liquids for glow—here are my full picks: Best Winter Makeup for Mature Skin. This is a liquid highlighter in a soft tube with a cushion applicator, making it foolproof to dot onto the skin. The formula has what Charlotte calls “Glow Gel” technology and finely milled pearlescent pigments that create a luminous sheen without obvious glitter. On my mature skin, the Hollywood Wand’s glow is more noticeable than the Chanel balm’s, but it’s still very refined. It’s fantastic for special occasions or anytime I want my cheekbones to pop a bit more (in a flattering way).
The reason it works so well for us over-50 gals is that the texture is a lightweight gel-cream – it doesn’t dry down to a flat powdery finish, so it maintains a slight moisture that moves with the skin. That means as I smile or my expression lines come into play, this highlighter doesn’t crack or emphasize wrinkles. In fact, it contains silica and oils that create a soft-focus effect, kind of blurring the area while adding shine. I also appreciate the subtle rosy-champagne tint (in the shade “Spotlight”) which adds a touch of warmth and doesn’t go ashy on my neutral medium skin tone. There’s even a botanical extract in here (Lindera root extract) that Charlotte claims helps mimic a youthful glow by improving skin’s look. Marketing aside, I do find the glow from this wand very flattering – it catches the light beautifully on the high points of my face, giving me that “candlelit” gleam that flatters mature skin. It layers nicely over foundation and under blush or can be used on its own. Compared to powder highlighters, this liquid is far more forgiving on dry patches or fine lines. And unlike some intense Instagram-style highlighters, the Hollywood Wand doesn’t scream “highlighter” – it just makes you look radiant.
Application Tips
The sponge tip applicator on this product is actually quite handy for dotting the highlighter precisely where you want it. (A quick note: open it with a slight twist, squeeze gently until you see product, then twist it closed before application to avoid any overflow.) I usually dot two small dots on my cheekbone (one near the apple, one higher up toward the temple) and a tiny dot on the inner corners of my eyes or under the brow for brightness. Immediately after dotting, I blend by tapping with my ring finger or a damp beauty sponge. I prefer tapping motions over swiping to maintain the coverage and shine. The formula sets after maybe a minute, so I do one side at a time. You can also draw a very thin line down the bridge of the nose and tap that out for a subtle nose highlight (just go easy to avoid an overly shiny nose).
One thing I adore about the Light Wand is how easy it is to control – it’s buildable. For day wear, one layer gives me a pretty sheen. For an evening event, I’ll let the first layer dry, then add another couple of dots on top for extra oomph. Hot tip: I often mix a drop of this with my concealer and tap under my eyes – it makes the under-eye area look brighter and slightly lifted, almost like you had a good 8-hour sleep. It also pairs beautifully with cream blush (see Best Blush and Bronzer for Mature Skin 2025). Sometimes I’ll dab my cream blush on first, then tap the highlighter just above it and slightly blend the edges together – this avoids any stark stripe and gives a lovely gradient glow. Since this is a liquid, I do all my cream and liquid products first ( foundation, concealer, this highlighter, cream blush), then I set lightly with a translucent powder only where needed (How to Apply Setting Powder for Mature Skin in 2025 has great tips on strategic powdering; also see Best Setting Powders for Mature Skin). This way, I keep the shine exactly where I want it.

Pros & Cons
Pros: Beautiful radiant finish (pearl glow, no chunky glitter); easy cushion applicator; blends effortlessly; buildable intensity; flattering tint that suits many skin tones; doesn’t accentuate texture or settle into lines.
Cons: Also on the pricey side; the tube can dispense too much if squeezed hard (be gentle!); needs to be blended quickly (sets fairly fast); if over-applied, can look too shiny on very large pores – use a pore primer or sheer foundation under it if that’s a concern.
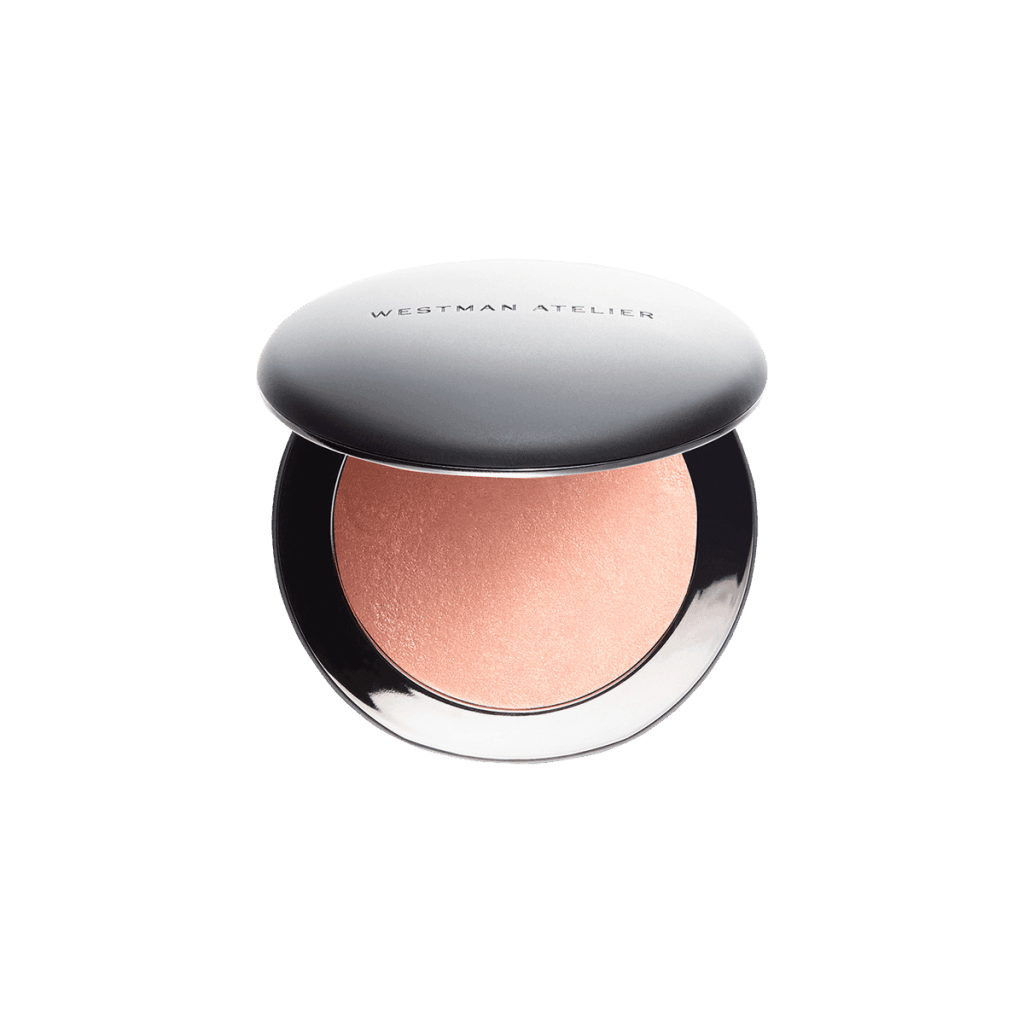
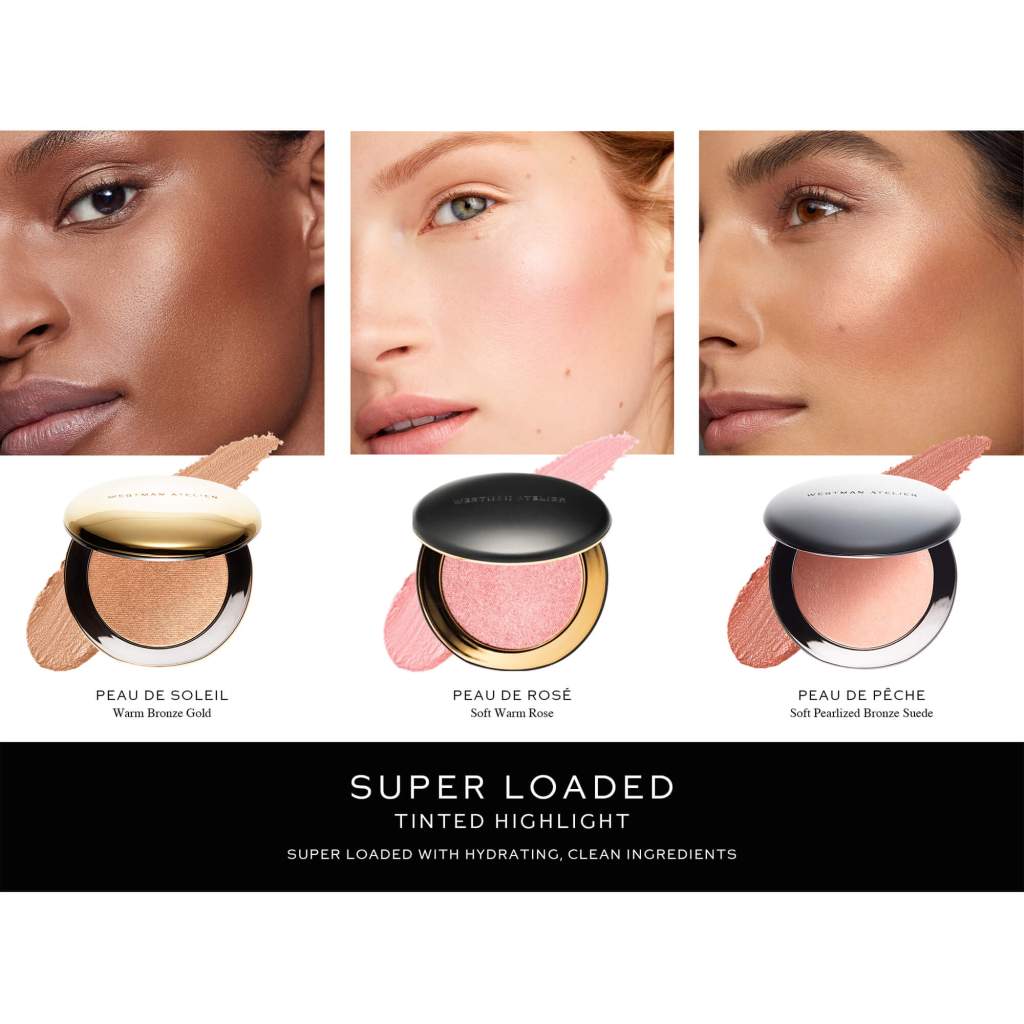
Westman Atelier Super Loaded Tinted Highlight
Why It’s Great for Mature Skin
If you’re ready to splurge on a luxury glow, Westman Atelier’s Super Loaded Tinted Highlight is totally worth it. This is a cream highlighter in a compact that feels like silk and gives a sophisticated, soft radiance. What makes it special for mature skin is its hybrid nature: it’s part highlighter, part skin-nourishing balm, part sheer blush/bronzer (depending on the shade). Created by Gucci Westman (a makeup artist known for working with women of all ages, including lots of over-50 celebs), this formula is clean and packed with skincare ingredients. It boasts goodies like hyaluronic acid, jojoba seed oil, and even caper extract to hydrate and protect the skin. That means while it’s sitting on your cheeks making you glow, it’s also moisturizing and plumping the skin underneath. In fact, hyaluronic acid is famous for retaining massive amounts of moisture (a mere quarter-teaspoon holds about one and a half gallons of water!), which helps to plump up fine lines and give a dewy, youthful look.
On application, the Super Loaded feels creamy but it sets to a velvety finish that is never tacky or greasy. I have the shade “Peau de Pêche,” a warm peachy-gold, which on my skin works like a blush-highlighter hybrid (I get a lovely subtle flush plus glow). The finish is radiant but not sparkly – it’s like a soft sheen that blends into the skin so well you can’t tell where the glow is coming from. Because the pigment is sheer yet buildable, it doesn’t streak or create an obvious stripe, which is fantastic for mature skin that may have uneven texture. Instead, it adds a wash of color and luminosity that looks very natural. I find that as the day goes on, this highlighter actually looks better – it seems to mesh with my skin’s natural oils and become even more skin-like, never separating or sitting in pores. It’s also long-lasting for a cream; I still see a hint of glow at dinner time. This is truly a luxury treat – from the buttery texture to the skincare benefits, it’s a highlighter that loves your skin back.
Application Tips
I like to apply the Super Loaded Highlight with my fingers or a dense brush, depending on the effect I want. For a soft all-over glow, I’ll use my fingers: I warm a bit of product on my index finger (just swirl it in the compact gently) and then tap it onto my cheeks. The key is to tap and press rather than swiping. The pigment in this is subtle, but you can layer it. I usually do one layer as a glowy blush on the apples of my cheeks and along the cheekbones. If I want more highlight on the high point of the cheekbone, I’ll take a bit more just on the upper outer cheek and temple. When using a brush, I opt for a small, fluffy complexion brush or stippling brush. I’ll pick up a small amount (it is densely packed, so start with less) and buff lightly onto the areas I want to glow. A pro tip I learned: use a synthetic brush for cream products like this – it picks up and distributes product more evenly on mature skin without patchiness. I’ve even used a bit of this on my eyelids for a pretty satin sheen (it doesn’t crease much since it sets nicely). Because the Super Loaded Highlight has some tint, you can wear it in place of blush or layer it over a matte blush for more dimension.
I often skip blush and just use this, blending it slightly lower on the cheek to get that touch of color. If you have multiple shades (they have rosy and bronze tones too), you can sculpt a bit – for example, use a bronzy shade on the outer cheek/temple and a lighter shade on the high point. The formula plays well with others: I’ve applied it over foundation from my Best foundation for mature skin and also just over tinted moisturizer from Best Tinted Moisturibzers for Mature Skin and it never lifts or creates bald spots. It also sits nicely on top of setting powder (in case you powdered first) from Best Setting Powders for Mature Skin – I patted it over powder and it still looked smooth, which is rare for creams! One note: keep the compact closed tight so it doesn’t dry out. If it feels a bit stiff in cold weather, warming it up with your finger or a quick blast from a hairdryer (on the closed compact) will soften it. Overall, using this is a sensory joy – take your time blending and enjoy the process, because the result is a truly graceful glow.
Pros & Cons
Pros: Ultra-flattering glow with sheer tint (blush + highlighter in one); skincare ingredients (hyaluronic acid, oils, antioxidants) that hydrate and plump skin; cream-to-satin finish that doesn’t stay sticky; blends imperceptibly into skin; long-lasting for a cream; clean, skin-loving formula (good for sensitive skin).
Cons: Very expensive for the amount of product; compact is small (you get 4g, though it’s densely pigmented); limited availability (mostly online or high-end stores); fingers/brush required (no handy stick or wand); shades are sheer – deeper skin tones may find the glow very subtle or need a deeper shade for the effect to show.
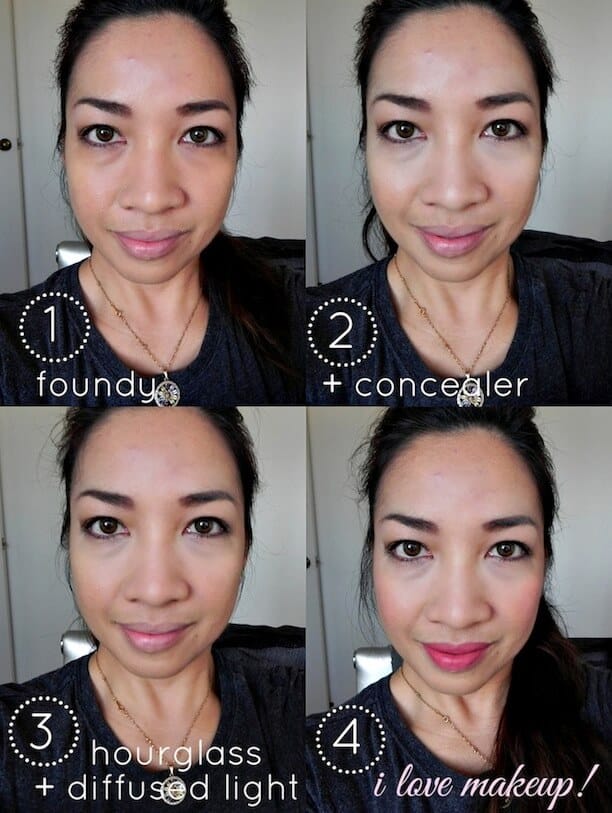
Hourglass Ambient Lighting Powder (Diffused Light)

Why It’s Great for Mature Skin
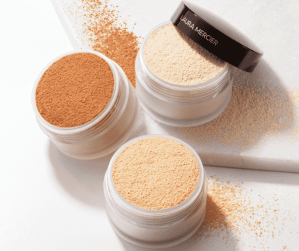
This might be a surprise entry, since the Hourglass Ambient Lighting Powders are not marketed as highlighters per se—but trust me, they are a mature-skin glow staple. I included the shade “Diffused Light” in my testing lineup and it earned a top spot because of how beautifully it brightens and blurs my over-50 complexion. Diffused Light is a pale yellow-beige finishing powder with the subtlest sheen. When you sweep it on, it doesn’t read as sparkly or even shimmery; instead, it gives an ambient candlelit glow that magically softens the look of fine lines and imperfections. Think of it as a “glow filter” in a compact. Hourglass formulated these powders with extremely finely milled particles that scatter light, which means no obvious glitter particles at all. On mature skin, this is a godsend: I can dust Diffused Light all over and my skin just looks smoother, slightly radiant, and not at all dry or powdery. In fact, I often use it as a finishing step for my makeup—almost like a setting powder that adds radiance.
The reason I count it as a highlighter here is that you can also concentrate it on the high points of the face for more glow. For example, if I use a matte foundation and matte setting powder, I’ll take Diffused Light and specifically apply it to my cheekbones, down the nose, and above the brows. The effect is subtle compared to a traditional highlighter, but in person it’s so flattering. It’s perfect for daytime or office looks where you want to avoid looking overtly shimmery but still want a youthful luminosity. Another plus for mature skin: this powder never cakes or settles into lines. It has almost a creamy quality despite being a powder, likely due to the talc-free, mica-based formula Hourglass uses. I have some texture on my cheeks, and unlike many highlighters that I have to keep high up, I can actually buff Ambient Lighting Powder across textured areas and it won’t draw attention to them. Instead, it gently blurs them. Diffused Light in particular also has a slight yellow tone, which can help counteract sallowness or redness in aging skin, giving a more even tone and subtle brightness. On days when I’m doing a minimal makeup, I’ll literally just dust this powder all over and it gives the illusion of well-rested, well-hydrated skin. It’s that magical. So, while it’s not a blinding highlight, it earns its place for giving the kind of low-key radiance that makes people say “You have great skin” rather than “nice highlighter.”
Application Tips
The Ambient Lighting Powder is incredibly easy to use. I usually take a fluffy face brush (something a bit smaller than a big powder brush, more like a tapered powder brush) and give it a swirl in the pan. Tap off any excess—though frankly this powder is so subtle you almost can’t overdo it. For an all-over glow, I use a light hand to dust it all over my face as the last step of my makeup. I concentrate on the outer perimeter of my forehead, tops of cheeks, and chin – basically the areas where you’d normally highlight, but I also do a quick pass on my nose and even under eyes to set concealer lightly (see Best Concealers for Mature Skin 2025). If using it specifically as a targeted highlighter, I’ll switch to a smaller brush (like a setting brush or even a dense eyeshadow blending brush) and apply it more intensely on the cheekbones. You can also wet your brush or use a damp sponge to pick up a bit for a slightly stronger sheen – when applied damp, it actually gives a more noticeable glow while still being very refined. One of my favorite ways to use Diffused Light is to finish off my makeup blending with it: after I’ve applied blush and bronzer, I take a clean brush with a touch of this powder and buff lightly around the edges of my blush/bronzer and across the cheeks (see Best Blush and Bronzer for Mature Skin 2025).
This marries everything together and gives that seamless, lit-from-within effect. If you find your makeup looks dry or heavy, a light dusting of Ambient powder can revive it (also see Avoid Common Foundation Mistakes on Mature Skin). I also carry it for touch-ups; if later in the day I notice my T-zone getting a bit shiny and my radiance fading, I’ll re-powder lightly with this. It paradoxically controls shine (since it is a powder) while adding luminosity back – so you never look flat or dusty. Keep in mind, the effect of this powder is meant to be subtle. If you want more obvious highlight on top, you can layer a more traditional highlighter just on the very highest points and use Diffused Light to blend out the edges. But for an everyday soft-focus glow, this product is ace. Bonus tip: It’s fantastic in photography – there’s a reason many makeup artists dust their clients with Ambient powders before photoshoots. It mimics flattering light on the skin, which we over-50 ladies will happily take!

Pros & Cons
Pros: Extremely fine formula that never accentuates wrinkles or pores; delivers a subtle all-over radiance (no glitter); doubles as a finishing/setting powder; blurring, soft-focus effect on skin; ideal for daytime and texture-prone skin; many shades available to suit different undertones (Diffused Light is great for a gentle glow on light to medium skin).
Cons: The glow is very subtle – those who want a strong highlight might find it too tame; somewhat expensive for a powder; on very deep skin tones, the lighter shades like Diffused Light might appear a bit ashy (Hourglass does have deeper Ambient shades, though the sheen is less visible on dark skin without a lighter contrast); the compact doesn’t come with a brush or mirror (minor gripe).
Yves Saint Laurent Touche Éclat Radiant Touch

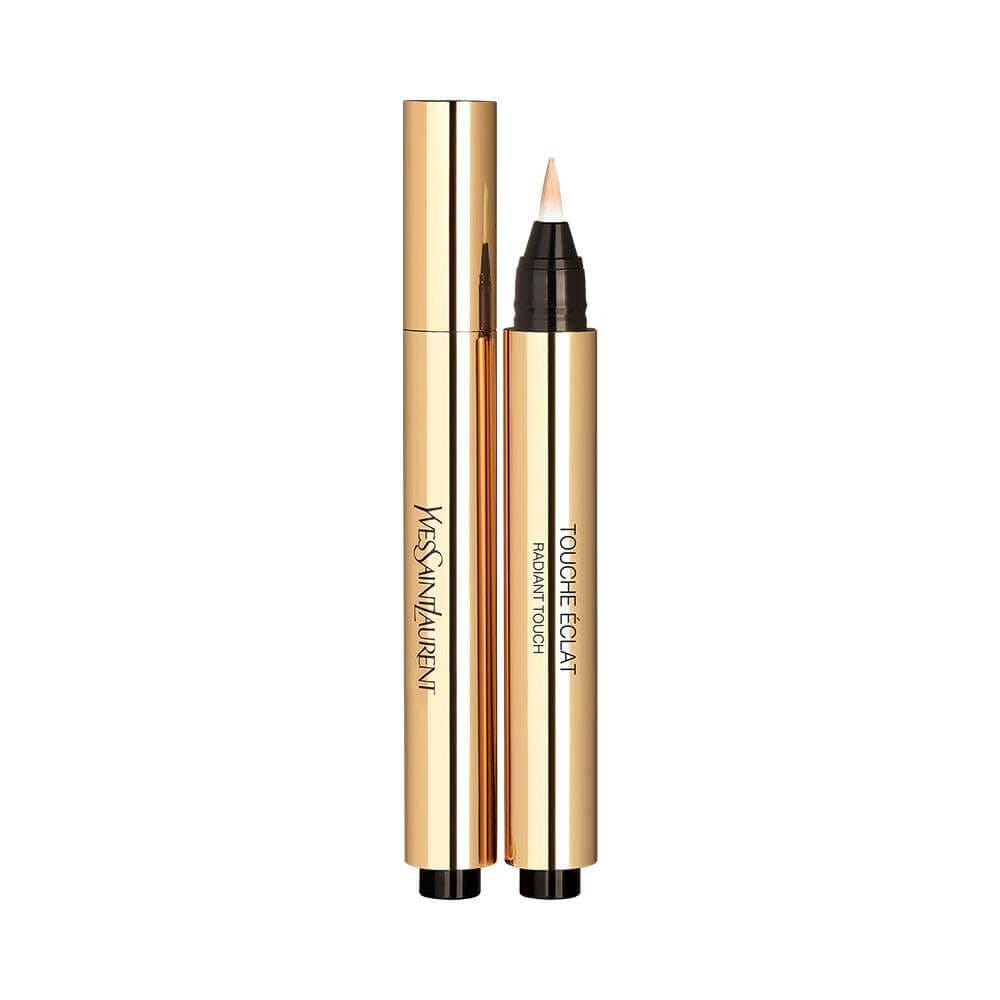
Why It’s Great for Mature Skin
Okay, this one is a bit different from a typical highlighter, but I had to include the iconic YSL Touche Éclat pen because it’s been my secret weapon for years. Touche Éclat is technically a brightening concealer pen, but it’s world-famous for adding light to the face in a very natural, no-sparkle way. In essence, it’s a sheer, luminous liquid you click out of a pen brush, and it brightens any shadowy areas with zero shimmer. For mature skin, this is a godsend for achieving a rested, lifted look. Here’s why: as we age, we often get a bit of hollowing or darkness under the eyes, around the mouth, or in nasolabial folds. A traditional shimmery highlighter would look odd in those spots, but Touche Éclat can be used there because it’s shimmer-free yet luminous. It contains ultra-fine light-reflective particles (not glitter, just a radiance) in a creamy base that blends into skin invisibly. When I dot this under my eye and at the inner corner, it immediately brightens my under-eye without caking or settling—instantly making me look more awake. I also love a tiny stripe of it just above my cheekbone, right under the outer corner of the eye, which gives a gentle lift to that area once blended. Because it’s so lightweight, it doesn’t crease in my fine lines (provided I don’t over-layer it with heavy concealers).
Another area I use it: the marionette lines (those lines from corners of lips down the chin). A little Touche Éclat right in the shadow of those lines and blended out makes them look less pronounced, effectively lifting the corners of my mouth. It’s basically a complexion brightener and subtle highlighter in one, ideal for a mature makeup routine where less is more. The finish is radiant but in a “your skin just happens to naturally glow here” way. There’s no obvious shine, so it’s perfect if you have more conservative tastes or want undetectable brightening. I often use it as a final touch after I’ve done all my makeup: I stand back, look in the mirror, and tap Touche Éclat wherever I see a shadow that’s bringing my face down. It’s like magic eraser for fatigue. The formula has hydrating ingredients too, so it doesn’t dry out the skin. It’s also worth noting YSL offers it in multiple shades, so you can use one close to your skin tone for a subtle effect or a slightly lighter-than-skin shade for more pronounced highlighting. In summary, while Touche Éclat is not a traditional cheekbone highlighter, it is one of the best products to add light and lift to a mature face without any sparkle, so it definitely earned its place in my top picks.
Application Tips
The Touche Éclat pen comes with a built-in brush. You click the end a few times to load the brush tip with product (when it’s new it may take a LOT of clicks initially). My preferred method is to draw small strokes or dots directly on the areas I want to brighten, then immediately pat with a finger or use a small fluffy brush to blend. Here are my go-to placements for a lifted look: under the eyes, especially at the inner corner near the nose bridge and at the outer trough where there’s a natural hollow – after my regular concealer, I’ll add Touche Éclat there to add a touch of radiance. Above the cheekbone, I’ll dot it in a “C” shape from the outer corner of the eye up to the temple (this subtly highlights that whole area in a very natural way). Nasolabial folds (smile lines): I put a thin line in the crease of the line and tap it out – it visually softens the depth of the fold. Around the lips: a teeny dot on the cupid’s bow (instead of a shimmery highlight, this makes the area glow in a believable way) and if you have downturned lip corners, a dot just above each corner then blended can lift the look of the mouth. Bridge of the nose: since this isn’t shimmery, you can do a quick stroke down the nose for light – it won’t look oily, just softly radiant. After placing, I usually use my ring finger to gently tap-tap-tap until it’s blended seamlessly. You’ll notice it just disappears into the skin, leaving a faint light. If you need more, you can add another layer – it layers nicely without getting cakey, as long as you blend each layer.
Some people also use Touche Éclat as a light concealer for under-eyes. If you don’t have dark circles, you can absolutely use it solo that way. I do have circles, so I use a peach corrector or normal concealer first, set lightly with a touch of powder, then use Touche Éclat on top for that final brightening. That layering prevents it from creasing and gives both coverage + luminosity. One caution: this product is not shimmery, so it’s safe to use in lines, but if you apply too much and don’t blend well, it could theoretically catch light in a way that shows the product. So always blend the edges well; you shouldn’t be able to tell where Touche Éclat is, just that the area looks perkier. I often finish by lightly tapping my foundation sponge over any edges just to make sure it’s diffused. This pen is also fantastic for touch-ups during the day – if your makeup has settled or you look a bit tired mid-afternoon, a few clicks of Touche Éclat patted under the eyes or around the face instantly refreshes without disturbing what’s underneath. I keep one in my purse at all times!


Pros & Cons
Pros: Completely shimmer-free radiance (undetectable – great for a no-makeup glow); lightweight formula that won’t cake or settle; perfect for under-eyes and shadowy areas to add subtle lift; easy-to-use pen applicator; hydrating and suitable for dry skin; multiple shades for different skin tones.
Cons: This is a subtle product – not for those who want a strong highlight shine; relatively expensive for the amount (and daily use can make it go fast); if used as a concealer replacement it has light coverage (better as a highlighter than a heavy concealer); the brush tip can get messy (wipe it periodically to avoid buildup).
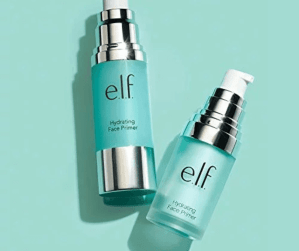
e.l.f. Halo Glow Liquid Filter

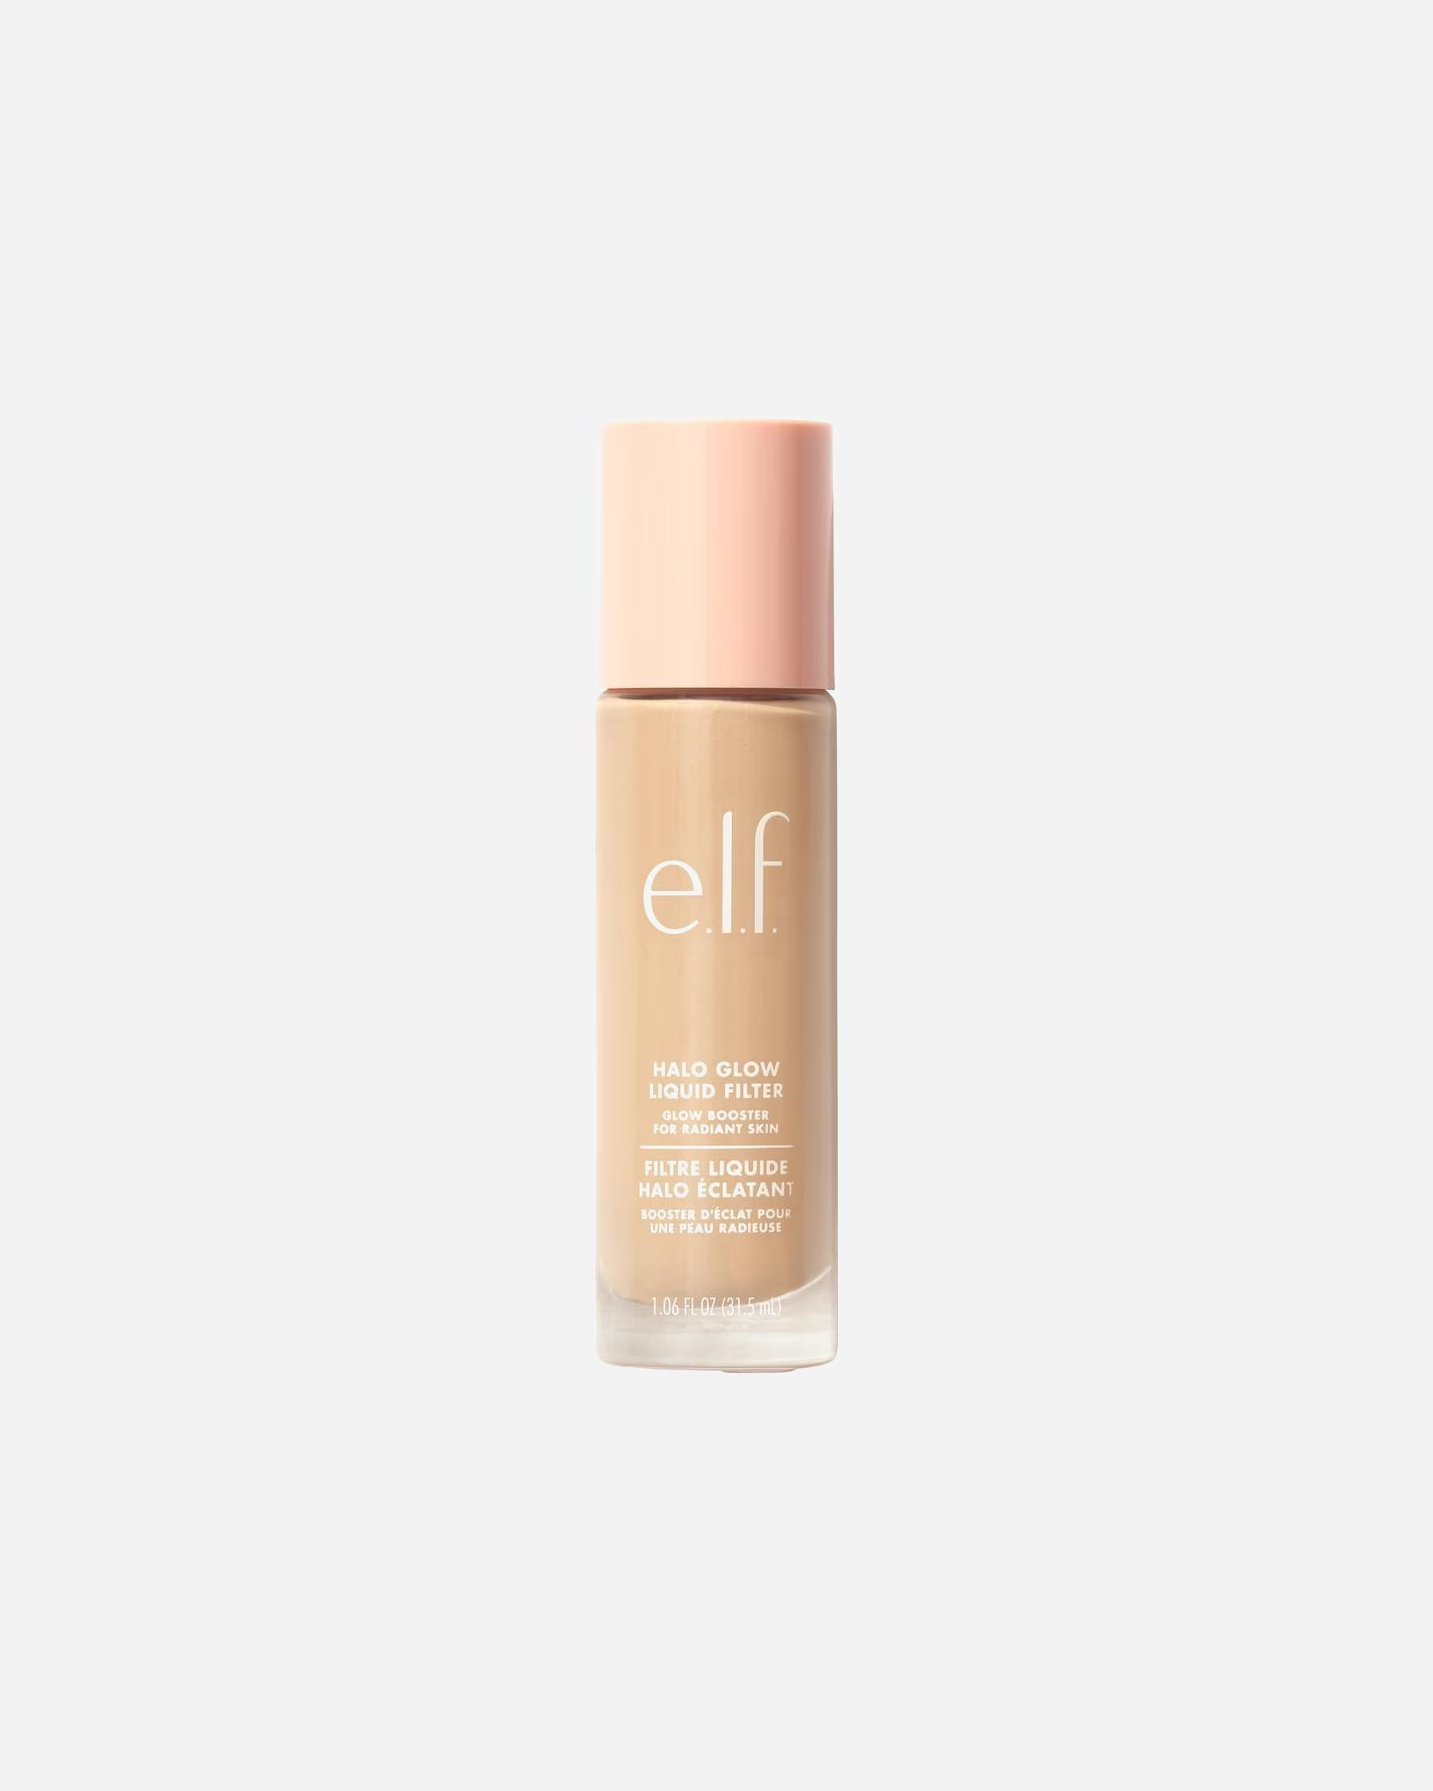
Why It’s Great for Mature Skin
I couldn’t leave out this drugstore gem that has taken the beauty world by storm. e.l.f. Halo Glow Liquid Filter is often called a dupe for Charlotte Tilbury’s Hollywood Flawless Filter, and it absolutely lives up to the hype, especially for mature skin on a budget. This product is a multi-purpose liquid glow booster that you can use in various ways: as a sheer glowing foundation, as a primer under makeup, mixed into foundation, or as a traditional liquid highlighter on the high points. The reason it’s fantastic for mature skin is its flexibility and hydrating formula. It’s infused with squalane and hyaluronic acid, which means it actually provides moisture and a plumping effect to the skin (hyaluronic acid draws in water to keep skin supple). When I wear Halo Glow, my skin not only looks radiantly smooth, it feels comfortable and never dry. The finish is a beautiful soft-focus dewy glow – it indeed gives that “halo” effect, like you have a flattering filter on your face in real life. Importantly, the glow is pearlescent, not glittery. There are tiny light-reflecting particles, but they’re so fine you won’t spot any shimmer chunks. It just imparts an even luminosity.
On my 50+ skin, this is a boon for days I look a bit dull or tired. I’ll sometimes use it all over in place of foundation on casual days, and it magically blurs imperfections while adding radiance. It has sheer coverage with a slight tint (comes in several shades, which is great because you can match close to your skin tone). Worn alone, it makes my skin look like I’ve had a facial – fresh and glowy, and it doesn’t settle into lines because it’s so sheer. As a targeted highlighter, if I dab it on cheekbones, it gives a similar effect to the Charlotte Tilbury Wand we talked about – perhaps a tad more subtle in shine but very similar. It layers well with other makeup too. I love that e.l.f. made this product so affordable (around $14) while performing like a high-end one; it means glowing skin is accessible to everyone. Also, since it’s a makeup-skincare hybrid, mature skin benefits from that extra hydration and the slight smoothing from the squalane (which is oil-like and very nourishing). Another plus: no sparkle overload – even in sunlight, Halo Glow just looks dewy, not glittery. If you have fine lines or texture, this kind of liquid glow will be much kinder to you than most powder highlighters. It reminds me a lot of being bathed in golden-hour light. For mature beauties who want a healthy radiance without emphasizing wrinkles (and without spending a fortune), Halo Glow is a must-try.
Application Tips
Halo Glow Liquid Filter comes in a bottle with a giant doe-foot applicator, which makes it easy to swipe on. Here are a few ways I use it: 1) As a glowy base: After moisturizing and priming (see Primer 101: Do older women need primer?), I dot Halo Glow in a few spots (forehead, cheeks, nose, chin) and blend it out like foundation. I usually use my fingers or a damp sponge to spread it evenly. It gives a very sheer tint, so I often still use a concealer on areas of concern (like under-eyes or spots) afterward. This method gives an all-over subtle radiance that shines through if you put foundation on top. (If you’re having a good skin day, you can actually just wear Halo Glow alone as your base—it will lightly even out skin tone and add glow, letting your real skin peek through.) 2) Mixed with foundation: This is one of my favorite mature-skin tricks—mix a drop of Halo Glow with your foundation (especially if it’s a medium or full-coverage foundation) to add moisture and dewiness. It makes matte foundations more radiant and prevents them from looking cakey on dry skin. I often mix it with my foundation from the 5 Best Drugstore Foundations for Mature Skin in 2025 list to get a more radiant finish. 3) As a spot highlighter: I swipe the doe-foot on the high points of my face (one swipe on each cheekbone, a dot on the nose, a tiny dab on the chin and above brows) after applying my foundation/tinted moisturizer. Then I tap it in with my finger or sponge. It blends really easily – you don’t have to rush as much as with some liquids because it has a moist, almost serum-like consistency. I sometimes layer a little more on the very tops of cheeks because why not? It’s so seamless that it never looks like “oh there’s a stripe of highlighter.” Instead it just amps up the glow. 4) Under foundation for lit-from-within: If I want a very subtle effect, I’ll apply Halo Glow all over my face first, then put a light layer of foundation on top. The foundation will tone down the shine but a gentle radiance will come through, making your base look more skin-like and alive.
This is a great technique for more formal settings or if you’re worried about looking too shiny—this way you get a glow from within instead of obvious highlight. Another tip: because Halo Glow has those skin-friendly ingredients, I sometimes use it almost like a tinted moisturizer on no-makeup days. I’ll do my skincare, then smear a bit of Halo Glow on just to give my face a hydrated, dewy finish and maybe a lick of mascara and go. It makes a great everyday complexion enhancer. Shade-wise, if you’re unsure, you can choose one that matches your skin tone for all-over use. If you only plan to use it as a highlighter, you could go one shade lighter than your skin so it stands out a touch more (but not necessary). For blending, a sponge will sheer it out more, fingers will keep more glow. Both work – I tend to use fingers on smaller areas and a sponge if I did my whole face. The product sets decently and isn’t glittery, so I even use a tiny bit on the brow bone or inner eye corner for a satin shine that won’t creep into lines. Don’t forget to shake the bottle occasionally – the formula is liquidy and has pigments, so just make sure it’s mixed well. All in all, you can’t mess this up – it’s super user-friendly, which is why it’s wonderful for those of us who want quick, easy glow.

Pros & Cons
Pros: Affordable “glow filter” in a bottle; infused with hyaluronic acid and squalane for hydration; very versatile (can use alone, under, mixed, over makeup); gives a soft-focus dewy finish with no chunky shimmer; mature-skin-friendly (doesn’t settle or highlight texture); comes in multiple shades for different skin tones.
Cons: Sheer coverage (not meant to conceal major discoloration); if you have very oily skin, the all-over use might make you too shiny (better to use just as highlighter on oily types); the large applicator can pick up a lot of product – wipe off excess before applying to avoid overdoing it; sells out often due to popularity.
Essence Pure Nude Highlighter


Why It’s Great for Mature Skin
Who says you can’t get a fabulous glow for under $5? The Essence Pure Nude Highlighter in shade “Be My Highlight” has been a beloved drugstore secret for years, and it’s absolutely brilliant for mature skin. This powder highlighter has an ultra-smooth, baked formula that gives a satiny sheen – no glitter, no frost, just a gentle luminosity. On mature skin, Pure Nude is a winner because it’s subtle yet buildable. In one swipe, it delivers a soft glow that is almost imperceptible as “makeup”; it just makes you look like you have naturally vibrant skin. If you layer it, you can get more intensity (even approaching a high-shine glow), but it never emphasizes texture the way some intense highlighters do. I was so impressed the first time I tried this – it reminded me of high-end formulas! In fact, one Allure editor noted that after blending Pure Nude on her face, it looked like “beams of light were bouncing off [her] cheekbones” (Allure) but still in a lit-from-within, natural way. She also loved that it left zero powdery residue and seemed to melt into her skin for one of the most natural-looking glows she’d ever gotten (Allure). I wholeheartedly agree with that assessment.
The texture of Pure Nude is finely milled and almost creamy for a powder. It doesn’t sit on top of the skin looking dry or chalky – a crucial point for us over 50, as drier powder products can age us. Instead, this highlighter “bakes” a luminous sheen onto the skin that catches light just right. I find the tone (a soft champagne-beige) to be very flattering on light to medium-tan skin tones. It’s not stark white or overly golden; it truly is a “pure” nude glow. On deeper skin, it can still work but might appear more subtle – however, Essence has come out with deeper shades in this line as well. One of the standout benefits: it doesn’t accentuate pores on my cheeks. A lot of times, I have to be careful not to bring shimmer too low on my cheek for fear of it highlighting my larger pores there. With Pure Nude, I can be a bit more carefree – a light dusting all over the cheekbone area just gives a healthy sheen. Also, because it’s not too shiny, I sometimes dust it on the center of my forehead and even down the bridge of my nose for a gentle brightness (places I’d never dare put a chunky highlighter). The effect is very similar to the Hourglass Ambient powder, actually, but Pure Nude has a tad more visible shine when layered. It’s like the perfect “everyday” highlighter – the one you can wear to the office, to lunch with friends, or anywhere you want to look glowy but not overdone. And for mature skin newbies who are scared of highlighter, this is a perfect starter because you really can’t overdo it with one swipe. At under $5, it simply can’t be beat in value – yet it outperforms many pricey highlighters in my collection. Truly, Essence Pure Nude is proof that sometimes the simplest, humblest product can give you the most elegant, ageless glow.
Application Tips
The Pure Nude Highlighter is super easy to apply. I usually take a small fluffy highlighter brush (or even a soft blush brush) and swirl it in the pan. Tap off the excess (though this powder doesn’t have a lot of kick-up, it’s firmly pressed). Then I lightly sweep it on my cheekbones in a “C” motion, starting from the cheekbone near the outer eye and curving up toward the temple. Because it’s so natural, I often take whatever’s left on the brush and dust it above the tail of my eyebrow and even a tiny bit on the forehead center. Basically, I can be a bit generous with placement because it never looks stripy. If I want to amp it up, I’ll go back and add a second layer just on the highest point of the cheek and maybe right on the tip of the nose. One thing I adore is using Pure Nude to blend edges of other products: after I apply my blush and highlighter, I take a clean brush with a little Pure Nude and buff the upper edge of my blush/cheekbone area. This softly diffuses any harsh lines and adds a cohesive glow – it makes the transition from blush to highlight ultra smooth. You can also use Pure Nude as an all-over finishing powder (see Best Setting Powders for Mature Skin) if you use a very light hand. For instance, I sometimes take a big fluffy brush, do one gentle tap into the pan (really tap off almost everything) and then lightly sweep across my whole face. It gives the most subtle luminosity – kind of like the Ambient powder effect. (If you have oily areas, avoid those for all-over; stick to the perimeter of the face).
Another tip: try it as an eyeshadow. On rushed days, I’ve taken a bit of Pure Nude on my finger and patted it on my eyelids – it brightens them up with a soft shimmer that’s not glittery. Add mascara and your eyes look naturally awake. Because the powder is so smooth, it doesn’t accentuate my crepey eyelids either. If you want more intensity for a night out, spritz your brush lightly with setting spray then dip into Pure Nude – it will go on a bit more metallic (still not sparkly, but a stronger sheen). I’ve done this for evening events and was surprised how glowy it could get while still looking refined. As for blending, Pure Nude basically blends itself. I sometimes feel like I can’t tell where it is on my skin – I just see the nice effect. So there are no special techniques needed; it’s an absolute breeze. Lastly, if you ever feel you applied too much of any highlighter, you can always take a damp beauty sponge and bounce it over the area – with Pure Nude, on the rare occasion I overdo, a quick pat with a sponge tones it down instantly (the sponge’s moisture helps it mesh with skin). Given how undetectable this is, though, “too much” is rarely an issue. All in all, the approach with Pure Nude is: swipe it on, look in the mirror from a few angles, admire your subtle glow, and add more if desired. It’s that simple!


Pros & Cons
Pros: Extremely affordable (and widely available); ultra-fine baked formula that gives a lit-from-within sheen (no obvious glitter); does not emphasize texture or pores – very forgiving on mature skin; buildable from soft glow to moderate highlight; blends effortlessly; flattering neutral champagne tone.
Cons: The glow, while buildable, is on the subtle side – if you prefer a blinding highlight you might need to layer a lot or choose a different product; only one main shade (“Be My Highlight”) in many stores – deeper skin tones might require the deeper shades (which can be harder to find); the packaging is basic (just a simple lid compact, though at this price who can complain); not super long-wearing compared to creams (by end of a long day it fades a bit, but you can reapply easily).
Highlighter Comparison Chart – Top Picks for Mature Skin
Here’s a summary of the top 7 highlighters and how they stack up:
| Product Name | Price | SPF | Finish | Coverage | Best For | Skincare Benefits |
|---|---|---|---|---|---|---|
| CHANEL Baume Essentiel Multi-Use Glow Stick | $48 (Buy Now) | No | Dewy balm | Sheer | Dry or normal skin; natural no-makeup glow | Emollients (jojoba, shea) – moisture |
| Charlotte Tilbury Hollywood Beauty Light Wand | $42 (Buy Now) | No | Luminous gel | Sheer-to-buildable | All skin types; targeted high points shine | Silica & Lindera extract – soft-focus, radiant effect |
| Westman Atelier Super Loaded Tinted Highlight | $75 (Buy Now) | No | Radiant cream | Medium (tinted) | Normal to dry skin; luxury blush-highlighter | Hyaluronic acid, jojoba oil – hydration and skin-plumping |
| Hourglass Ambient Lighting Powder (Diffused Light) | $58 (Buy Now) | No | Satin powder | Sheer | Combination or oily skin; all-over subtle glow | Vitamin E; light-diffusing particles – blurs lines |
| Yves Saint Laurent Touche Éclat Radiant Touch | $40 (Buy Now) | No | Radiant liquid (no shimmer) | Light (brightening) | Brightening under-eyes & shadow areas (all skin types) | Vitamin E, hydration – prevents caking in lines |
| e.l.f. Halo Glow Liquid Filter | $14 (Buy Now) | No | Dewy liquid | Sheer tint | Normal to dry skin; all-over glow or mix-in | Hyaluronic acid, squalane – boosts moisture and plumpness |
| Essence Pure Nude Highlighter (Be My Highlight) | $5 (Buy Now) | No | Satin powder | Sheer-to-light | All skin types (esp. textured skin); natural everyday highlight | Vitamin E, sunflower seed oil – subtle antioxidant, smooth finish |
(All prices are approximate; SPF = sun protection factor if included; “Coverage” refers to pigment payoff – e.g.,
sheer means more transparent glow, medium means adds some color/coverage. “Best For” notes ideal skin
type or use case. Skincare Benefits highlight notable nourishing ingredients.)
Join the GlowOver50 Newsletter ✨
Stay in the loop with my latest makeup tips, skincare secrets, and honest product reviews — all tailored for women over 50. Subscribe today and keep that gorgeous glow going!
FAQs – Getting Your Glow On After 50
Q: How do I choose a highlighter for mature skin without accentuating wrinkles?
A: The key is to look for finely-milled or liquid highlighters that have a pearlescent sheen rather than chunky glitter.
Formulas described as dewy, satin, or luminous are usually better than ultra-metallic ones. If you swatch a highlighter and see obvious sparkles, it may sit on top of the skin and draw attention to lines. Instead, opt for products like creams or liquids (e.g. Charlotte Tilbury’s Wand or e.l.f. Halo Glow) which merge with the skin, or extremely fine powders (like Hourglass Ambient or Essence Pure Nude) that blur and glow at the same time. Also, consider the tone: a shade close to your skin tone or just slightly lighter will look more natural. Extremely frosty white or super gold highlighters can look harsh on mature skin. Finally, placement is everything – focus the highlighter just on the high points (upper cheekbone, brow bone) and avoid areas with a lot of texture (like crow’s feet or deep smile lines). This way you get the lift and glow without emphasizing wrinkles. It might take a bit of experimenting, but once you find that refined formula that gives you a lit-from-within glow, you’ll see how forgiving and fabulous highlighter can be after 50!


Q: What’s better for over-50 skin: powder, cream, or liquid highlighter?
A: It really depends on your skin type and personal preference, but generally creams and liquids tend to be more forgiving on drier, mature skin.
Cream and liquid highlighters (like the Chanel stick or the Westman Atelier compact, or liquid pens and wands) have a bit of moisture, so they often blend into the skin seamlessly and move with your skin instead of sitting on top. They’re great if you have fine lines or dry patches, as they won’t cling or make your skin look parch. Powders can absolutely work too – the trick is choosing a finely-milled, soft powder (like the Ambient or Pure Nude). These act almost like a hybrid between a setting powder and a highlighter, so they don’t create that textured, obvious streak. If you have oily or combination skin, you might actually appreciate a good powder highlighter because it will set on the skin and last longer where you have natural oils (and not add more dew that could turn to shine). One strategy many mature makeup lovers use is layering: apply a cream or liquid highlighter first for that hydrated glow, then lightly tap a similar-tone powder highlighter on top to set and intensify. This can give the best of both worlds – longevity and radiance – without creasing. In summary, if you’re unsure: start with a cream/liquid for ease of blending on mature skin. As you get comfortable, you can use a soft powder to boost the glow or for areas like eyelids. Avoid chunky glittery powders and you’ll be golden (pun intended)!


Q: Where should I apply highlighter on a mature face for a lifting effect?
A: The classic spots work wonderfully, with a couple of tweaks.
Here’s a quick guide: cheekbones – apply on the upper outer cheekbone, not too close to the nose. Start at about the outer edge of your eye and sweep up toward the temple. This placement instantly draws the eye up and gives a subtle lift. Brow bone – a small dab right under the highest point of your eyebrow arch will lift the eye area (just keep it minimal if you have heavy lids, and blend well). Inner corners of eyes – a tiny touch of a low-shimmer highlight here can open up the eyes, making you look more awake. (YSL Touche Éclat is great here since it’s not shimmery, or a very fine shimmer like Hourglass.) Bridge of the nose – optional, but a light run down the bridge can make your nose look a bit straighter and bring dimension to the face, just avoid the tip if you don’t want to spotlight your nose. Cupid’s bow (upper lip) – a little highlight on the cupid’s bow can make lips look plumper and give a youthful pout. I find this especially nice if you wear lipstick – it makes the lip look juicy. When I really want that juicy look to last, I pair a subtle highlight on the cupid’s bow with one of my picks from the best lipsticks for mature skin so the colour stays put instead of travelling into lip lines. One area to be cautious: if you have very pronounced texture or large pores on, say, the apples of your cheeks, avoid putting a shimmery highlighter directly there; stick to just above that area. Also, avoid the forehead center if you have deep lines there – shine can make lines more visible. A good rule is “high planes of the face” – anywhere light naturally hits when you’re lit from above. And always blend the edges of your highlighter so it fades naturally into your skin or foundation, which ensures you get a glow without a stripe. When done right, someone will just notice that your face has a lovely dimension and lift to it, rather than noticing the highlighter itself.


Q: Can I wear highlighter if I have very textured skin or enlarged pores?
A: Yes, you can, but choose your formula wisely and prep your skin.
For very textured skin, a liquid or cream highlighter is usually the best bet because it won’t settle into the nooks and crannies as much as a dry powder can. Something like the Chanel Baume Essentiel or the e.l.f. Halo Glow is great – they provide glow without harsh shimmer particles. Also, using a blurring primer on areas with large pores (like maybe the front of cheeks) can help create a smoother canvas so that when you apply highlighter on top, it doesn’t sink into the pores. (See Avoid Common Foundation Mistakes on Mature Skin for more on prepping and priming – the same principles apply here; also see How to prep mature skin for foundation). Another trick is to keep the highlighter slightly above the most textured areas. For example, if the front of your cheeks by your nose has larger pores, start your highlighter a bit further back, more toward the temple. You’ll still get that pop of light when you turn your head, but you’re not directly emphasizing the textured zone. Additionally, application method matters: try pressing or tapping the product in, rather than buffing vigorously. Using a damp sponge to lightly press a liquid highlighter on will minimize the chance of it accentuating texture. With powders, a fan brush or very light hand is key – dust it on gently instead of packing it on. If you’re really concerned, start with a subtle powder like Essence Pure Nude which is known to not show texture (many users with acne scars or textured skin rave about it). Lastly, remember that from a normal conversational distance, people don’t see texture as much as you might see in a magnifying mirror. A little healthy glow can actually make skin look more hydrated and youthful overall. So don’t be afraid to experiment – you can always start subtle and see how your skin reacts. Often, the confidence and fun of wearing a bit of glow will outweigh those texture worries.

Q: How can I make my highlighter last longer on my skin?
A: To prolong your glow, try these tips: 1) Layering – like we touched on earlier, layer a cream and a powder.
For example, apply a cream or liquid highlighter first, let it set, then dust a tiny bit of a similar-toned powder highlighter on top. The powder will set the cream and add extra glow. (One caution: make sure the cream isn’t super sticky when you apply the powder, or it could grab – if it is, lightly tap your face with a damp sponge first or use a very fine translucent setting powder sparingly over the cream before the highlight powder.) 2) Use a setting spray – after all your makeup is done (including highlighter), spritz your face with a setting spray. This helps meld products into the skin and can improve longevity. Some setting sprays also give a dewy finish which complements the highlighter. 3) Choose long-wear formulas – products like the Westman Atelier or Charlotte Tilbury are quite long-wearing on their own. If you have particularly oily skin, consider a formula that “sets” down like a self-setting liquid or a dry-touch balm. 4) Don’t apply on very wet base – if your foundation or skincare underneath hasn’t fully set or absorbed, a highlighter can slip and slide. Give your base a moment to sink in or set your foundation in key areas before applying highlighter on top. 5) Avoid touching your face – sounds obvious, but throughout the day if you’re constantly touching or rubbing (maybe forgetting you have makeup), you’ll disturb the product. Highlighter tends to be on the higher points that we might brush against (hugging someone = cheekbone contact, etc.), so just be mindful. If you really need your highlight to stay put (for a long event or dancing perhaps), you can also consider a makeup primer on the areas you’ll highlight. A tiny bit of primer patted on the cheekbones can give the product something to grip. Some makeup artists even lightly dampen the skin with setting spray before applying powder highlighter – it grabs on and won’t budge. And of course, carrying a little of your product for touch-ups is always an option. The good news: many highlighters, like the ones above, fade gracefully (they don’t streak or get patchy), so even as they wear, you won’t look weird – you might just be a tad less glowy. A quick touch-up in the evening can revive it fully. Overall, layering and setting are your best friends for longevity.