How I Cover Redness & Rosacea After 50 (Without Looking Cakey): My Step-by-Step Base Routine
If you have mature skin, visible redness, or mild to persistent rosacea, you already know the struggle is not just finding makeup that covers it. The real struggle is finding makeup that covers it without making everything else look worse.

Table of Contents
That was the part I kept fighting with.
I could cover the redness, yes. But then my makeup looked too heavy. Or too dry. Or too obvious around my nose and smile lines. Sometimes my skin looked calmer in color, but older in texture. Other times my foundation would cling to dry areas, separate on my cheeks, or settle into fine lines by lunchtime. And if I tried to “fix” it by adding more product, the whole thing usually tipped straight into cakey.
So I changed my approach.
Instead of trying to erase every bit of redness with one thick layer of foundation, I started focusing on thin layers, strategic correction, skin prep, and texture-friendly formulas. That’s when my base finally started looking smoother, softer, and more believable.
Now when I want to cover redness and rosacea after 50, I do not aim for a flat, full-coverage mask. I aim for calm-looking, even-looking, naturally radiant skin. I still want coverage, of course. I just want it in a way that respects mature skin instead of fighting it.
This is the exact step-by-step base routine I keep coming back to when my skin is flushed, reactive, uneven, or blotchy and I still want my makeup to look polished.
And if you also love soft, flattering complexion makeup, you may want to read my 25 Expert Tips for a Flawless, Ageless Look, my guide to How to Choose Concealer for Mature Skin, and my roundup of Best Winter Makeup for Mature Skin, because all of those pieces fit beautifully with the routine I’m sharing here.
Why Covering Redness After 50 Is So Different
I think this is the part many beauty articles skip.
When you’re younger, you can sometimes get away with heavier complexion products because the skin is firmer, oilier, smoother, and a little more forgiving. After 50, the whole situation changes. Skin often becomes drier, thinner, more textured, and more reactive. Fine lines become more visible. Pores may look more noticeable around the nose and inner cheeks. Makeup can settle faster, cling faster, and look overly “there” much more quickly than it used to.


Now add redness or rosacea into the mix.
Suddenly you are trying to solve two very different problems at once:
- You want enough coverage to neutralize redness
- But you need the finish to stay soft and flexible on mature skin
That’s exactly why so many foundations that promise “full flawless coverage” can be disappointing on older skin. Yes, they may mute redness at first. But if they are too matte, too dry, too fast-setting, or too heavy, they can leave the skin looking stiff and overdone.
For me, the answer was not searching for the thickest formula. The answer was learning how to make my base routine do the work in stages.
That means:
- calming and prepping the skin well
- using a small amount of targeted correction
- choosing a flattering foundation texture
- building coverage only where it’s needed
- using powder sparingly
- adding life back into the skin afterward
Once I started doing that, everything looked more natural.
I also think it helps to remember that redness-prone skin usually responds best to a gentler overall approach. I found it useful to read more about the basics of rosacea care, common triggers, and why daily sun protection matters through the American Academy of Dermatology’s rosacea tips, Cleveland Clinic’s rosacea overview, and the AAD sunscreen guide. Those kinds of resources helped me think about my skin more kindly instead of just trying to paint over it.
What “Without Looking Cakey” Means to Me Now
I think “cakey” can mean different things to different people, so I want to be clear about what I mean when I say I want to cover redness without looking cakey.
For me, cakey makeup usually looks like one or more of these things:
- foundation sitting on top of the skin instead of blending into it
- product gathering around the nostrils, mouth, or chin
- a thick makeup texture that shows before the skin does
- too much powder flattening the face
- coverage that looks disconnected from the rest of the complexion
- dry-looking patches around redness-prone areas
- makeup settling into lines by mid-morning
- a base that looks fine in bathroom lighting but obvious in daylight
What I want instead is:
- even but still skin-like coverage
- softness around fine lines
- enough glow to keep the face fresh
- redness reduced, not necessarily erased to the point of looking unnatural
- makeup that still looks good up close
- a face that looks calm and polished, not smothered
That’s why my routine now is much more about placement and restraint than product overload.
My Skin Type and Redness Pattern
For context, my skin is not the kind of skin that loves a thick matte base. My best complexion days usually happen when I keep things hydrated, light, and strategic.

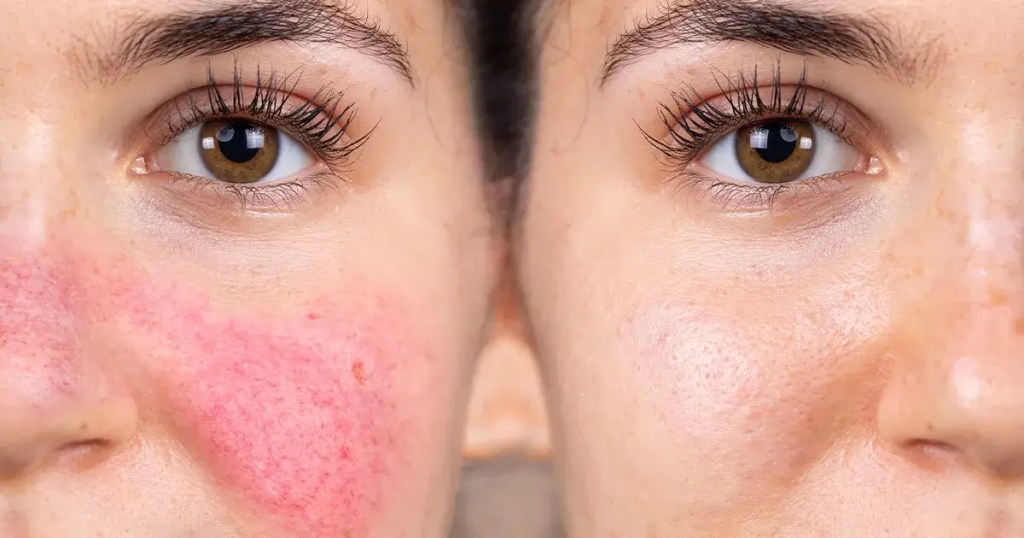
My redness tends to show most in these areas:
- cheeks
- around the nose
- sides of the nostrils
- chin on some days
- occasional diffuse flushing across the center of the face
And the areas where makeup can go wrong fastest are usually:
- around the nose
- smile lines
- chin
- textured cheek areas
- under the eyes if I over-layer
So everything in this routine is built around that reality.
My Step-by-Step Base Routine for Covering Redness & Rosacea After 50
Step 1: I Start With Gentle Skin Prep, Not a Complicated Routine
This step matters more than people think.
If my skin feels tight, hot, flaky, or irritated, foundation will usually show it. On redness-prone days, I do not want a complicated skincare routine under my makeup. I want my skin to feel comfortable, lightly hydrated, and settled.
I used to think that if my makeup looked dry, I should just add more moisturizer, more serum, more face oil, more of everything. But too many layers can actually make foundation slide, separate, or pill — especially over sunscreen.
Now I keep my prep much more balanced.
I want:
- enough hydration to soften texture
- a comfortable surface for makeup
- no greasy residue
- no stinging products
- no overly active skincare right before makeup
If my skin is extra reactive, I go even simpler.
This is also why I’ve become much more careful about what I use regularly on mature skin. I’ve learned that a supportive skincare routine helps my makeup look better long before foundation ever enters the picture. That’s something I talk about more in Skincare Ingredients Every Woman Over 50 Should Know, because with mature skin, what you put underneath absolutely changes how your base sits on top.
What I do
I apply my skincare, then I let it sit for a few minutes. I don’t rush straight into makeup anymore. That little pause helps everything settle and keeps the base from turning slippery or patchy.
Step 2: I Always Apply Sunscreen and Let It Set Properly
If my skin is already prone to redness, I’m not skipping SPF.
That said, I am very fussy about sunscreen under makeup. Some formulas make my face feel heavy, some pill under foundation, and some leave a finish that makes it difficult to get an even base. So I look for sunscreen that feels comfortable and doesn’t fight with the rest of my complexion products.

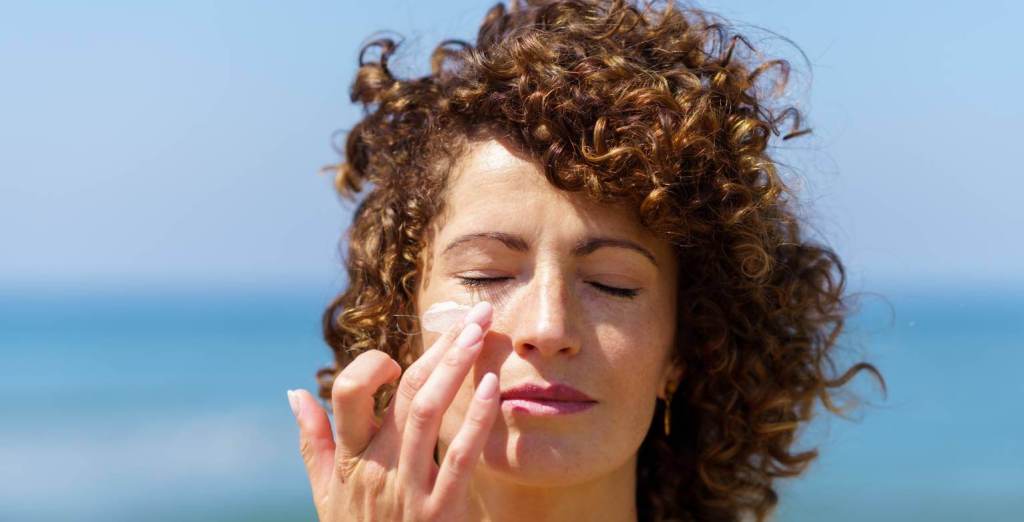
I also give it time to settle.
This made a bigger difference than I expected. When I used to apply foundation too quickly on top of sunscreen, I often got uneven blending, product dragging, or extra buildup around the nose. Now I let the SPF sit, and the base goes on much more smoothly.
For mature skin with redness, I honestly think sunscreen is part of the beauty routine, not separate from it. Protecting the skin helps everything look better in the long run.
Step 3: I Prime Only Where I Need Smoothing
I no longer put primer all over my face automatically.
That was one of my old habits, and it wasn’t helping.
When you have mature skin, especially if you’re dealing with dryness or sensitivity, too much primer can become just another layer that foundation has to sit on. Sometimes that makes the makeup look more artificial instead of more perfected.
Now I use primer surgically.
I usually place a small amount only in the areas where makeup tends to break up or emphasize texture:
- around the sides of my nose
- inner cheek area if pores look more visible
- chin if foundation fades there
- lightly near smile lines if I want a smoother finish
I usually avoid loading primer across the full cheek area because I want that part of the face to stay flexible and skin-like.
Why this helps
This gives me smoothing where I want it without creating that slippery, layered feeling all over the face.
Step 4: I Neutralize Redness Before I Reach for Foundation


This changed everything for me.
If I apply foundation directly over strong redness, I almost always end up using too much. And once I start layering too much foundation, I’m halfway to cakey already.
So now I use a small amount of green-tinted corrector only in the places where redness is strongest.
Usually that means:
- around the nose
- on the central cheeks
- over small flare zones
- on the chin if I’m especially pink there
The key is using very little.
I am not trying to paint my face green. I’m only trying to gently soften the red tones so my foundation doesn’t have to work so hard.
I usually tap it in with my finger or a small damp sponge. I don’t drag it around too much because I want it to stay exactly where I placed it.
Why this step matters so much
Once the redness is slightly muted first, I can use a much thinner layer of foundation afterward. That is one of the biggest secrets to covering rosacea after 50 without looking cakey.
Step 5: I Use a Thin Layer of Foundation Only Where I Need It Most
This is probably the most important step in my whole routine.
I do not apply foundation like a mask anymore.
I start with a small amount — usually less than a full pump — and place it mostly in the center of my face, where redness and uneven tone are strongest.
That usually means:
- around the nose
- cheeks
- chin
- a little around the mouth
- very little on the forehead
- only a light leftover amount along the outer face
I always blend from the areas that need the most coverage outward. That way I’m not wasting product on parts of my face that don’t need it.
How I apply it
Most of the time, I either:
- use a brush first for controlled placement, then soften with a sponge
- or use a damp sponge if I want the sheerest, most natural finish
If my skin is extra reactive that day, I use a very gentle pressing motion instead of buffing aggressively. I’ve found that too much rubbing can disturb the correction underneath and bring the redness right back through.
My rule
One thin layer first. Then stop and look.
That pause matters.
Instead of automatically applying more foundation everywhere, I assess what still needs help and correct only those areas.
This is also why I tend to favor formulas that behave beautifully in light layers. A foundation can be lovely in theory, but if it needs a thick application to look good, it usually isn’t my best friend anymore. That’s one reason I’ve kept going back to formulas like Charlotte Tilbury Beautiful Skin Foundation, Giorgio Armani Beauty Luminous Silk Foundation, and Pat McGrath Labs Skin Fetish: Sublime Perfection Foundation. They each give a slightly different finish, but they all understand the beauty of a thinner, more skin-like layer.
Step 6: I Spot Conceal Instead of Doing a Heavy Second Layer
This is another big one.
The old me would see a little redness still peeking through and immediately add more foundation all over. The result was never better. It was just thicker.

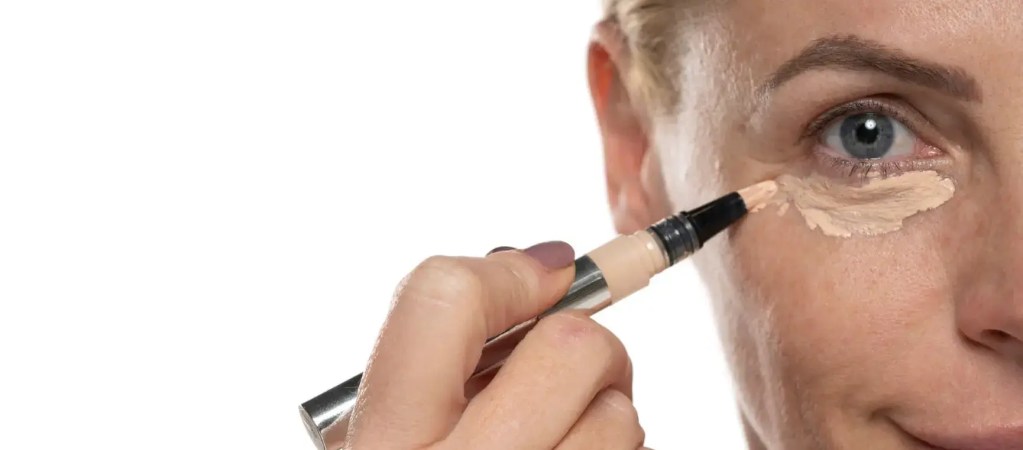
Now I use a small brush or fingertip and spot-conceal only the places that still need extra coverage.
That usually includes:
- the corners of the nose
- stubborn pink areas on the cheeks
- chin redness
- little patches of visible flushing
- any spot that foundation softened but didn’t fully even out
This technique gives me much more believable coverage because the thicker product is only where I actually need it.
And because I’m not overloading the whole face, the rest of the skin still looks fresh and alive.
This is also exactly why concealer matters so much in a mature-skin routine. If the texture is too dry, too matte, or too heavy, it can undo all your careful work. That’s why I put so much thought into How to Choose Concealer for Mature Skin, because the right concealer can quietly carry a lot of the workload.
Step 7: I Keep the Under-Eye Separate From the Redness-Covering Strategy
This might sound small, but it matters.
I used to do my entire complexion with the same mentality: cover everything, brighten everything, set everything. That approach does not flatter my face now.
My under-eye area needs something different from my cheeks.
The redness on my cheeks can usually handle a bit more coverage, but the under-eye area needs lightness, flexibility, and minimal powder. If I treat both areas the same, I end up with too much product under the eyes and too much dryness there by midday.
So I think of my face in zones now.
- cheeks and nose: neutralize and even out
- under-eyes: brighten carefully and keep soft
- chin: add coverage only if needed
- forehead: keep light
That change alone made my makeup look more refined.
Step 8: I Powder Only the Areas That Actually Need It
I used to powder my whole face because I thought it was the “finished” thing to do.
Now I know better.
Too much powder is one of the fastest ways to make mature skin look older, flatter, and more textured than it really is. When I’m covering redness, I want the complexion to stay smooth and calm, not dry and chalky.
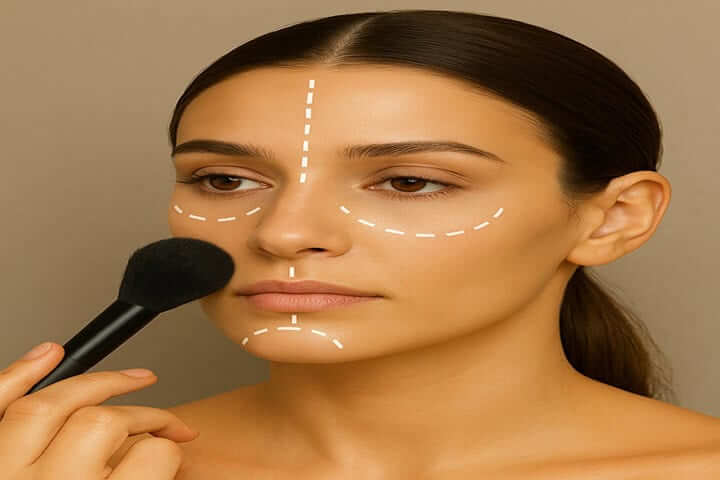

So I powder strategically.
I usually powder these areas:
- around the nostrils
- sides of the nose
- chin
- lightly under the eyes if needed
- sometimes the center of the forehead
And I usually use very little or none at all on the upper cheek area because that’s where I want my skin to keep some natural dimension.
How I apply it
I prefer pressing a tiny amount in with a small puff instead of dusting powder everywhere with a fluffy brush. Pressing gives me more control and keeps the finish cleaner.
What I avoid
I avoid over-powdering the areas where I have the most texture or dryness. Powder tends to magnify whatever is already there.
If powder is a struggle area for you too, it may help to pair this routine with a lighter hand and softer formulas across the board. I’ve found that complexion makeup behaves best when each layer is doing its job without competing with the others.
Step 9: I Bring Soft Color Back Into the Face Carefully
Once I’ve neutralized redness, I need to be careful not to create a flat, blank complexion.
This is where blush and bronzer come back in — but in a more thoughtful way than they used to.
Because my cheeks are naturally where the redness lives, I don’t place blush right on the fullest central part of that redness. Instead, I usually place it a little higher and a little farther outward for a lifted effect.
That way I get color and freshness without making the face look flushed again.
Cream products usually work best for me here because they melt into the skin more naturally. Powder blush can look beautiful too, but only if the base underneath still has enough life.
If you love soft glow the way I do, my edit of I Tested 15 Highlighters After 50 — These 7 Gave Me Real Lift is a great companion to this kind of base routine. And for that creamy, elegant glow that doesn’t fight mature texture, I still adore the look I talked about in CHANEL Baume Essentiel Multi-Use Glow Stick Review.
Step 10: I Finish With Setting Spray to Melt Everything Together
This is the final step that makes the whole base look like skin instead of layers.
A good setting spray softens that freshly-applied look and helps powders, cream products, foundation, and concealer settle into each other. It can take a face that looks a little too “made up” and bring it back to something much more natural.
For me, that’s especially helpful after I’ve used any powder around the nose or chin.
I don’t want tightness. I don’t want a crispy finish. I want the makeup to look settled, comfortable, and softly alive.
That’s exactly why I became so picky about setting sprays later on. I wanted one that kept makeup fresh without making mature skin feel drier, and I went deep into that in I Tested 10 Setting Sprays After 50.
The Foundation Types That Work Best for Me in This Routine
Even though this post is about my routine, foundation obviously still matters. I’ve found that certain kinds of formulas work much better for me than others when I’m covering redness on mature skin.


What tends to work best for me:
- light-medium to medium buildable coverage
- natural, satin, or softly radiant finishes
- fluid or creamy textures that spread thinly
- formulas that layer well without drying down too harshly
What tends to work worst for me:
- thick matte formulas
- fast-setting full coverage foundations
- anything that looks powdery on application
- formulas that grab dry patches
- products that require a lot of buffing
Some of the formulas I’ve liked most for mature skin include Charlotte Tilbury Beautiful Skin Foundation Review, Giorgio Armani Beauty Luminous Silk Foundation — My Honest Review After 50, and Pat McGrath Labs Skin Fetish: Sublime Perfection Foundation Review. Each one gives a slightly different effect, but they all share something important: they can be applied in thin, skin-like layers, which is exactly what I need when I’m trying to cover redness without making mature skin look heavy.
I’ve also talked about other foundation formulas for mature skin in posts like Is Estée Lauder Double Wear Good for Mature Skin?, Best Foundation for Mature Skin: L’Oréal Age Perfect Review, and broader guides like 7 Foundations That Don’t Settle into Wrinkles, 10 Best Foundations for Mature Skin (I’m 52 & Tested 2025!), Top Luxury Foundations for Mature Skin – Over 50 Picks, and 5 Best Drugstore Foundation for Mature Skin in 2025.
My Favorite Product Categories for This Kind of Base
1. Green correctors
A tiny amount under foundation helps reduce the amount of base I need overall.
2. Flexible medium-coverage foundation
This gives me room to build only where necessary.
3. Hydrating concealer
I need spot coverage that doesn’t turn dry and obvious.
4. Finely milled powder
Only for the small areas that need extra hold.
5. Cream blush or balm highlighter
These bring life back into the face after I neutralize redness.
What I No Longer Do When Covering Redness After 50
This section is honestly just as important as the routine itself, because I learned a lot by seeing what didn’t work.
I no longer try to fully erase every trace of redness
Trying to make the skin look completely blank often makes the makeup look more obvious than the redness ever did.
I no longer use thick layers all over
Coverage should go where it’s needed, not automatically across the entire face.
I no longer powder by default
Powder is a tool, not a rule.
I no longer assume “more coverage” means “better result”
On mature skin, the opposite is often true.
I no longer copy techniques that were designed for younger, oilier skin
Baking, dense full-face matte application, and heavy contouring usually do not give me the soft finish I want now.
The Most Common Mistakes That Make Redness Look Worse
I’ve made all of these, so this comes from experience.
Using too much color corrector
If the corrector layer is too thick, the makeup on top becomes harder to blend and easier to notice.
Applying foundation before skincare and SPF have settled
This often creates dragging, patchiness, or pilling.
Using the wrong finish
A formula that is too matte can exaggerate texture. A formula that is too shiny can make redness stand out in a different way. Balance matters.
Buffing too aggressively over sensitive skin
This can disrupt the coverage and bring redness right back through.
Putting blush directly over the most reactive part of the cheeks
That can make the face look more inflamed instead of more lifted.
Setting everything with too much powder
That is one of the quickest ways to turn mature skin dull and cakey.
How I Adjust This Routine on Different Skin Days
My skin is not the same every day, so I don’t do this routine in exactly the same way every single time.
On extra dry days
I use less powder, more cream products, and a lighter hand with correction.
On stronger redness days
I use slightly more targeted corrector and lean into spot concealing instead of building thick foundation layers.
On good skin days
I often skip the corrector entirely and just use a light layer of a flattering foundation.
In winter
I focus more on hydration and softer finishes. That’s also why I love routines like the ones I shared in Best Winter Makeup for Mature Skin, because cold weather can make both redness and texture more visible.
The Base Finish I Actually Aim For Now
This might be the biggest mindset shift of all.
I no longer aim for “perfect” skin.
I aim for:
- calmer-looking skin
- smoother-looking skin
- fresher-looking skin
- skin that still moves
- skin that still looks human
- skin that looks good in daylight
That’s a very different goal from trying to blanket the face into one uniform color. And ironically, once I stopped trying to over-perfect everything, my makeup started looking so much better.
The best foundation routine for redness and rosacea after 50 is not the one that uses the most product. It’s the one that makes the skin look balanced, soft, and believable.
My Simple Everyday Version of This Routine
When I don’t want to do the full version, this is my shortcut routine:
- skincare
- sunscreen
- a tiny bit of green corrector around the nose and cheeks
- a light layer of foundation in the center of the face
- spot concealer only where needed
- powder only around the nose and chin
- cream blush placed slightly higher on the cheeks
- setting spray
That gives me most of the same effect with less effort.
Final Thoughts: How I Cover Redness & Rosacea After 50 Without Looking Cakey
If I could go back and tell myself one thing, it would be this:
You do not need more makeup. You need a softer strategy.
That was the real turning point for me.
Once I stopped trying to attack redness with thick layers and started working in light, thoughtful steps, my base began to look so much better. My skin looked more even, yes, but also more comfortable. More modern. More flattering. More like me.
Now, when I cover redness and rosacea after 50, I focus on:
- gentle skin prep
- giving sunscreen time to settle
- targeted green correction
- thin layers of foundation
- spot concealing instead of piling on
- selective powder
- bringing life back with soft cream products
- finishing with setting spray
That combination gives me the best chance of looking polished without looking overdone.
And really, that’s the sweet spot I’m always after now: coverage with grace.
If you’re building your own flattering complexion routine, I’d also recommend reading 25 Expert Tips for a Flawless, Ageless Look, How to Choose Concealer for Mature Skin, Charlotte Tilbury Beautiful Skin Foundation, Giorgio Armani Beauty Luminous Silk Foundation, and I Tested 10 Setting Sprays After 50, because they all connect naturally with this kind of routine.
Join the GlowOver50 Newsletter
Stay in the loop with my latest makeup tips, skincare secrets, and honest product reviews — all tailored for women over 50. Subscribe today and keep that gorgeous glow going!
FAQ: How I Cover Redness & Rosacea After 50 Without Looking Cakey
What is the best foundation for mature skin with rosacea and redness that won’t look cakey after 50?
I think this is the question so many of us start with, because when redness is the main thing bothering us, it feels logical to search for the highest coverage foundation possible and hope that one product will solve everything. I used to think exactly that. If my cheeks looked red, if my nose looked pink, if my chin was blotchy, I assumed the answer had to be a thicker foundation.
But after 50, I really do not think that is the best approach anymore.
For me, the best foundation for mature skin with rosacea and redness is not the one that gives the most dramatic before-and-after in one swipe. It is the one that lets me build coverage in a thin, flexible, skin-like way. That difference matters so much. Mature skin usually has more texture, more movement, and more dryness than younger skin, so the formulas that can look “flawless” at first can very quickly look stiff, obvious, or flat by lunchtime.
What I want instead is a foundation that does these things well:
- evens out redness without looking mask-like
- works in thin layers
- does not dry down too aggressively
- does not cling to dry patches
- keeps some life in the skin
- still looks believable in daylight
- can be paired with concealer instead of replacing it
That is why I naturally lean toward light-medium to medium buildable coverage rather than ultra-heavy formulas. I want enough pigment to soften redness, but I still want the finish to move with my face. Once I started focusing on that balance instead of chasing maximum coverage, my makeup looked much better.
I also think finish matters just as much as coverage. A foundation can technically cover redness very well and still not flatter mature skin. If it is too matte, the face can end up looking drier, older, or more textured. If it is too heavy, it can gather around the nose and mouth. My sweet spot is usually a natural, satin, or softly radiant finish. That type of foundation gives me enough polish to calm the redness while still letting the skin look alive.
Some of the formulas I personally keep coming back to are the ones I talked about in my reviews of Charlotte Tilbury Beautiful Skin Foundation, Giorgio Armani Beauty Luminous Silk Foundation, and Pat McGrath Labs Skin Fetish: Sublime Perfection Foundation. They all give a different vibe, but what they have in common is that they don’t need to be plastered on to look beautiful.
Charlotte Tilbury Beautiful Skin is the sort of foundation I reach for when I want glow, comfort, and medium coverage that still feels flattering on mature skin. Giorgio Armani Luminous Silk gives me a more refined, elegant, skin-like finish that looks very grown-up and polished. Pat McGrath Sublime Perfection is one I love when I want that lighter, more refined, almost second-skin effect. None of them are “rosacea treatment” products, of course, but they are the kind of textures that help me cover redness in a way that still looks natural.
And honestly, I do not think foundation should be doing all the work anyway.
Once I started pairing a flattering foundation with targeted color correction and spot concealing, I no longer needed to ask one product to do everything. That was a huge shift. Instead of thinking, Which foundation can erase all of this? I started thinking, Which foundation will give me the prettiest overall finish once I’ve already softened the redness a little?
That is also why I often recommend reading this blog alongside my posts on How to Choose Concealer for Mature Skin and The Order Matters: The Exact Makeup Layering Routine, because the foundation is only one part of the result. The final finish depends just as much on what you layer before and after it.
So if you’re asking what the best foundation is for mature skin with rosacea and redness after 50, my most honest answer is this: choose a buildable, skin-like, hydrating formula that lets you correct and conceal strategically instead of forcing one thick layer to carry the whole face. That approach has made a much bigger difference for me than any “full coverage” marketing promise ever did.
How do I cover rosacea and redness on mature skin without foundation settling into fine lines and wrinkles?
This is probably the second-biggest struggle after choosing the foundation itself.
I know how discouraging it feels when you finally get the redness toned down, only to realize the makeup has settled into smile lines, clung around the nostrils, or made the area around the mouth look older than it did before. I have absolutely had those days, and for a long time I blamed the products. Sometimes it was the product, yes, but more often it was the way I was applying everything.
What I’ve learned is that covering rosacea and redness after 50 without foundation settling into fine lines is really about controlling the amount of product and being very intentional about placement.
The first thing that changed for me was skin prep. If my skin is dry, irritated, or flaky, foundation will find every single one of those issues and make them more visible. If my skin is overloaded with too much moisturizer, too much serum, or too many layers that haven’t settled, the foundation can slide around and gather in lines. So I now aim for a middle ground: comfortable, hydrated, calm skin that is not greasy and not rushed.
That is why I like to keep prep simple and let everything settle before makeup. My post on How to Prep Mature Skin for Foundation goes into that in much more detail, because prep really is half the battle for mature skin.
The second thing I changed was where I put foundation. I do not apply a heavy blanket layer all over my face anymore. I start where redness is strongest, usually the center of the face, and then I blend outward with less and less product. That means the areas that move the most — around the mouth, smile lines, outer cheeks, and parts of the forehead — often end up with much less foundation on them. That alone helps prevent settling.
The third big change was learning to spot conceal instead of adding a second full layer of foundation. This is huge. If I still see redness around the nose or on one part of my cheek, I no longer answer that by spreading more base over my entire face. That is usually what creates buildup. Instead, I use a tiny bit of concealer or extra coverage only on the exact spots that still need help. That lets the rest of the skin stay lighter and more flexible.
I also think the under-eye area has to be treated completely differently from the cheeks. I used to do my whole complexion with the same mindset: cover, brighten, powder, done. That does not work for me anymore. My cheeks can handle a little more structure because that is where the redness lives, but my under-eyes need softness and restraint. That separation made my makeup look much more refined.
Powder is another place where things can go wrong very fast. Too much powder can make fine lines look sharper, especially if the skin is already a little dry. I still use powder, but I use it selectively. Usually I only set the sides of the nose, chin, maybe a little under the eyes, and sometimes the center of the forehead. I almost never want a full blanket of powder anymore.
If powder is a tricky area for you, I’d really pair this routine with my post on Best Setting Powders for Mature Skin, because the type of powder and the way you place it can completely change whether the base looks polished or heavy.
I also find that finishing everything with a good setting spray helps the layers settle together and look more skin-like. It takes away that freshly-powdered look and makes the whole face appear softer. That is exactly why I became so particular about setting spray and eventually wrote I Tested 10 Setting Sprays After 50. The right one really can make the whole base look less dry and less “stacked.”
So if foundation is settling into fine lines and wrinkles, I would not immediately assume you need more coverage or stronger products. Usually the solution is the opposite:
- less product
- thinner layers
- better prep
- more precise placement
- spot concealing instead of piling on
- powder only where truly needed
- a finish that stays flexible
That combination is what finally helped me cover redness without creating a whole new problem in the texture department.
Should I use green color corrector under foundation for rosacea and redness on mature skin over 50?
For me, this is a yes — but with a very important condition: it has to be subtle.
I think green color corrector can be one of the most useful tools in a redness routine, but it is also one of the easiest to overdo. And once it is overdone, the whole complexion starts getting harder to manage. If I apply too much, I end up needing more foundation on top, which defeats the whole point.
The reason I like green corrector is because it lets me solve the redness problem in a smarter way. Instead of demanding that foundation completely erase every pink and red tone on its own, I let the corrector gently neutralize those tones first. Then the foundation only needs to even things out rather than perform miracles.
That matters so much on mature skin, because every extra layer shows.
When I skip green corrector on a high-redness day, I often find myself adding more and more foundation trying to get the cheeks calm enough. By the time I’m done, the base is thicker than I want. When I use a tiny bit of corrector first, I can usually get away with much less foundation, and the end result looks smoother and less cakey.
I do not use it everywhere, though. That is important.
I only use green corrector where I genuinely need it, which for me is usually:
- around the nose
- on the pinkest part of the cheeks
- around the nostrils
- on the chin if I’m looking extra flushed
- on small patches of visible redness
And I apply very little. I tap it in with a finger or sponge, and I stop as soon as the redness looks slightly softened. I do not want green showing through. I do not want a minty cast. I do not want a thick corrective layer. I just want enough neutralization so that my foundation can stay lighter.
That is really the heart of it: green corrector is useful not because it makes the skin perfect on its own, but because it helps me use less of everything else afterward.
I also think it works best when the rest of the complexion is built around the same philosophy. If I use green corrector, then thick matte foundation, then heavy concealer, then lots of powder, I can still end up cakey. The corrector helps, but it is not magic. It works best in a routine that already respects mature skin.
That is why I think it pairs so naturally with posts like How to Choose Concealer for Mature Skin, How to Prep Mature Skin for Foundation, and The Order Matters: The Exact Makeup Layering Routine. Color correction is not a random extra. It works best when it is part of a thoughtful sequence.
On lower-redness days, I sometimes skip corrector completely. If my skin is behaving and I only have mild pinkness, I would rather keep the routine simpler and use a light layer of foundation plus spot concealing. But on days when the redness is stronger or more diffuse, green corrector genuinely makes a difference.
So yes, I do think green color corrector is worth using under foundation for rosacea and redness after 50. I just think it should be treated like a quiet helper, not a full-face solution. A small amount in the right places can save you from having to use much more foundation later, and that is exactly what helps the final result stay smoother and more natural.
What makeup mistakes make rosacea and redness look worse on mature skin after 50?
I’ve made enough of these mistakes myself that I could probably write this answer in my sleep.
One of the strangest things about makeup on redness-prone mature skin is that sometimes the makeup makes the redness look worse even when it technically adds coverage. That usually happens when the texture, finish, or placement becomes so obvious that the whole face looks more irritated, more rigid, or more overworked.
The biggest mistake I used to make was over-applying foundation. I would see redness and immediately try to erase it with one full layer, then a bit more, then maybe concealer, then powder. On paper that sounds like more coverage should equal a better result. In real life, especially after 50, it usually means the makeup starts showing before the skin does. That is the exact point where the complexion stops looking polished and starts looking cakey.
Another huge mistake is choosing a foundation that is too matte or too dry for the skin you actually have now. Matte sounds tempting when you are dealing with redness because it sounds like it will control everything. But if the finish is too flat, the skin can end up looking older and more textured. Fine lines become more obvious. Dry areas stand out more. The redness might be quieter, but the face as a whole does not look better.
That is one reason I found it so helpful to think more about finish, not just coverage. My post on Matte vs Dewy Makeup: What Actually Works on Mature Skin really comes into play here, because I think many of us were taught to fear glow and chase “long wear” when in reality a softly radiant finish is often much more flattering after 50.
Too much powder is another major culprit. Powder absolutely has its place, but if I powder everything heavily, the face starts looking dry, dull, and older almost immediately. Powder can also grab onto the exact areas where redness is most textured, which makes the skin look more uneven rather than smoother. That is why I use it so selectively now and why I like pairing this whole conversation with Best Setting Powders for Mature Skin.
Another mistake I see often is putting blush directly on top of the areas that are already naturally the reddest. I still love blush. I am not giving up blush. But placement matters so much more now. If the center of the cheeks is where the rosacea or flushing tends to show up most, then loading blush right there can make the face look more inflamed instead of more lifted. I usually get a prettier result when I place blush slightly higher and farther outward.
I also think harsh blending can be a problem. If the skin is already reactive and I buff aggressively trying to get perfect coverage, I can disturb the corrector underneath, move product around, and bring the redness right back through. On mature skin, pressing and tapping often work much better than scrubbing everything into place.
Using the wrong skincare under makeup can also make redness look worse. If I use something too active, too irritating, or too rich right before foundation, the base can pill or separate, and then all I see are patches, texture, and unevenness. That is why I keep linking this kind of topic back to Skincare Ingredients Every Woman Over 50 Should Know and How to Prep Mature Skin for Foundation. The makeup often behaves badly because the prep underneath it is fighting it.
And finally, I think one of the most subtle mistakes is trying to make the skin look completely blank and uniform. Mature skin does not usually look its best when it is erased into one flat color. I get a much prettier result when I aim for calmer-looking skin, not perfectly colorless skin. Once I accepted that, my makeup started looking far more flattering.
So if your redness looks worse after makeup, I would look at these habits first:
- too much foundation
- too much powder
- too matte a finish
- too much rubbing and buffing
- blush placed over reactive areas
- skincare that doesn’t support the base
- trying to erase every trace of natural tone
For me, the fix was not stronger makeup. It was a softer, lighter, more strategic way of applying it.
How can I make foundation and concealer last all day on rosacea-prone mature skin without looking dry, flat, or heavy?
This is such a good question because longevity and comfort can feel like they’re fighting each other.
If I focus only on making the makeup last all day, I can end up with something too dry, too matte, or too stiff-looking. If I focus only on comfort and glow, the makeup can fade faster than I want, especially around the nose and chin. So the trick for me has been learning how to make the base last in a graceful way rather than a harsh way.
The first thing I do is start with skin that is properly prepped. If the skin underneath is dehydrated, irritated, or overloaded with too many products, long wear becomes much harder. I keep my prep calm and balanced, and I let everything settle before I start. That one habit improved wear time more than I expected.
The second thing is that I do not overload foundation or concealer in the name of longevity. This sounds backward, but heavy application usually gives me worse wear, not better. It starts to separate faster, crease faster, and look more obvious throughout the day. Thin, well-placed layers actually tend to hold up better because there is less product competing on the skin.
I also find that the order matters. When I do a bit of correction first, then a light layer of foundation, then spot concealer only where needed, each product has a clear role. That makes the whole base more stable. I’m not asking one thick layer to fix everything.
Powder is part of the longevity equation too, but again, only in a controlled way. I do need a bit of powder if I want my makeup to stay neat around the nostrils, the chin, or areas that tend to crease. But I only use it where I need it. I do not want to turn the whole face dry just to make three areas last longer.
Then I finish with setting spray, which for me is what helps the entire complexion stop looking like separate steps and start looking like skin again. I want the powder to soften, the foundation to settle, and the concealer to look less obvious. That is exactly why I Tested 10 Setting Sprays After 50 ended up being such an important post for me. I didn’t just want a spray that “set” makeup. I wanted one that helped it stay fresh without making mature skin feel tight.
I’m also more careful about touch-ups now. I do not usually slap more foundation over worn makeup halfway through the day unless I absolutely have to. That tends to create buildup fast. If I need to refresh something, I usually press the area first, then add the tiniest amount of concealer or powder only where necessary. That keeps the complexion looking cleaner.
And honestly, I think the rest of the face contributes to whether the base still looks good too. A bit of cream blush, a flattering finish, and realistic expectations all help. If the skin still has some life in it, the makeup can fade a little and still look pretty. If the base starts off too stiff or too flat, any wear becomes much more obvious.
This is also why I like to connect this kind of question with posts like Best Winter Makeup for Mature Skin and 25 Expert Tips for a Flawless, Ageless Look. Longevity is never just one product. It is the whole balance of hydration, finish, texture, and layering.
So if you want your foundation and concealer to last all day on rosacea-prone mature skin without looking dry, flat, or heavy, my best advice is this:
- prep the skin well
- let skincare and SPF settle
- use thin layers
- correct before you cover
- spot conceal instead of piling on
- powder only where needed
- finish with a setting spray that keeps the skin looking alive
That combination gives me the best wear without sacrificing the softness that mature skin needs.
What is the best everyday makeup routine for redness-prone mature skin over 50 when I want natural coverage and healthy glow?
Not every day needs the full routine, and I think that matters.
There are plenty of mornings when I want to look a little more even, a little more polished, and a little less red, but I do not want to spend ages doing a full complexion. On those days, I still want the same general effect — calm, smooth, natural-looking skin — just in a simpler form.
For me, the best everyday makeup routine for redness-prone mature skin is a pared-back version of the full method.
I start with skincare and sunscreen, and I always let both settle first. If my redness is mild, I may skip green corrector entirely. If I’m a little more flushed, I use the tiniest amount just where I need it most, usually around the nose or on the inner cheeks.
Then I use a small amount of foundation only in the center of the face and blend outward. I do not take it across every inch of skin unless I genuinely need that much coverage. That is one of the biggest ways I keep everyday makeup looking natural.
After that, I spot conceal only what still shows through. I might use concealer around the nostrils, on one stubborn pink patch, or under the eyes. That is usually enough. I don’t need a whole second layer of foundation for an everyday face.
Then I powder only where makeup tends to move, usually around the nose or chin, and I bring softness back with a little cream blush or glow product. For glow, I prefer things that add lift without chunky sparkle. That is why I love connecting this kind of routine with I Tested 15 Highlighters After 50 and my CHANEL Baume Essentiel Multi-Use Glow Stick Review. That kind of glow suits this look perfectly because it feels fresh rather than flashy.
If I want the whole thing to last a bit longer or melt together more beautifully, I finish with a little setting spray. And that’s it.
What I love about this version is that it gives me a face that still looks like my skin, just more rested and more even. I don’t feel hidden under makeup. I just feel a little more put together.
I also think everyday makeup is where product finish matters the most. I’m not trying to create a full-event face. I’m trying to create something flattering in natural light, at the grocery store, over coffee, in the car, in real life. So I want skin-like texture, healthy glow, and enough softness that nothing looks harsh.
That is why I think this everyday question fits so naturally with your other guides too. Posts like Best Winter Makeup for Mature Skin, How to Choose Concealer for Mature Skin, 25 Expert Tips for a Flawless, Ageless Look, and Matte vs Dewy Makeup: What Actually Works on Mature Skin all support the same idea: the best makeup after 50 usually comes from balance, not excess.
So if I had to summarize my best everyday routine for redness-prone mature skin, it would be this:
- skincare
- sunscreen
- a touch of green corrector only if needed
- thin foundation in the center of the face
- spot concealer where needed
- minimal powder
- soft cream color or balm glow
- optional setting spray
That gives me natural coverage, a healthy-looking finish, and a face that still feels like mine. And really, that is what I want most from makeup now — not perfection, just a calmer, fresher version of my own skin.