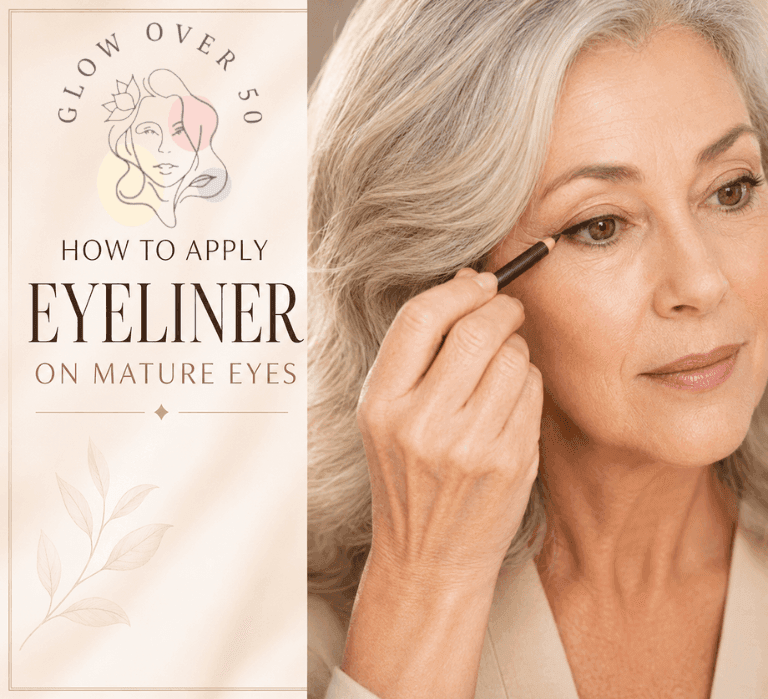

Eyeliner was one of the first makeup products I learned to use, yet it was also one of the first products I had to rethink as the eye area changed. The pencil had not suddenly forgotten how to draw a line. The surface underneath it had simply become drier, softer, more folded and less willing to cooperate with one quick swipe.
I used to think the solution was a sharper point and a steadier hand. What helped much more was changing the goal. I stopped trying to create a perfectly graphic stripe and started using eyeliner to make the lash line look fuller, the outer corner look gently lifted and the whole eye look a little more awake. That one change made the routine softer, easier and far more forgiving.
My method now uses a creamy pencil, a supported elbow, a mirror placed slightly below eye level and several tiny strokes. I keep the inner corner light, concentrate most of the definition on the outer half and check the shape with my eyes open. If the edge is not perfect, I soften it instead of repeatedly drawing over it.
If you still need the right pencil, I compared smooth formulas, softer colors and easier-to-hold formats in my guide to the best eyeliners for mature eyes. This article is the companion tutorial: it shows exactly how I would use that type of pencil without tugging, creating a harsh line or losing the result inside a hooded crease.
I also want to separate beauty technique from eye health. Eyeliner should never feel like a test of endurance. I stop immediately if something stings, scratches or makes the eye water. The FDA gives the same basic advice: if an eye cosmetic causes irritation, stop using it immediately. A flattering line is never worth pushing through discomfort.


My Quick Answer: What Is the Most Flattering Eyeliner Technique After 50?
The most forgiving technique is a thin, softly diffused line pressed close to the upper lash roots, with a little extra depth on the outer third. I apply it in short dashes rather than one long stroke. I keep the inner corner almost bare, then check the finished shape while looking straight ahead.
That placement works because it defines the lashes without using up all the visible lid space. It also allows a tiny upward direction at the outer corner without forcing a dramatic wing over folds. If I want lower-lash definition, I use whatever is left on a small brush along the outer third only. I do not automatically draw a dark line around the entire eye.
My everyday sequence is simple:
- I prepare the lid lightly and keep the lash line dry.
- I choose a creamy, controllable pencil in a soft shade.
- I support my elbow and place the mirror correctly.
- I map the outer direction with my eyes open.
- I connect tiny strokes along the upper lashes.
- I press color between sparse lash roots and soften the edge.
- I balance the lower lash line, let the pencil set and finish the eye.
I keep the surrounding makeup equally light. One of my favorite cream eyeshadows for mature eyes, a thin liner and separated lashes usually looks fresher to me than several heavy eye products competing for space. I use the same restraint in my complete makeup-over-50 routine.
Table of Contents
Why Eyeliner Can Feel More Difficult on Mature Eyes
The eye area does not age in one identical way. One lid may become more hooded than the other. The skin may feel dry but the lash line can still become oily during the day. Lashes may look finer, the outer corner may turn downward slightly and vision or hand steadiness may make a precise line less convenient.
Menopause can contribute to those changes. The American Academy of Dermatology explains that skin can become dry, slack and thin as hormone levels fall. I do not treat that as something to hide. I simply adjust the texture, pressure and placement of my makeup to suit the skin I have now.
The lid moves more beneath the pencil
A firm, waxy pencil can catch on small folds and leave gaps. Pressing harder usually makes the line less controlled, not more. I prefer a pencil that glides with light pressure but still gives me a few seconds to soften the edge. My mature-eye eyeliner comparison explains which formats I would choose for no-tug application, tightlining, watery eyes and an easier grip.
The line can disappear when the eye opens
A line that looks thin with the eye closed can fill most of the visible lid when I look straight ahead. That is why I no longer perfect the shape with my eye shut and hope it works afterward. I map the outer direction with the eye open, add only a little product, then check again.
The upper lid may touch the liner
On a hooded or deep-set eye, the lash line can meet the skin above it. A creamy pencil that never sets may stamp onto the hood; a formula that sets instantly may not give enough blending time. I work thinly, keep the area dry, soften quickly and give the line a moment to set before looking up fully.
A harsh line can overpower softer features
Black eyeliner is not forbidden after 50, but a thick, solid black band can visually shrink the lid or make the under-eye area look more shadowed. Espresso, charcoal, muted navy, plum and bronze can create definition with less contrast. I use the same soft-color principle when I choose lipstick shades for mature skin or place color in my lifted blush routine: placement and balance matter more than rigid age rules.
What I Set Out Before I Start

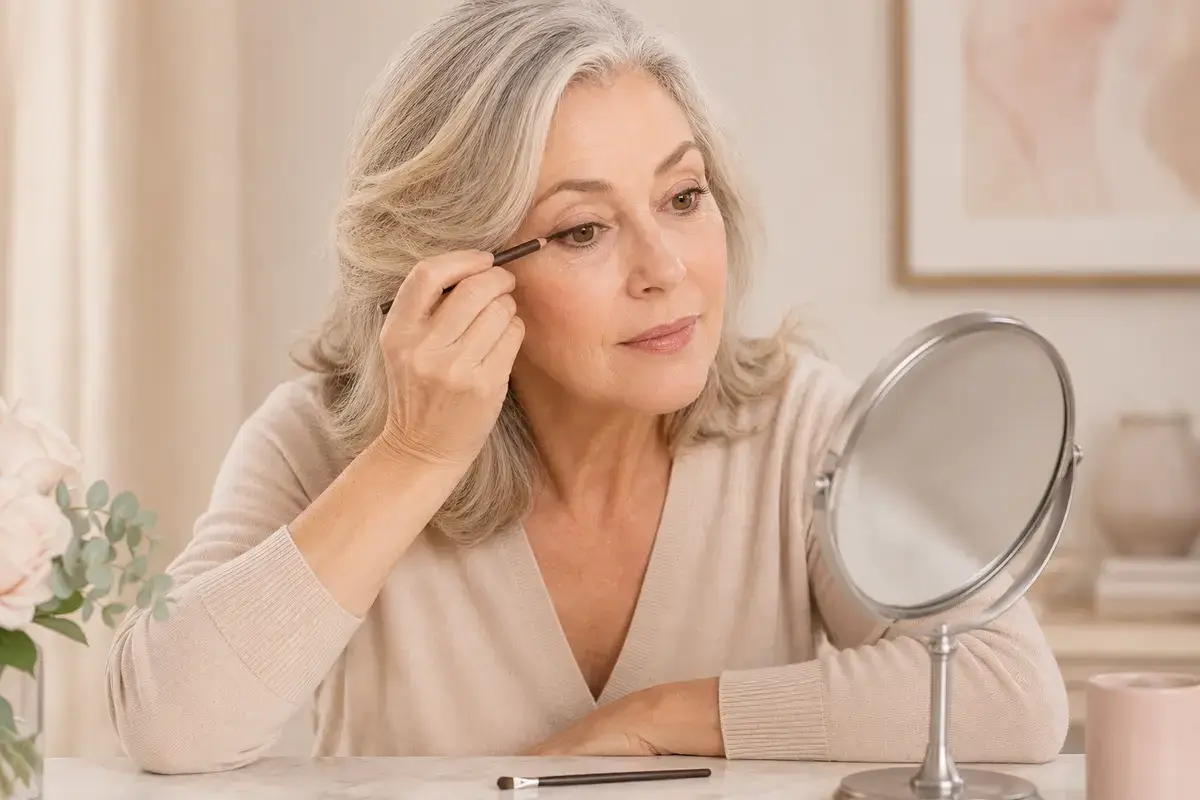
I get a cleaner result when everything is within reach before the pencil touches my eye. Stopping halfway to find a brush gives a long-wear liner time to set, and then I am tempted to rub or redraw the edge.
I set out:
- A freshly sharpened pencil or a retractable liner with only a small amount twisted up.
- A small firm angled brush or tiny pencil brush.
- A clean cotton bud for correcting the edge.
- A stable tabletop mirror, preferably with a magnifying side.
- A tissue or cotton pad for lightly blotting the lid.
- My chosen eyeshadow and mascara so I can judge the complete balance.
I wash my hands before I begin, particularly if I plan to work close to the lash roots. The FDA notes that bacteria on the hands can be transferred to the eye area. I also clean the angled brush rather than letting yesterday’s product harden between the bristles; the same FDA guidance says to make sure instruments used in the eye area are clean.
For the rest of my makeup, I keep the order predictable. I normally complete complexion products first, then brows, shadow, liner and mascara. For that brow step, I use my comparison of eyebrow pencils for older women to choose a soft shade and controllable tip. My full makeup-layering routine for mature skin explains how I keep cream and powder layers from disturbing each other.
Step 1: I Prepare the Eyelid Without Making It Slippery

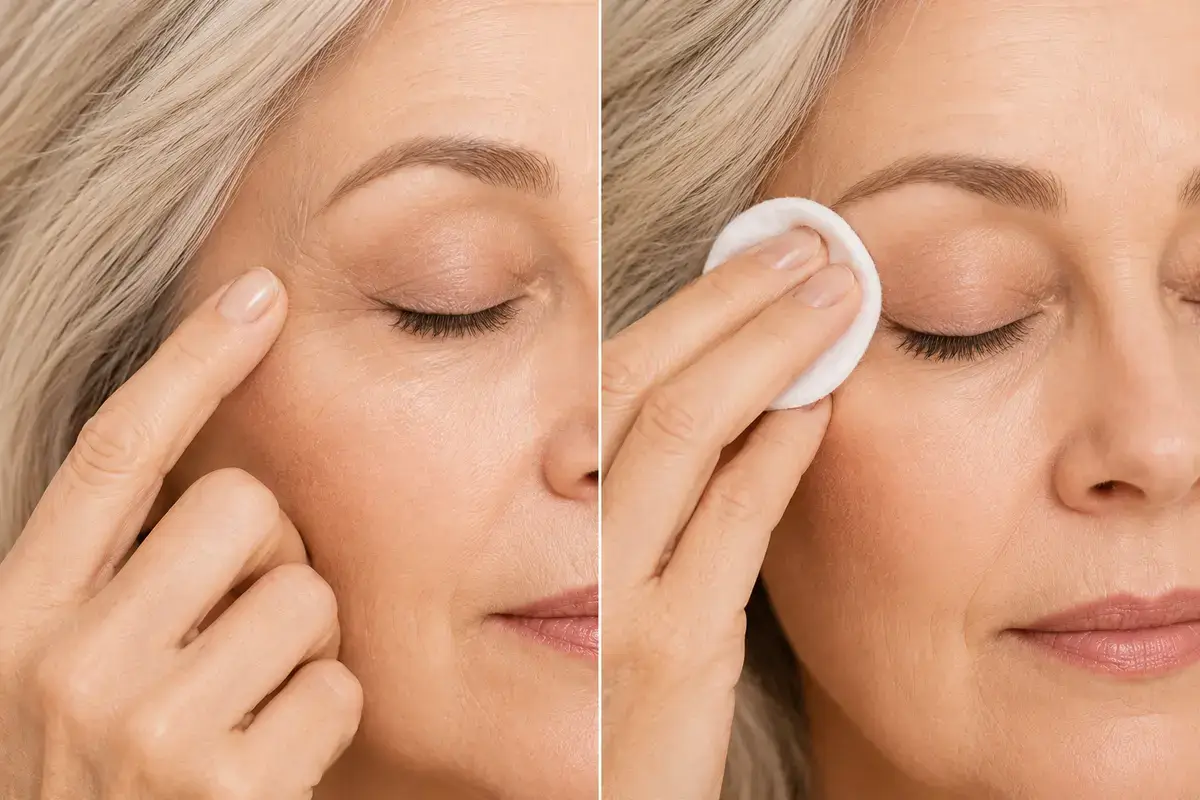
I want the lid comfortable, not coated. If the eye area feels tight, I use a tiny amount of lightweight eye moisturizer around the orbital bone and give it time to settle. I avoid spreading a rich cream directly through the lash roots immediately before liner because the pencil will have difficulty gripping.
That small amount matters because mature skin often needs more moisture. The AAD explains that skin becomes drier with age and moisturizer helps trap water. I follow the hydration principle without assuming more cream is always better under makeup.
After several minutes, I press a clean tissue lightly over the mobile lid and lash line. I do not rub. If the lid still feels tacky, I use the smallest veil of eye primer or a skin-toned cream shadow and let it settle. Someone with an oily hood may prefer a whisper of finely milled powder above the lash line, while a very dry lid may look better without powder at all.
I use the same targeted approach on the face. My guide to whether mature skin needs primer explains why I do not automatically prime every inch, and my roundup of the best primers for mature skin covers different textures. Around the eyes, I would rather use a tiny strategic amount than create another thick layer that can crease.
If I am wearing cream eyeshadow
I apply the shadow first, blend the edge and allow it to set before eyeliner. A soft taupe, rosy beige or muted bronze creates dimension without demanding a complicated crease. My cream-eyeshadow guide for crepey and hooded lids includes finishes that I would pair with a brown or charcoal liner.
If my concealer has crept onto the lid
I blot away the excess instead of putting liner over a wet concealer film. Heavy concealer near the outer corner can mix with the pencil and create gray smudges. I keep under-eye product thin using the placement in my guide to choosing and applying concealer on mature skin.
Step 2: I Choose a Forgiving Formula and a Softer Shade


The easiest eyeliner is not necessarily the one with the longest wear claim or the darkest pigment. I want a texture that glides, stays controlled and gives me enough time to soften it. For most everyday looks, that means a creamy pencil or gel pencil rather than a very wet liquid pen.
I reach for espresso brown when I want natural lash definition. Charcoal works beautifully with cool coloring or gray hair. Muted navy can make tired-looking eyes appear clearer, plum flatters many green and hazel eyes, and bronze gives warmth without the heaviness of black. Soft black still has a place, especially for evening, but I use less of it.
I compared these practical differences in my seven best eyeliners for older women. I included retractable and sharpenable options, easier-grip barrels, softer colors and formulas intended to resist transfer. I would choose from that guide based on the job, not solely on the ranking.
My pencil test before application
I draw a short line on the back of my clean hand. If I need to press hard, I do not use that pencil on a delicate lid. If the tip collapses into a thick blob, I sharpen it or twist it down. If it sets quickly, I know I must work one eye at a time.
I also check that the product is intended for the part of the eye where I plan to use it. The FDA advises consumers to use only cosmetics intended specifically for the eye area. I never assume that a lip pencil can double as eyeliner simply because the color is pretty.
When I use liquid liner
I save liquid liner for a very small outer accent or for days when my hand feels steady. I rest the pen sideways and stamp, rather than trying to draw a long calligraphy stroke with the tip. If a liquid formula dries shiny or creates a hard edge, I soften the look with brown shadow directly above it.
Step 3: I Stabilize My Hand and Place the Mirror Correctly
The supported elbow is one of the simplest improvements I have made. I sit at a table, plant my elbow and let the heel of my hand rest lightly against my cheek. That turns the movement into a small action from the fingers instead of asking my whole arm to draw a precise line in midair.
I place the mirror slightly below eye level. Looking down exposes more of the upper lash line without forcing me to pull the skin tight. I keep my chin level and relax the brow. Raising the eyebrows dramatically can stretch the lid into a temporary shape that disappears as soon as the face relaxes.
I never apply eyeliner in a moving car or train, even if I am late. A sudden stop can turn a pencil into an eye injury. The FDA specifically warns people to avoid scratching the eye and never apply or remove eye cosmetics in a moving vehicle.
If my eyesight makes the mirror awkward
I use a magnifying mirror but keep it close enough that I am not leaning forward and losing elbow support. I finish one small section, then move back to a normal mirror to judge the whole face. Magnification is wonderful for placing product but terrible for telling me whether I have accidentally made the line too strong.
If my hand shakes
I shorten the pencil slightly, hold it closer to the tip and use the side rather than the sharp point. I also give myself permission to create a softly smudged line. A diffused edge turns small wobbles into texture. My wider mature-makeup tips use the same philosophy: I design the routine to be forgiving instead of demanding perfect control.
Step 4: I Map the Lift With My Eyes Open

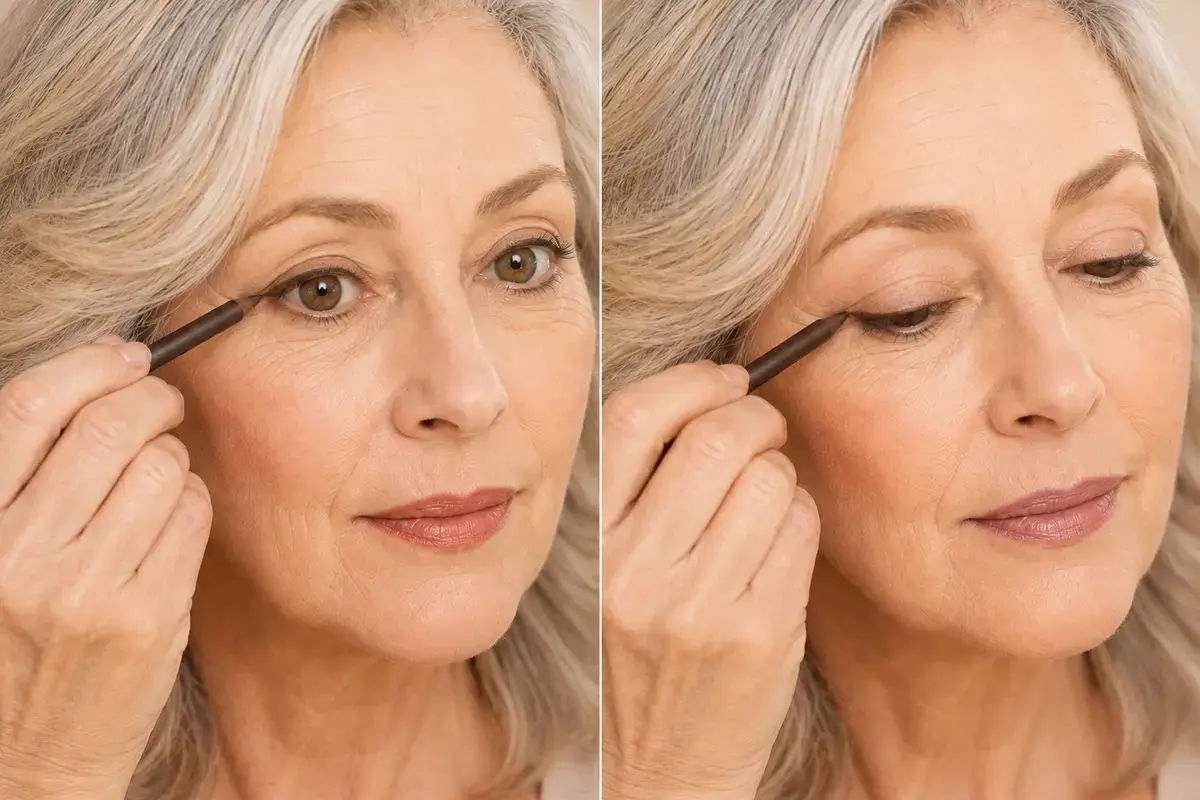
Before filling the lash line, I decide where the outer edge should finish. I look straight into the mirror and imagine the lower lash line continuing gently upward toward the tail of the brow. I place one tiny dot or short dash in that direction.
I do not follow a downturned outer corner all the way toward the temple. That can pull the eye visually downward. I also do not force a high, sharp wing. My goal is a miniature lift: often no more than a few millimeters, and sometimes only a thicker cluster of color at the outer lash roots.
On a hooded eye, I keep the eye open while I mark the direction because that is how the result will be seen. I then lower the gaze and connect the mark back into the lashes. If a fold interrupts the line when the eye closes, I care more about how it looks open than whether it forms a perfect straight stripe on stretched skin.
My outer-third rule
I place most of the visible width on the outer third, use less across the center and almost none at the inner corner. That small graduation creates shape without covering the lid. It also works well with a lifted shadow placement from my cream-eyeshadow routine for hooded mature eyes.
When my eyes are different shapes
I do not try to make both lines identical with my eyes closed. I adjust them so they look balanced when I face the mirror. One eye may need a slightly shorter outer mark; the other may need more color between the lash roots. Symmetry is the impression of balance, not a measurement contest.
Step 5: I Build the Upper Line With Tiny Connected Strokes


I start on the outer half of the upper lash line. I place the side of the pencil at the roots, make a dash, lift the pencil and place the next dash beside it. I do not drag the point from the inner corner to the outer corner in one movement.
Those small strokes allow the tip to travel over folds without catching. They also make correction easy. If one dash is slightly too high, I can soften it with the angled brush. A single long stroke encourages me to press harder and redraw the entire line when one section skips.
I keep the pencil almost horizontal rather than pointing it directly at the eye. The side of the tip creates a softer mark and feels more stable. I use the least pressure that leaves color. If I have to stretch the lid aggressively or press repeatedly, the pencil is not creamy enough for this technique.
How thin is thin enough?
I open the eye after the first pass. If I can see a clear band of liner occupying most of the mobile lid, I stop adding product and soften the upper edge. If the lashes simply look denser and the eye shape looks clearer, I have enough.
I coordinate the rest of the eye before deciding whether to deepen it. A lightweight mascara from my waterproof-mascara guide for women over 50 can add more definition than a second layer of eyeliner. I prefer to finish the lashes and then reassess rather than build a heavy line too early.
How I soften a broken or uneven edge
I take a clean small brush and tap along the top edge before the pencil sets. I move upward by a fraction, not back and forth across the whole lid. If I need more control, I use a cotton bud with the faintest touch of makeup remover to sharpen only the outer boundary, then pat the skin dry.
I avoid piling concealer over a dark mistake because that can create a thick gray patch at the corner. When I do need a tiny cleanup, I use the same minimal approach described in my best concealers for mature skin guide.
Step 6: I Press Color Between Sparse Lash Roots and Soften the Edge


If the lashes look sparse, I do not automatically draw a thicker stripe above them. I press tiny dots between visible gaps at the upper roots. This creates the impression of density while keeping the lid itself light.
I keep the point at the visible lash-root edge. I do not push deeply into the eye or repeatedly scrub the inner rim. Some pencils are specifically labeled for waterline use, but product labeling does not override discomfort. If my eyes are dry, irritated, infected or unusually watery, I skip this step and define just above the lashes.
The FDA recommends avoiding eye cosmetics when the eye is infected or the surrounding skin is inflamed and says to wait until an eye infection or inflamed eye area has healed. I would also discard the products used around the time of an infection rather than risk reintroducing contamination.
My softening step
After filling the gaps, I tap a clean angled brush across the line. I do not sweep it far upward. The brush joins the dots, removes any waxy excess and blurs tiny skips. If I want more longevity, I press a matching matte shadow over the outer half only.
This is where the eye look starts to feel complete. A soft cream shadow, lash-root definition and separated mascara create a polished trio. I would choose the shadow from my best cream eyeshadows for mature lids and the lash formula from my mature-eye mascara roundup.
Step 7: I Balance the Lower Lash Line and Finish the Eye
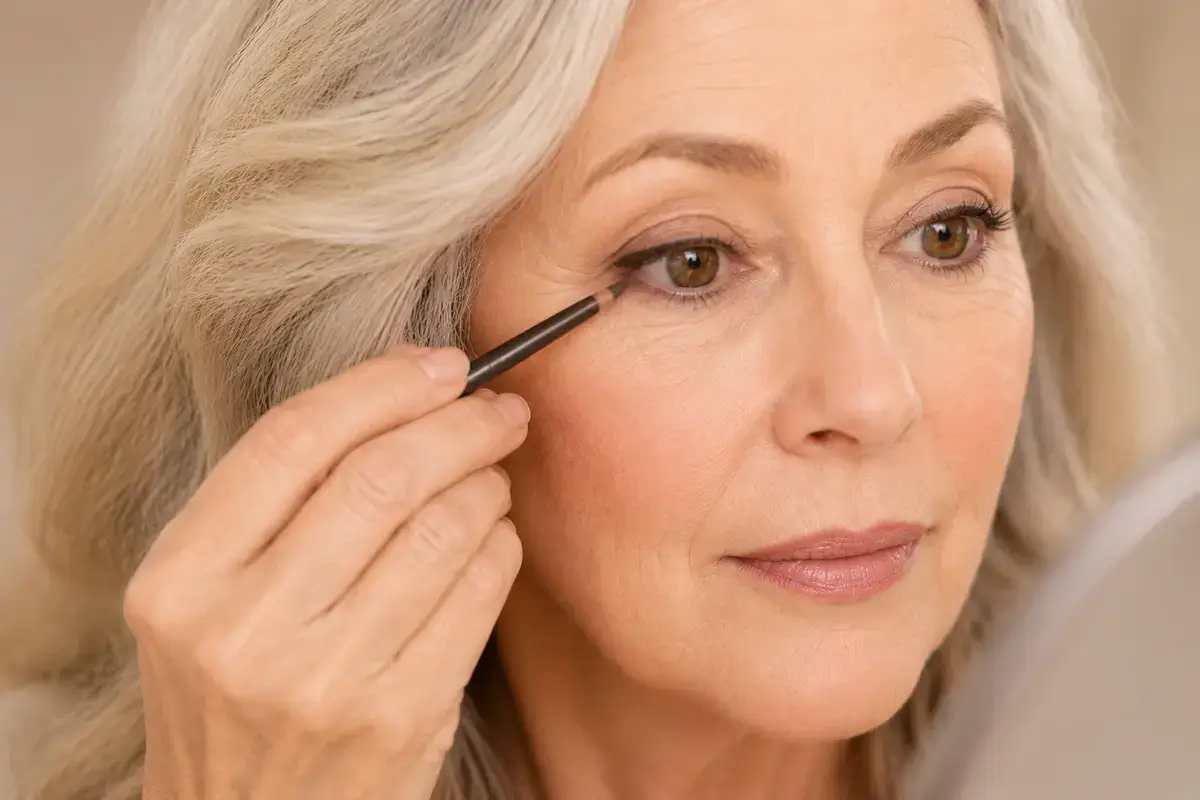
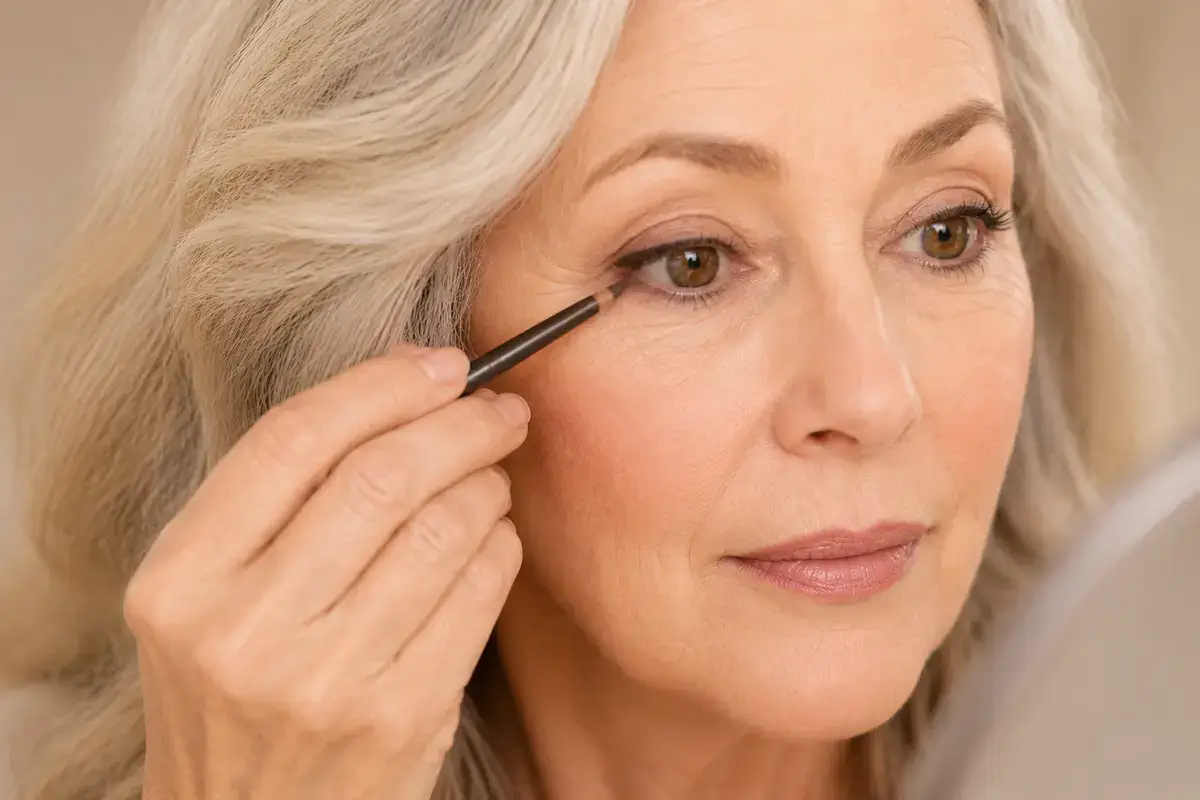
I do not believe women over 50 must stop wearing lower eyeliner. I simply use less and place it with intention. A solid dark line from corner to corner can make the eye look smaller or emphasize under-eye shadow, while a softly blurred outer third can balance the upper liner beautifully.
I prefer to use the residue on my angled brush instead of drawing directly with the pencil. I touch the brush beneath the outer lashes, keep the inner half clean and diffuse the color before it becomes a stripe. Brown, taupe, plum or charcoal usually looks softer than black in this position.
How I finish the upper lashes
I curl the lashes before mascara, not after they are stiff with product. Then I apply a thin coat, concentrating at the roots and separating the tips. If watery eyes or humidity are the problem, I use the techniques in my no-smudge mascara guide.
How I finish the complexion
I step back from the mirror and judge the whole face. Strong eye definition may need only a fresh cheek and a quiet lip. I use the placement in my seven-step blush tutorial, and if I want light around the eyes I choose a restrained formula from my highlighter guide for mature skin.
For wear, I powder only where necessary. A heavy cloud of face powder around the eyes can emphasize dryness. My guide to applying setting powder on mature skin shows how I target creasing without flattening the entire face. If I use setting spray, I close my eyes and mist from the recommended distance rather than spraying toward the open eye; I compare finishes in my setting-spray guide after 50.
How I Adapt the Routine to Different Mature-Eye Concerns
Hooded eyes
I keep the line extremely thin, mark the outer direction with the eye open and allow the liner to set before looking up fully. I avoid taking a thick band across the whole lid. If transfer remains a problem, I use a small amount of eye primer on the hood and press a matching shadow over the outer liner.
I also coordinate the shadow placement so it remains visible above the natural crease. A cream shadow with enough set time can be easier than several powder layers; my hooded-eye cream-shadow recommendations explain which textures I would consider.
Crepey or very dry eyelids
I give skin care time to absorb, blot the lash line and use a creamy pencil with a light hand. I avoid stretching the skin tight because the line can buckle when I release it. A softly smudged edge is more forgiving than a crisp liquid line over changing texture.
I carry that hydration-first approach through the rest of the face. My mature-skin preparation routine and guide to matte versus dewy makeup after 50 help me keep the eye look connected to a fresh, comfortable base.
Downturned eyes
I stop the liner just before the natural outer corner drops and place the final dash slightly upward. I keep lower-lash color away from the very outermost corner if it pulls the shape down. The lift is subtle; I do not try to redraw the anatomy with a long wing.
Sparse lashes
I fill the root gaps first, then decide whether a visible line is needed. Root definition plus mascara can be enough. A heavy stripe above sparse lashes can create contrast without actually making them look fuller.
Watery or sensitive eyes
I choose a product specifically intended for the eye area, keep the application above the lashes if the waterline feels sensitive and stop at the first sign of irritation. I never share the pencil. The FDA warns that another person’s bacteria may be hazardous when cosmetics are shared.
I use thin layers and give the liner time to set before mascara. If I need the whole look to resist heat, I follow my summer makeup routine for mature skin instead of trying to solve every problem with more waterproof product.
Glasses and limited close-up vision
I use magnification for placement, then put on my glasses and check the strength. Frames can soften or hide some definition, so I may use a slightly deeper outer third. I still keep the inner corner thin. The line should work with the frames, not compete against them.
Contact lenses
I follow the care instructions from my eye professional and keep hands clean. The American Optometric Association advises contact-lens wearers to remove lenses before removing makeup. If a lens feels gritty, the eye is red or vision changes, I stop doing makeup and deal with the eye first.
Seven Eyeliner Mistakes I Avoid After 50
1. Pulling the lid tight
Stretching creates a smooth temporary canvas, but the line may wrinkle or point downward when the skin is released. I lower my gaze, use short strokes and let the natural lid remain close to its resting shape.
2. Drawing the same thickness from corner to corner
I keep the inner corner nearly bare and build width gradually toward the outer third. That preserves visible lid space and makes the line feel lighter.
3. Correcting every wobble with more eyeliner
Adding layer after layer turns a small imperfection into a heavy band. I soften the edge with a brush or remove one tiny section with a cotton bud.
4. Using a dry pencil because it promises long wear
A formula cannot look flattering if I have to drag it across the lid. I test the glide on my hand and choose a more comfortable texture from my mature-eye eyeliner shortlist.
5. Applying heavy black beneath the whole eye
I use a soft shade on the outer third and keep the inner lower lash line clean. If the under-eye area still looks dark, I correct the discoloration sparingly rather than adding more liner. My no-creasing concealer guide explains that placement.
6. Ignoring the rest of the makeup
Eyeliner can look harsher when the base is thick, dry or overly matte. I keep foundation thin using my foundation-mistake checklist and troubleshoot wear with my guide to stopping foundation separation after 50.
7. Sleeping in eye makeup
I remove eyeliner and mascara every night. Mayo Clinic lists leaving on eye makeup overnight and using old cosmetics among stye risk factors. Even when I am tired, a gentle press-and-wipe routine is better than waking with irritated, gritty eyes.
How I Remove Eyeliner Without Pulling Mature Skin
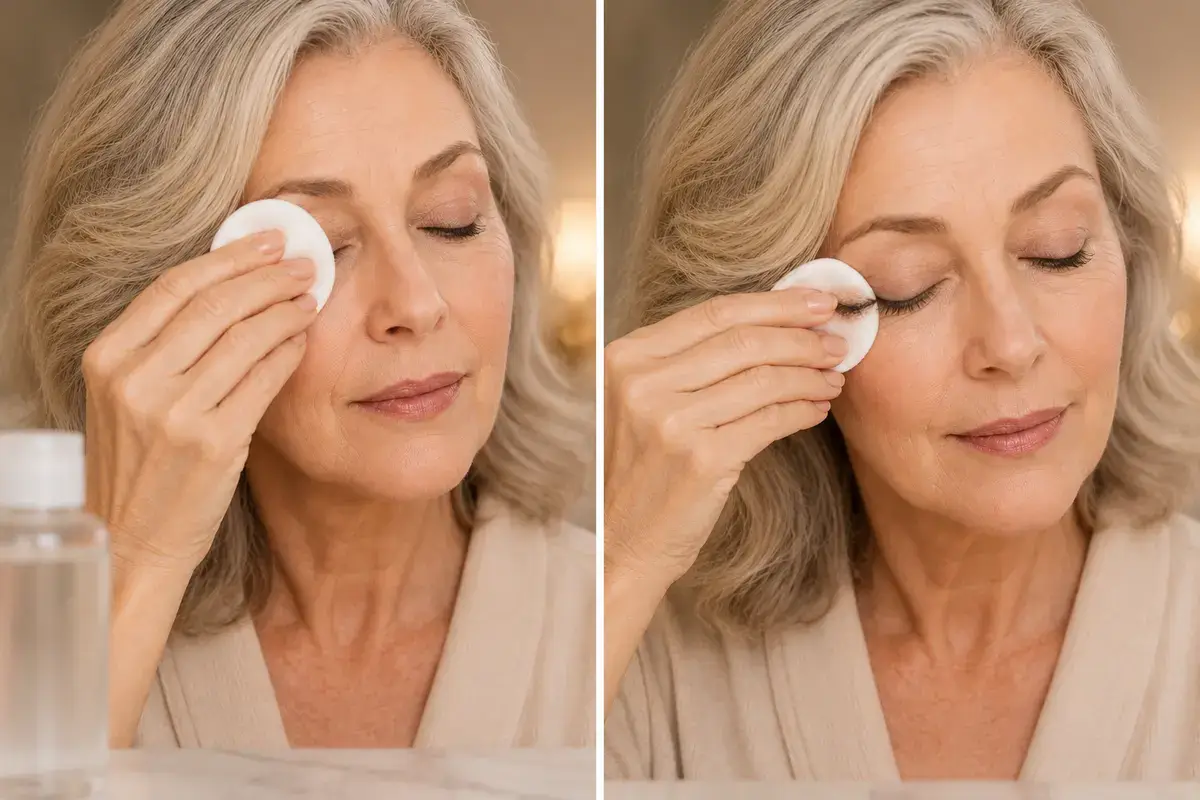

I saturate a soft pad with an eye-appropriate remover, close the eye and press the pad against the lashes for several seconds. I let the remover dissolve the waxes before I wipe. Then I move gently downward and outward rather than scrubbing from side to side.
For product left between the lashes, I fold the pad around a clean cotton bud and roll it carefully along the roots with the eye closed. I do not dig into the rim. If I wore a very long-wearing pencil, I repeat the soak instead of increasing pressure.
I cleanse the rest of the face with warm—not hot—water and a mild cleanser. The AAD recommends warm water, a mild cleanser and avoiding scrubbing. That gentle approach suits the eye area especially well.
After cleansing, I pat the skin dry and use a small amount of moisturizer. When the whole complexion needs a reset, I follow the gentler ideas in my guide to skincare ingredients for women over 50. For an occasional hydrating treatment, I also compare Korean face masks for mature skin.
How I Change the Look From Daytime to Evening
My five-minute daytime eye
I use a neutral cream shadow, espresso pencil through the outer half, two or three root-filling dots and one thin coat of mascara. I skip obvious lower liner or use only the residue on the brush. Paired with one of my tinted moisturizers for mature skin or a light option from my BB and CC cream guide, the result looks polished without feeling done-up.
My softer evening eye
I deepen the outer third with charcoal, plum or soft black and blur the edge upward with a small brush. I add a satin shadow to the lid rather than a chunky glitter and build mascara at the outer lashes. I keep concealer thin and use one of my setting powders for mature skin only where creasing is likely.
My hot-weather version
I use eye primer only where the hood touches, apply less pencil, let it set and press matching powder shadow over the outer section. I avoid rich cream directly at the lash line. For the complexion, I use the lighter layers from my heat-friendly makeup routine after 50.
My winter version
I give skin care more time to absorb, avoid unnecessary powder and use a creamier pencil. Brown, bronze and plum look especially soft with the hydrated finishes I discuss in my winter makeup guide for mature skin.
How I Practice the Technique Without Ruining a Finished Makeup Look
I do not wait until an important dinner or event to experiment with a new eyeliner shape. I practice on a quiet evening before I wash my face. That removes the pressure to make both eyes perfect, and I can test the mirror position, pencil angle and outer direction without worrying about disturbing finished foundation.
I practice one skill at a time. On the first eye, I concentrate only on making three or four short strokes close to the upper lashes. On the second, I practice placing the outer-third direction while looking straight ahead. Then I step back, compare what each small change did and remove everything gently. Ten calm minutes teaches me more than repeatedly correcting one heavy line when I am trying to leave the house.
I also photograph the result in ordinary window light with my eyes open and my face relaxed. A close magnifying mirror exaggerates every wobble, while a normal photograph shows whether the eye actually looks lifted and balanced. I do not use filters or zoom in until skin texture becomes the only thing I can see. The question is whether the eyeliner supports the complete face.
When I try a new pencil, I note three practical things: how much pressure it needs, how long I have to soften it and whether it transfers after the line sets. If a pencil drags, I do not keep forcing it because it was expensive. If it is very creamy, I use less and set only the outer section. If the barrel is awkward, I adjust the grip or choose an easier format from my eyeliner guide for mature hands and lids.
I then practice the full eye in the order I would genuinely wear it: a thin layer of shadow, eyeliner, mascara and a final open-eye check. My cream-eyeshadow recommendations for mature eyes and waterproof mascara guide after 50 help me keep those surrounding textures light. If the liner suddenly looks too strong after mascara, I know the next practice attempt needs less pencil—not more eye makeup everywhere else.
Finally, I practice stopping. That sounds silly, but it is the most useful habit. Once the lashes look denser and the outer corner looks gently lifted, another pass rarely improves the result. I put the pencil down, finish the rest of the face and judge everything together. The best mature-eye eyeliner is often the line I notice least.
Frequently Asked Questions About Applying Eyeliner on Mature Eyes
Should women over 50 wear eyeliner, and where should I place it?
Yes. I do not believe eyeliner has an age limit. What changes is the technique. Instead of treating eyeliner as a thick decorative stripe, I use it to create lash density and guide the eye shape. The most flattering everyday placement is usually close to the upper lash roots, with the thinnest amount at the inner corner and slightly more definition toward the outer third.
I begin around the outer half because that is where a little depth can create lift. I connect tiny dashes rather than pulling the pencil over the whole lid. Then I open my eyes and check the line from a normal distance. If the eye looks clearer and the lashes look fuller, I stop. If I can see a heavy band occupying the entire lid, I soften it.
Lower liner is optional. I like a little brown, taupe, charcoal or plum beneath the outer lashes, but I usually apply it with a small brush and leave the inner half clean. A full black ring can make some eyes look smaller, especially when there is already natural shadow beneath them.
The exact placement also depends on the eye. Hooded lids need a thinner line and an open-eye check. Sparse lashes benefit from dots between the roots. Downturned eyes often look best when the liner stops before the outer corner falls and the final dash angles gently upward. Watery eyes may feel better when I keep product above the lashes rather than on the inner rim.
If you want help choosing the texture for that placement, start with my best eyeliners for mature, hooded and sensitive eyes. I would pair the finished line with one of my lighter waterproof mascaras after 50 rather than adding more and more pencil.
Is brown or black eyeliner better for older women?
Neither color is automatically better, but brown is usually easier to control for daytime. Espresso or dark chocolate can make the lashes look fuller without creating the hard contrast of a thick black line. I especially like brown with warm skin tones, golden or auburn hair, and neutral bronze or rosy eyeshadow.
Black can still look elegant. I use it in a thinner amount, keep it close to the roots and soften the upper edge. It can be useful for evening, deeper skin tones, dark lashes or when glasses reduce the apparent strength of the eye makeup. The mistake is not the color itself; it is assuming black must be applied as a wide, solid band.
Charcoal is my favorite compromise for cool coloring and silver hair. Muted navy can brighten the look of tired eyes without looking obviously blue. Plum brings out green or hazel eyes, while bronze adds warmth with less severity than black. I would rather own one flattering soft shade that I use comfortably than several black pencils that require correction.
I also consider the rest of the face. A defined black eye can work beautifully with a quiet cheek and lip. A softer brown eye leaves room for brighter lipstick or blush. My guide to the best lipsticks for mature skin and my roundup of blush and bronzer after 50 can help balance the complete look.
For product ideas in brown, charcoal, navy and plum, I compared shade ranges in my eyeliner buying guide for older women. I do not think mature women need “safe” color; I simply choose color that supports the shape instead of overwhelming it.
How do I apply eyeliner to hooded mature eyes without it transferring?
I first identify exactly where the upper lash line touches the hood. Then I keep skin care light in that area, blot away residue and use the smallest amount of eye primer only where contact occurs. I do not cover a dry mature lid with a thick matte base simply because transfer is possible.
I map the outer direction while looking straight ahead. This is essential because a wing drawn with the eye closed may fold, point downward or disappear when the eye opens. I place one tiny mark at the outer third, lower my gaze and connect that mark into the lashes with short strokes. The line stays very thin through the center and inner corner.
After applying, I soften immediately if needed and let the pencil set before looking up fully. I may press a matching matte shadow over the outer line. I avoid putting face powder directly into the eye area; a small shadow brush gives me much better control.
If transfer continues, I use less product before I buy something harsher. Sometimes the problem is a thick layer that has not set, not the formula alone. On warm days I combine this with the thin layers in my summer makeup routine and choose a pencil from my smudge-resistant eyeliner list.
I coordinate the shadow too. A formula that remains creamy all day can contribute to transfer, while a thin cream shadow that sets can make a smooth base. My cream-eyeshadow guide for hooded mature eyes explains those differences.
Should older women put eyeliner on the lower lash line?
They can, but I rarely draw a strong line across the entire lower rim. My most flattering placement is a diffused shadow of color beneath the outer third of the lower lashes. I use a small angled brush, pick up residue from the upper liner and work inward only as far as the pupil. The inner half stays light.
This creates balance without closing the eye. Brown, taupe, charcoal and plum are easier than solid black, and a soft matte eyeshadow can work better than a pencil if the lower skin is very textured. I keep the color directly beneath the lashes rather than dragging it down into under-eye fine lines.
If the eye is small, deep-set or naturally shadowed underneath, I may skip lower liner completely and use mascara only on the upper lashes. If the eye is large or the upper liner looks top-heavy, the faint outer-third shadow can make the look feel finished.
I also check the under-eye makeup. Thick concealer and powder beneath a dark line can make the area look dry. I apply only a little concealer where discoloration is deepest, following my concealer placement for mature under-eyes, and set only where needed using my mature-skin powder technique.
I never follow an age rule that says lower liner is forbidden. I judge the shape with the eye open, soften the edge and remove anything that makes the eye look smaller or more tired.
How can I stop eyeliner smudging when my eyes water?
I begin by asking where the smudge starts. If it appears at the outer corner, tears may be dissolving the product before it sets. If it stamps above the crease, lid contact or oil may be the larger problem. If it spreads beneath the whole eye, mascara, concealer and liner may all be contributing.
I keep moisturizer away from the lash roots, blot the lid, apply a very thin layer of pencil and give it time to set. I avoid building several creamy passes. At the outer corner, I stop the line slightly before the wettest point and press matching powder shadow over the last few millimeters. I carry a clean cotton bud for touch-ups rather than rubbing with a finger.
Waterproof can help, but it does not guarantee that every eye will tolerate the formula or that oil and friction cannot move it. I choose products intended for the eye area, stop if they irritate and replace anything that smells, changes texture or was used during an infection. The FDA advises consumers to discard dried mascara rather than add liquid and warns that adding saliva or water can introduce bacteria. I apply that same clean-product mindset to all eye makeup.
My eyeliner guide for watery mature eyes includes formulas positioned for water resistance and sensitive-eye use. I finish with techniques from my waterproof-mascara guide, because a smudge beneath the eye may be mascara rather than liner.
Persistent watering, pain, redness or vision changes are not makeup problems for me to troubleshoot. I stop using the products and seek advice from an eye-care professional.
How do I apply eyeliner with shaky hands, arthritis or poor eyesight?
I make the environment do as much work as possible. I sit down, support my elbow and rest the heel of my hand against my cheek. I place a magnifying mirror slightly below eye level and keep tissues, a small brush and a cotton bud within reach. I do not try to apply liner standing over a sink with my arm floating.
A thicker barrel may be easier to hold than a slim pencil. A retractable format removes the need for sharpening, although I twist up only a tiny amount so the tip does not break. If grip is the main difficulty, a foam pencil grip designed for writing can sometimes make a narrow barrel more comfortable, provided it does not interfere with keeping the cosmetic clean.
I use dots and dashes. Three or four small marks along the outer half are easier to control than one long line. Then I join or soften them with a firm angled brush. A smudged brown or charcoal result is deliberately forgiving, so a tiny wobble disappears into the finish.
I use magnification to place the liner, then look through my normal glasses from a regular distance. Otherwise I may keep correcting details nobody can see. If my frames are dark, I may deepen the outer roots slightly; with delicate frames, the softer line may already be enough.
For an easier full-face routine, I use the tools in my brush and sponge guide for mature skin and choose a lightweight base from my tinted-moisturizer guide after 50. When every step is simpler, I have more patience for the eye detail I actually enjoy.
Is tightlining safe for mature eyes, and do I have to do it?
No one has to tightline. I can make lashes look fuller by pressing color between the visible upper roots or drawing an extremely thin line just above them. That is often enough, especially when the eyes are dry, sensitive or prone to watering.
If I use a product on the inner rim, I first confirm that the exact pencil is labeled for that use. I wash my hands, sharpen or clean the tip and work in small sections. I never share the pencil. I stop immediately if the eye stings, waters heavily or becomes red. During an infection, inflammation or a dry-eye flare, I skip inner-rim makeup altogether.
I also avoid repeatedly rubbing the pencil back and forth. One controlled pass is enough. My preferred mature-eye effect usually comes from the roots rather than a deeply darkened waterline. Pressing tiny dots between sparse lashes gives believable density while keeping more distance from the eye itself.
At night, I remove the product thoroughly. I press an eye-appropriate remover against the closed lid, wait and wipe gently. If I wear contact lenses, I follow my eye professional’s instructions and the AOA advice to remove lenses before makeup removal. I never sleep in tightline product.
For pencils with smoother application and specific waterline information, see my best eyeliner guide for mature eyes. I would pair a subtle lash-root line with one of my mascaras for sparse mature lashes instead of making the inner rim very dark.
What eyeliner style makes mature eyes look more lifted without looking harsh?
The style I find most lifting is a soft outer-third line that begins thin, grows slightly deeper toward the outer lashes and finishes with a very short upward direction. It is closer to a tapered shadow than a traditional cat eye. I keep the inner corner light and concentrate mascara on the upper outer lashes.
I map the direction with my eyes open. I imagine the lower lash line continuing toward the tail of the brow, place one tiny mark and connect it back into the upper roots. I stop before the natural outer corner pulls downward. If a hood interrupts the shape, I prioritize how the line looks with the eye open.
Color makes a difference. Espresso, charcoal, plum or navy creates definition with less contrast than a thick black wing. I soften the upper edge with a small brush so the line blends into the lashes and shadow. A satin cream shadow placed slightly above the natural crease can reinforce the lift; my cream-eyeshadow guide explains that placement.
I balance the face rather than adding more eye makeup. A lifted blush, light-reflective but not glittery highlighter and comfortable lip color make the eye look intentional. I use my lifted blush placement, my highlighter recommendations after 50 and the thin-base order in my complete makeup-layering routine.
The final test is simple: I step away from the magnifying mirror. If I notice brighter eyes and fuller lashes before I notice the eyeliner itself, the line is doing exactly what I wanted.
My Final Thoughts
I do not need the eyeliner I wore years ago to work in exactly the same way now. I need a routine that respects a softer, more mobile eyelid and still gives me the definition I enjoy. For me, that means preparation without heaviness, a creamy pencil, a supported hand, an open-eye check and several tiny strokes.
The goal is not a mathematically perfect wing. I want the lashes to look denser, the eye to look softly lifted and the whole result to feel comfortable. I keep the inner corner light, concentrate on the outer third and stop before correction turns a delicate line into a heavy band.
If you are still choosing the pencil, visit my comparison of the seven best eyeliners for mature eyes. Then pair the technique with a soft lid color from my cream-eyeshadow guide and a separated lash formula from my waterproof-mascara roundup. Together, those three guides create a complete mature-eye makeup cluster without asking the eye area to carry more product than it needs.
Most importantly, I pay attention to comfort. If the eye is irritated, infected, painful or unusually watery, I put the pencil down. Makeup should make the routine more enjoyable, not turn a sensitive eye into something I have to battle.