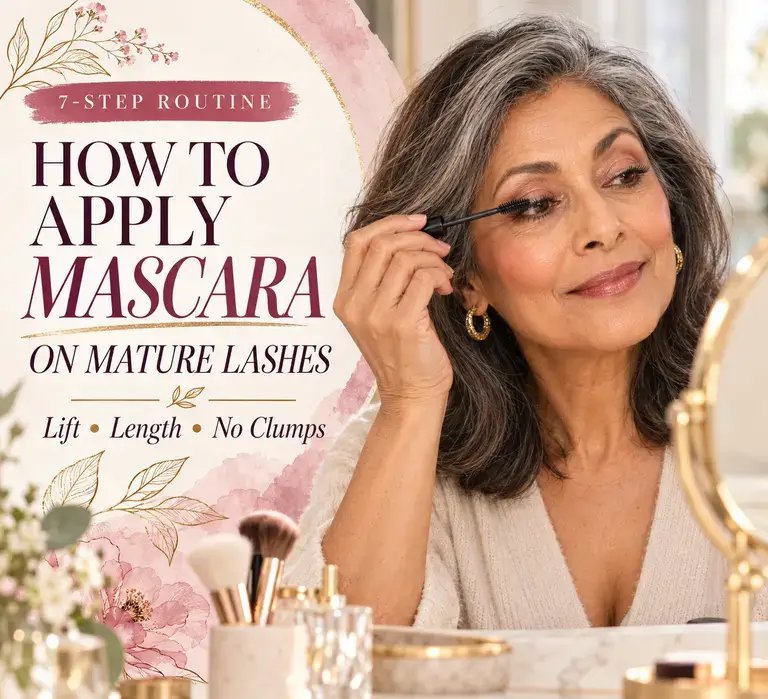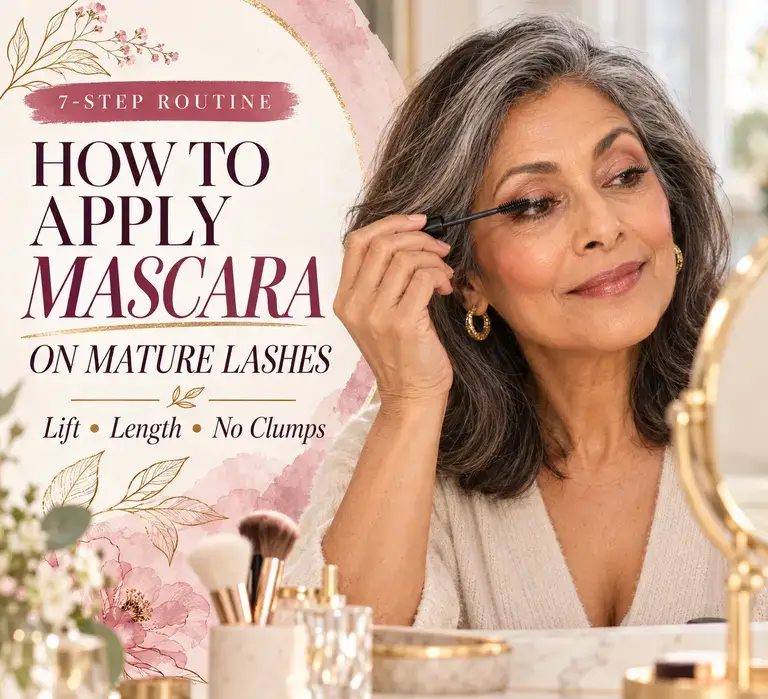

Mascara should be the cheerful little finishing touch that wakes up the eyes. It should not turn into a ten-minute negotiation with three lashes that have decided to form a committee. My routine is simple: start with clean, dry lashes, curl gently, remove excess from the wand, work one thin coat into the roots, fan the tips, separate while the formula is still flexible, and treat the lower lashes as optional. The result is definition that looks fresh and lifted rather than stiff, spiky or heavy.
If your mascara looked effortless at 35 but suddenly seems determined to smudge, clump or disappear at 55, you are not imagining the frustration. Lashes can look finer or less dense, the lid may fold differently, and a formerly reliable brush can feel enormous near a hooded eye. None of that means mascara has stopped working for you. It usually means the old “three fast swipes and go” method needs a friendlier pace.
This is the technique guide I would use beside my roundup of the best waterproof mascaras for women over 50. That page helps with the shopping; this one helps once the tube is open. If you already own Clinique High Impact Waterproof Mascara or another formula you like, try the routine before assuming you need a new product. A lighter hand and a better mirror position can make a surprisingly large difference.

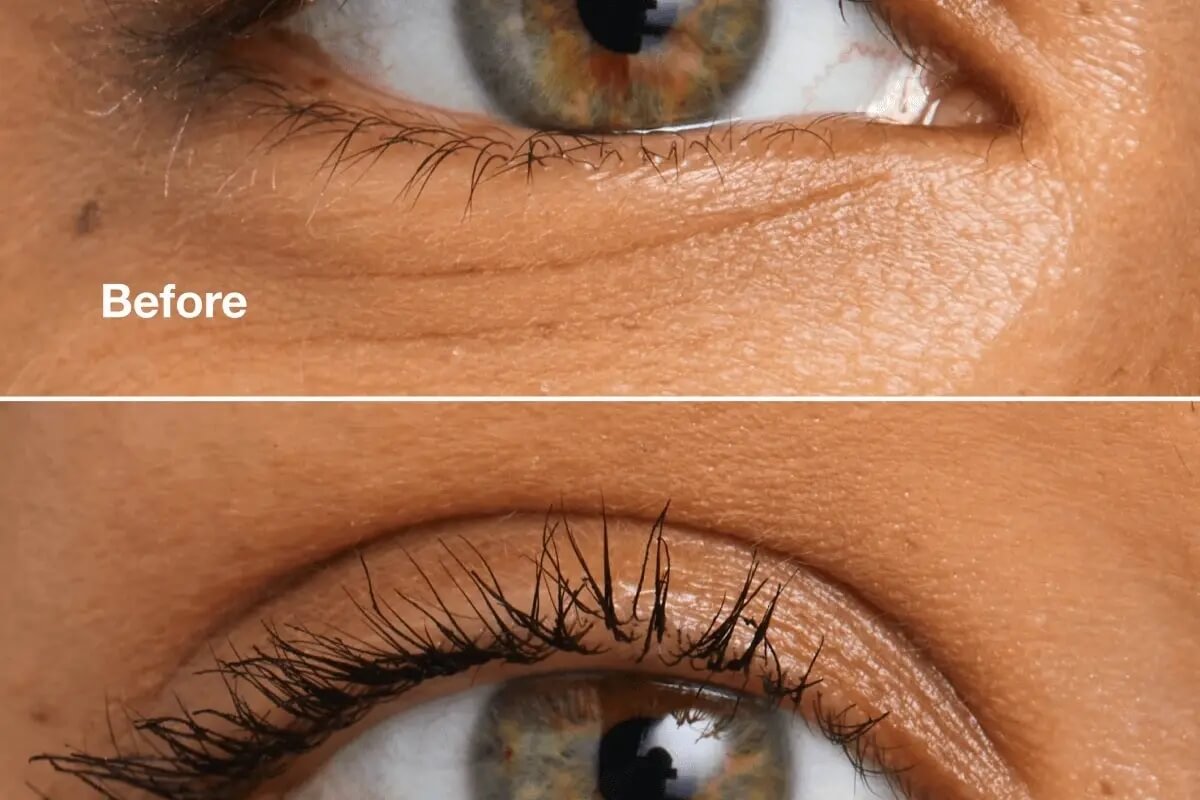
Mascara does not need to create a dramatic false-lash effect to make mature eyes look brighter and more defined.
The quick version: look slightly down into a mirror, keep the forehead relaxed, place the brush at the upper-lash roots, wiggle only a millimeter or two, then glide upward and outward. Use what is already on the wand before dipping again. One careful coat usually looks more polished than three hurried ones.
Table of Contents
Mascara does not need to create a dramatic false-lash effect to make mature eyes look brighter and more defined.
Why mascara can behave differently on mature lashes
I prefer to begin here because technique makes much more sense when we know what we are solving. Some of us notice fewer visible lashes, paler tips, a straighter growth direction or a little more space between hairs. A hooded lid may now touch the lashes, and dry or watery eyes can make the whole area less predictable. Even the brow and liner around the lashes affect what we see, which is why a soft eyeliner technique for mature eyes often works better with mascara than a thick black stripe.
There is also a simple optical issue. When each lash carries too much wet product, fine lashes join together and the gaps become more visible. We add more mascara to make them look fuller, the clumps grow, and suddenly four large spikes are doing the work of twenty delicate hairs. The answer is rarely “more.” It is usually a thinner first coat placed at the roots, where the darkness creates the impression of density while the tips stay light.
The eyelid itself matters too. If the skin above the crease rests close to the lashes, a long, wet formula can stamp onto it before it sets. A slightly downward gaze creates more room. So does applying mascara before you rush on to another step. I use the same calm, open-eye thinking in my eyeliner guide for mature eyes and when choosing cream eyeshadow that will not fight the lid texture.
Finally, the eye area deserves sensible hygiene without turning the vanity into an operating theatre. The FDA notes that eye cosmetics are used very close to delicate tissue and advises stopping if a product causes irritation. If mascara stings, makes the lid swell or leaves the eye persistently red, rinsing and stopping is wiser than trying to “get used to it.”
What I keep beside the mirror
You do not need a suitcase of tools. My small setup is deliberately boring, which is exactly why it works:
- A mascara with a brush I can control and a formula matched to the day.
- A clean eyelash curler with a soft, intact pad.
- A clean dry spoolie or lash comb for quick separation.
- A folded tissue or cotton bud for excess product and tiny mistakes.
- A stable mirror positioned slightly below eye level.
- Good light, preferably from the front rather than directly overhead.
I also like a clear patch of counter where I can rest my elbow. That one change is more useful than half the clever gadgets sold for “precision.” If close-up vision is difficult, a moderate magnifying mirror can help, but too much magnification makes every pore look like a canyon and can encourage overworking. I want to see the lash roots, not conduct a geological survey.


Support the elbow and place the mirror a little below eye level; steadiness often starts with posture, not the wand.
Start with the eye makeup already in place
Mascara is usually my last eye step. I apply cream shadow or an eyeshadow stick, soften any liner, check the brows, and only then reach for mascara. That order prevents powder or shadow from dusting over freshly coated lashes. It also lets me judge how much definition the eye truly needs. A softly lined eye may need only one whisper-light coat; a nearly bare lid may welcome a little more at the outer corner.
If the rest of your makeup tends to feel complicated, my exact makeup layering order puts the steps in a sensible sequence. And if the goal is a relaxed everyday face, the same “edit before adding” idea runs through my guide to fresh, natural makeup on mature skin.
My 7-step routine for applying mascara on mature lashes
Here is the full routine. On an ordinary morning it takes me only a couple of minutes, but I am spelling out the small decisions because those are the bits that stop clumps, smudges and poked eyelids. Once your hands know the sequence, it becomes delightfully uninteresting—in the best way.
Step 1: Begin with clean, completely dry lashes
Mascara grips most evenly when the lashes are free of last night’s makeup, eye cream, face oil and tears. I do not mean the eye area must feel stripped. The skin can be comfortably moisturized; I simply keep rich cream off the lash hairs themselves and give skincare a few minutes to settle. If the lashes look shiny, I press—not rub—a clean tissue lightly against them.
Yesterday’s mascara is not a useful primer. It creates stiff patches, makes today’s coat grab unevenly and encourages more brushing. My guide to removing makeup gently from mature skin explains the press-and-hold method around the eyes, while the best makeup removers for mature skin page compares formulas for ordinary and waterproof eye makeup.
If the lid margin is flaky, sore or crusted, I pause the makeup experiment. The National Eye Institute explains that blepharitis affects the eyelid area where lashes attach and can cause irritation or flakes. A tender lash line is a reason to focus on eye comfort and professional advice, not to camouflage it with extra coats.
Also check the tube itself. A formula that has become dry, unusually thick, crumbly or odd-smelling will not be rescued by technique. Please do not add water or saliva. The FDA specifically warns against adding saliva or water to mascara because that can introduce or help microorganisms grow. A fresh tube is cheaper than an eye problem and considerably less dramatic.
Step 2: Curl first, gently and only on bare lashes
Curling is optional, but it can make straight or downward-pointing lashes look longer without adding more mascara. I curl before applying product, while the hairs are flexible. Curling after mascara can make coated lashes stick to the pad or bend sharply, especially once the formula has dried.
Look slightly down, bring the open curler close to the upper-lash roots, and make sure no lid skin is caught. Close it with light pressure for a few seconds. If the lashes need more lift, release, move to the middle and press again more softly. Two gentle presses create a curve; one hard squeeze can create an L-shaped bend that looks like the lashes have had a disagreement with a right angle.
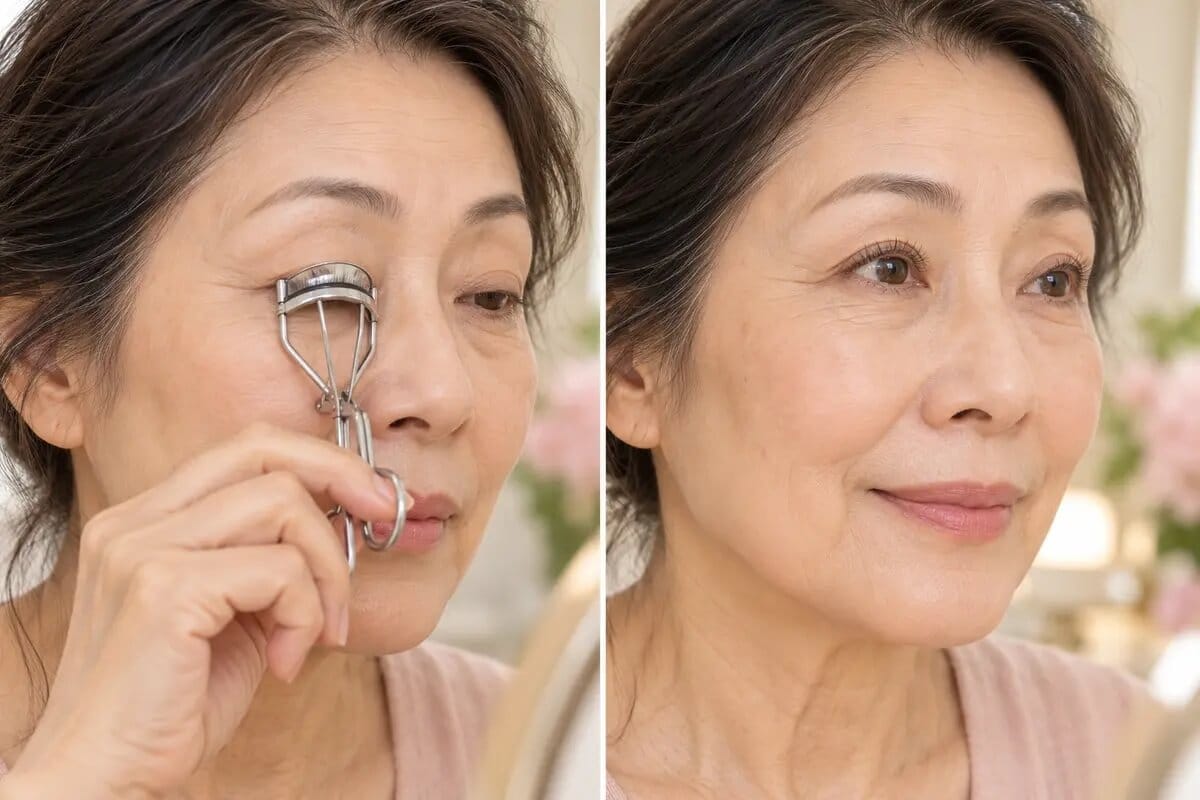

Curl clean lashes before mascara, using light pressure and an intact curler pad.
Inspect the curler pad regularly. If it is split, flattened or dirty, replace it. Wipe the tool clean and never share it. The same no-sharing rule applies to mascara and other eye products. The FDA’s eye-cosmetic guidance says not to share cosmetics and to keep applicators clean. That may sound obvious, but tester wands and “just try mine” moments are easy habits to overlook.
If your natural lashes already curve upward, skip the curler happily. This is a routine, not a loyalty test. The only required result is a comfortable eye and a shape you like.
Step 3: Remove the blob from the wand
The fastest way to prevent clumps is to avoid placing a clump on the lashes in the first place. Pull the wand out slowly rather than pumping it up and down. If the tip carries a large blob, wipe just that excess onto a folded lint-free tissue. I also check both sides of a flat or hourglass brush, because one side can hold much more formula than the other.
I am not trying to dry the wand. I want an even coating on the bristles with no visible lump at the tip. If I wipe away nearly everything, the mascara cannot do its job; if the brush looks like a tiny chocolate-dipped pinecone, it is about to do far too much.

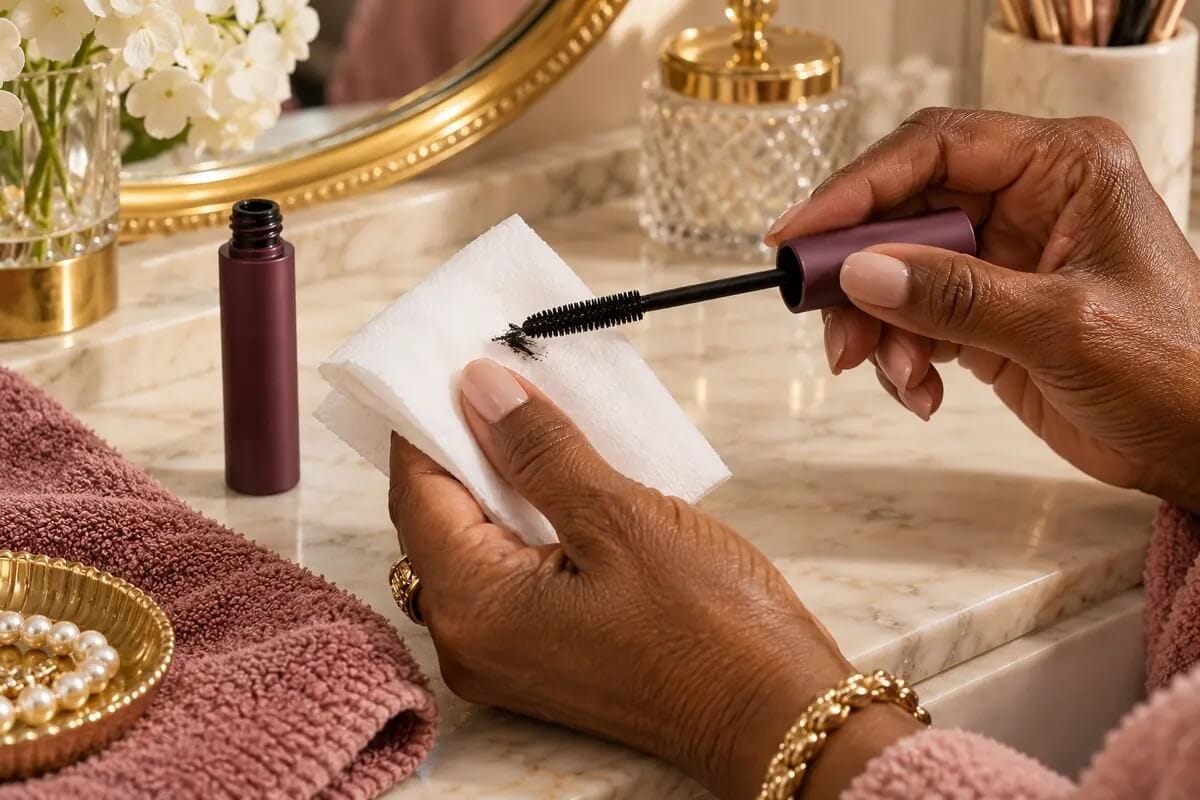
Keep an even coat on the bristles, but remove the obvious blob that would otherwise land on the first few lashes.
Avoid repeatedly pumping the brush into the tube. It does not load the wand more intelligently, and it can push air into the formula. Twist gently against the wiper instead. If the built-in wiper no longer removes obvious excess and every application begins with a loaded brush, the formula may be aging or the packaging may simply be a poor match for fine lashes.
Brush shape matters here. A huge fluffy brush can create dramatic volume on dense lashes, but it can also bump the lid and overwhelm a small or hooded eye. A narrower brush offers more control near sparse roots. My waterproof mascara comparison looks at formula performance, while my Clinique High Impact Waterproof review shows how one familiar brush-and-formula combination fits a mature-eye routine.
Step 4: Make the setup steady before the brush reaches the eye
This is the unglamorous step that changes everything. Sit if you can. Rest the elbow of your mascara hand on the counter or dressing table. Place the mirror a little below eye level, then lower your gaze into it while keeping the chin comfortably lifted. That position creates space between the upper lashes and the lid, which helps prevent stamping.
Keep the forehead relaxed. When we raise the brows to “open” the eye, the lid changes shape and the lashes move closer to the skin. Then we release the brow, and the placement no longer looks the way it did during application. A neutral expression gives a more honest view, just as it does when I map liner in the seven-step eyeliner routine.
If the hand shakes, shorten the distance it has to travel. Hold the wand closer to the cap rather than at the very end of a long handle. Let a finger or the side of the hand touch the cheekbone lightly for another point of support, as long as it does not pull the skin. Work in two or three small sections instead of one heroic sweep.
Glasses wearers can keep their everyday pair beside the mirror and check the result between sections. A magnifying mirror helps with placement, but always step back and look at the whole face before adding a second coat. Magnification is excellent at finding gaps and equally excellent at convincing us that a perfectly normal lash is a national emergency.
Step 5: Wiggle at the roots, then sweep up and slightly outward
Now the important part. Place the brush horizontally at the base of the upper lashes—not on the waterline and not pressed into the eye. Make a tiny side-to-side movement at the roots, only a millimeter or two. Then pull upward in one slow pass. Think anchor, wiggle, lift.
The root wiggle deposits enough color to create fullness where the lashes begin. The upward sweep distributes less product toward the tips, so they stay fine and separated. If I keep wiggling all the way to the ends, the hairs cross and tangle. A little movement belongs at the base; the length needs a clean glide.

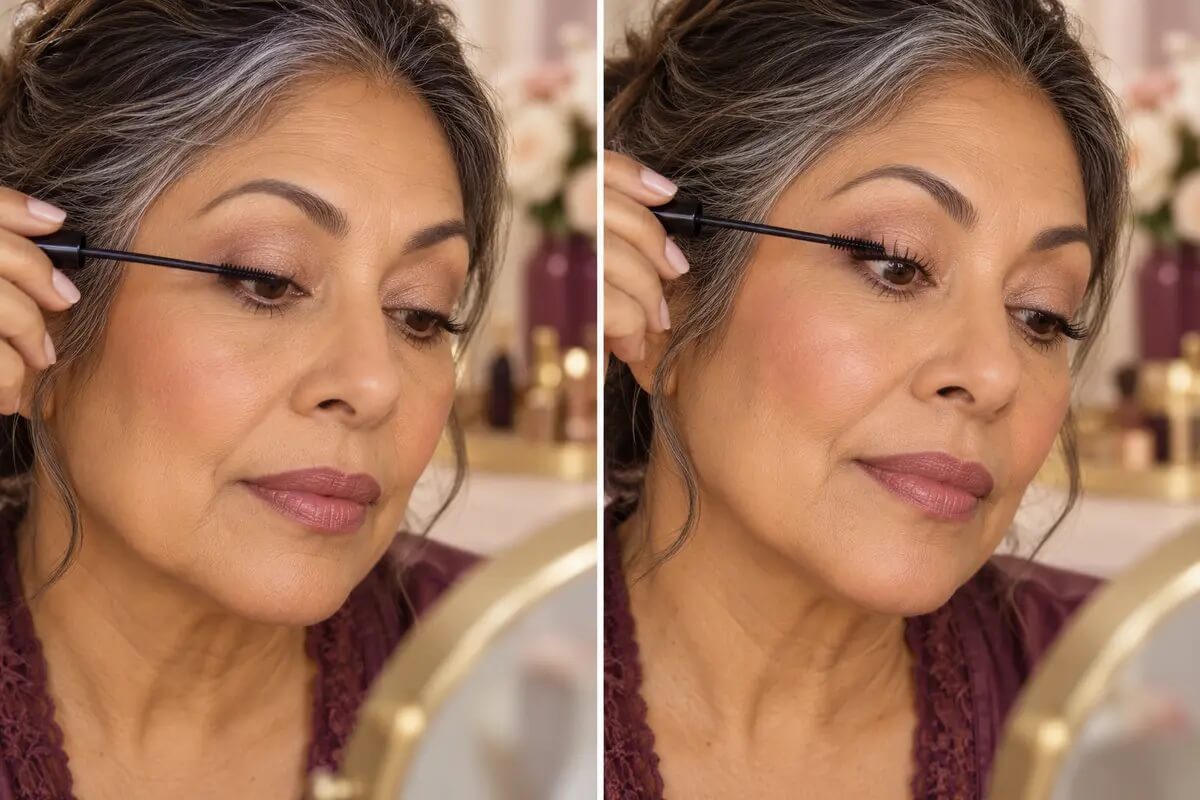
Use a tiny wiggle only at the roots, then glide through the lengths and fan the outer lashes slightly outward.
I usually divide the eye into inner, center and outer sections. For the inner corner, use the narrow tip with hardly any pressure. Through the center, pull mostly upward. At the outer corner, angle the brush slightly toward the temple. That gentle fan can make the eye look lifted without the weight of a thick wing.
Do not saw rapidly back and forth. A frantic wiggle makes fine lashes knot together and sends wet mascara onto the lid. Slow is faster here because it avoids repairs. If you do touch the skin, leave the mark alone for a moment. A wet smear grows; a dry fleck usually lifts away with a clean cotton bud.
If you use eyeliner too, keep the line thin near the inner and center lashes so the root darkness from mascara remains visible. The right pairing is soft definition, not a competition between two black products. For shade ideas beyond black, see my roundup of brown, gray, navy and plum eyeliners.
Step 6: Fan, separate and decide whether you truly need a second coat
After the first coat, pause for a few seconds—not until it is bone dry, just long enough for it to become less wet. Look straight ahead from normal mirror distance. Are the roots defined? Are the tips visible? Do the two eyes look balanced? Very often the answer is yes, and the wisest second coat is no second coat.
If you want more, add it only where it helps. I might touch the center for extra lift or the outer third for a more open shape. I rarely reload the brush immediately. There is usually enough formula left on it for these small adjustments. Building selectively preserves the airy spaces between lashes.
If a few hairs have joined, use a clean dry spoolie while the mascara is still flexible. Place it under the clump at mid-length and comb gently through the tips. Avoid digging repeatedly at the roots, where the skin is close and the hairs are easiest to pull. A metal lash comb can work too, but I prefer a spoolie for everyday use because it feels less intimidating near the eye.


Separate a small clump while the formula is still workable; comb from the middle through the tips rather than scraping at the roots.
The most common clumping mistake is adding wet mascara over a completely dry, already-thick coat. The fresh layer catches on hard tips and builds little knobs. If a second coat is part of your look, apply it within the working time of the formula. If the first coat has set and looks good, call it finished.
For a more polished overall face, balance matters more than lash volume. A little blush placed for lift, softly filled sparse brows and comfortable lip color often make the eyes look brighter without another layer of mascara.
Step 7: Treat the lower lashes as a choice, not a rule
Some eyes look beautifully balanced with a little lower-lash mascara. Others look fresher with none. The question is not whether women over 50 are “allowed” to wear it. The useful question is what the lower definition does to your particular eye shape.
If lower mascara pulls the eye downward, try using it only on the outer half or skip it completely. If the eye looks top-heavy without it, hold the wand vertically and touch the tips of a few lower lashes with the very end of the brush. Do not sweep a fully loaded horizontal wand underneath; that is how five delicate lashes become five little fence posts.
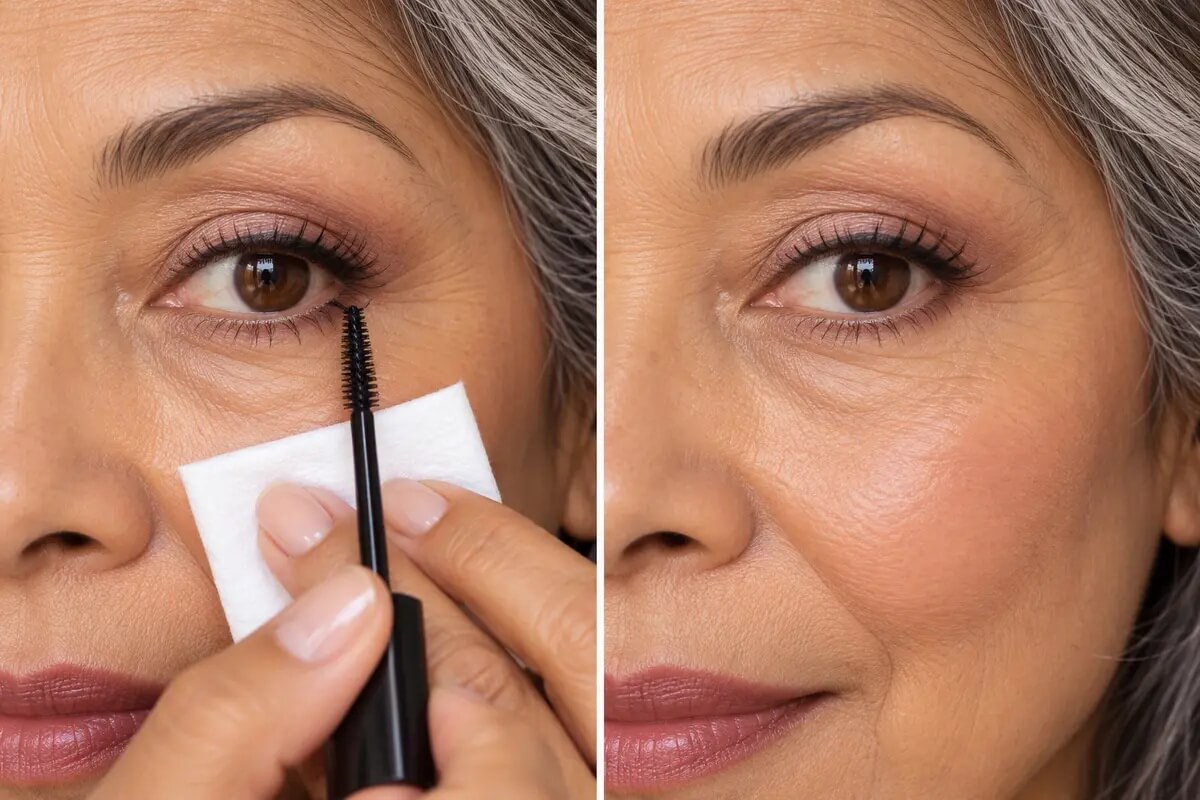

For subtle lower-lash definition, use the tip vertically and touch only a few outer lashes.
Brown or brown-black is often softer on the lower lashes, even if you use black above. A tubing formula can also be helpful when the under-eye area becomes humid or watery. If you wear concealer, allow it to settle and use only a whisper of powder where needed. My guides to choosing concealer for mature skin and applying setting powder without emphasizing lines can help keep that area from becoming a smudgy, cakey battleground.
Once the mascara is dry, blink normally and smile. If the upper tips touch the lid or the lower lashes stamp the skin, note where it happens. That information is more useful than staring at the tube. Next time you can use less on that section, choose a quicker-setting formula, or leave the lower lashes bare.
How I adapt the routine for different mature-lash problems
If the lashes are sparse
Put the emphasis at the roots. A narrow brush, tiny root wiggle and one clean upward pass create more believable fullness than loading the ends. Concentrate the second touch only where there is a visible gap. If the lash line still looks disconnected, press a soft brown pencil between the roots rather than drawing a thick line above them. The best eyebrow pencils for older women use a similar principle: fine marks create dimension; one heavy block removes it.
Avoid fiber-heavy formulas if loose fibers irritate your eyes. Also remember that a naturally spaced lash line is not a mistake to erase. The goal is definition, not a dense black fringe that could only have arrived with extensions.
If the lashes are short
Choose a smaller brush that can reach the roots without coating the lid. Curl first if it is comfortable, use the thinnest possible layer at the base, then pull right through the tips. Length comes from separation and visible ends. When every tip is covered by a heavy blob, the lashes can actually look shorter.
A lengthening or tubing formula may suit this job better than a very thick volumizer. Let the brush do the stretching; do not keep dipping. Pairing the look with a luminous but restrained lid shade from the cream-eyeshadow guide can also help the dark lash tips stand out.
If the lashes grow straight or downward
Curling matters most here. Use two light presses rather than one hard bend, then apply a light first coat before the curl has time to relax. Very wet, heavy mascara can pull fine lashes downward, so wipe excess carefully. A water-resistant formula often holds a curl better, although removal requires more patience. My waterproof mascara picks for mature lashes are the logical next read if lift disappears by lunch.
If the eyes are hooded and mascara transfers
Look downward during application, keep the brow relaxed, and give the formula a real moment to set before looking up fully. Use less product on the very longest tips, especially in the center where they may touch the fold. If transfer happens only on humid days, waterproof or tubing mascara may solve more than another layer of powder.
Check the rest of the eye base too. A slippery eye cream, rich concealer carried onto the lid or unset cream shadow can re-wet mascara where the two touch. That is one reason I keep the primer conversation separate from the idea that every surface needs more product. My Primer 101 guide explains when an extra layer helps and when it simply creates more movement.
If the eyes are watery or sensitive
Use the simplest routine that feels comfortable. Keep mascara on the external lashes rather than pushing the wand into the inner rim. Skip the very inner and lower lashes if those areas trigger watering. A smaller brush helps you stay controlled, and a fragrance-free, ophthalmologist-tested formula may be worth prioritizing—while remembering that no label can promise perfect tolerance for every person.
If contact lenses are part of your day, follow the lens and eye-care guidance you were given. The American Optometric Association notes that some fiber-containing lengthening mascaras may irritate contact-lens wearers. A smooth formula that stays where you put it may be a better friend than a dramatic fiber effect.
Persistent burning, redness, discharge or sudden discomfort is not a makeup-technique problem. Remove the product, stop using it and seek appropriate eye care. If you have an eye infection, do not share or continue using the same tube. The National Eye Institute advises against sharing makeup because some causes of pink eye spread easily. That is also a good reason to replace eye products used during an infection rather than welcoming them back afterward.
If the hand is unsteady
Make the motion smaller. Sit, plant the elbow, hold the wand closer to the brush end and work in sections. A compact mirror on a stable stand is easier than holding one object in each hand. If the wand has an unnecessarily long decorative handle, a shorter package may genuinely be easier to control next time you shop.
You can also place a clean folded tissue over the lid as a loose shield while coating the lashes, provided it does not press into the eye or pull the skin. I prefer a dry mascara guard or tissue to a spoon because it is lighter. And I keep cotton buds nearby—not as a sign that I expect failure, but because knowing a mistake is easy to fix makes the hand calmer.
If you wear glasses
Glasses change the visual balance. Strong plus lenses can magnify clumps, so a separated one-coat look is especially flattering. Minus lenses can make the eyes appear smaller, and a slightly more defined root with curled center lashes may help. Either way, put the glasses on before deciding whether the eye needs more product.
If lashes brush the lenses, focus mascara at the roots and mid-lengths rather than loading the tips. Curling can redirect them upward. Clean lenses also make an astonishing difference; sometimes the “smudgy mascara” is simply makeup dust or skincare on the glasses.
Black, brown or another shade?
Black is not automatically harsh, and brown is not automatically invisible. The best choice depends on hair, brows, skin contrast, eye color and the rest of the makeup. I like black when I want the clearest definition or when lashes are naturally dark. Brown-black is my easy everyday middle ground. True brown can be lovely with blonde, red, gray or softly brunette hair, especially when the liner and brows are also gentle.
Navy can brighten the whites of the eyes for some people, while plum can bring out green or hazel tones. These shades are most flattering when they read as subtly different from black, not as theatrical colored lashes. If you are experimenting, begin with the upper lashes and keep the rest of the eye quiet.
Brows help the shade make sense. A softly balanced brow from my sparse-brow tutorial or one of the best eyebrow pencils for gray and sparse brows frames the eye without requiring pitch-black mascara. The aim is harmony, not a rule based on age.
Which mascara formula and brush suit mature lashes?
Type | What it does well | Watch for | Best match |
|---|---|---|---|
Lengthening | Defines tips and makes short lashes visible | Loose fibers or overly dry texture | Short, fine or lightly colored lashes |
Volumizing | Adds darkness and body at the roots | Large brushes and fast clumping | Sparse lashes when used in a thin coat |
Tubing | Resists ordinary smudging and removes in small sleeves | Can look less plush; needs warm-water removal | Hooded, watery or smudge-prone eyes |
Waterproof | Holds curl and resists tears, humidity and rain | Requires patient, oil-compatible removal | Special occasions, straight lashes and humid days |
Lengthening mascara
Lengthening formulas are often thinner and pair well with smaller brushes. They can make pale tips visible without adding much weight. I like them for fine lashes and a clean daytime look. If the formula includes fibers, sensitive or contact-lens eyes may prefer a non-fiber alternative.
Volumizing mascara
Volume is useful at the roots, where it gives the impression of a fuller lash line. The danger is applying the same bulk all the way to the tips. Wipe the wand well, use one deliberate root-to-tip pass, then decide whether a small second touch belongs only at the base. A giant hourglass brush is not mandatory; on a mature hooded eye, a compact brush can deliver volume with far less cleanup.
Tubing mascara
Tubing formulas form little polymer sleeves around the lashes. They can be excellent for people who find ordinary mascara under the eyes by midafternoon. Removal is different: warm water and light pressure usually slide the tubes away. The pieces can look alarmingly lash-like in the sink, but they should be product sleeves, not hairs. Never pull; follow the label and let warmth do the loosening.
Waterproof mascara
Waterproof mascara is the raincoat of the drawer. I use the category when curl retention, humidity, tears or a long day truly call for it—not because every Tuesday deserves a weather system. It can be more drying or more work to remove, so the application should stay light and the evening removal should be patient. The GlowOver50 waterproof mascara roundup compares options, and the Clinique waterproof mascara review gives you a shorter single-product example.
The brush matters as much as the label
A narrow straight brush is easy to place at the roots. A tapered tip reaches inner and lower lashes. A curved brush can lift, but only if its shape matches your eye. Silicone teeth often separate crisply; traditional bristles may build a softer, fluffier coat. None is universally best.
When trying a new mascara, judge the brush before judging your hands. If it is twice the size of the space you have, bumps are predictable. You may still like the formula, but you are not required to master an awkward applicator for the privilege of using it.
Seven common mascara mistakes—and the kinder fix
1. Starting with too much product
The mistake: The wand comes out carrying a visible blob, and the first three lashes receive most of the tube’s enthusiasm.
The fix: Wipe the tip, check both sides of the brush and begin on the outer lashes where a little extra definition is easiest to absorb. One thin coat gives you somewhere to go; one thick coat gives you a repair project.
2. Wiggling all the way to the tips
The mistake: Side-to-side motion continues through the length, crossing fine lashes into knots.
The fix: Wiggle only at the roots, then glide. Think of the base as the fullness zone and the tips as the separation zone.
3. Applying several coats after the first has dried
The mistake: Each dry layer catches the new wet one, making knobs, flakes and stiff spikes.
The fix: Build selectively while the first coat is still flexible. If it is already set and the lashes look respectable, stop. “Respectable” is an underrated beauty goal.
4. Curling coated lashes
The mistake: The curler presses into dried product, where lashes can stick or snap.
The fix: Curl clean, dry lashes before mascara. If you forgot, skip it for the day rather than negotiating with hardened hairs.
5. Raising the brows throughout application
The mistake: The lid looks open while mascara is applied, then drops back and touches the wet tips.
The fix: Relax the forehead, look down into a lower mirror and apply in the eye position you actually wear.
6. Coating every lower lash heavily
The mistake: A loaded horizontal wand creates dark spikes and transfers under the eye.
The fix: Use the brush tip vertically on a few outer lashes, switch to brown, or leave them bare. Lower mascara is a design choice, not a compulsory second course.
7. Blaming mascara for a slippery eye base
The mistake: Rich cream, unset concealer or mobile shadow sits where lashes touch, then the mascara transfers.
The fix: Let skincare settle, keep heavy cream away from the moving lid and use the smallest amount of powder only where necessary. The same restraint helps in my guides to concealers for mature skin and setting powders that do not over-dry the face.
How mascara fits into a fresh, balanced makeup look
I do not judge mascara in isolation. A soft lash can look underdone next to a heavy base and perfect next to sheer skin. If you want an everyday face, begin with comfortable skin prep, use only the coverage you need, place color high enough to lift, and let one feature lead. My guides to prepping mature skin for foundation, choosing foundation for mature skin and avoiding common foundation mistakes all follow that same less-but-better logic.
If the base separates during the day, see my guide to stopping foundation separation. If tools are part of the trouble, compare foundation brushes and sponges for mature skin. Neither subject sounds connected to mascara, but a tidy base lets the eyes look polished with far less product.
For lighter days, tinted moisturizer, a little cream blush and one coat of brown-black mascara may be the whole story. You can compare tinted moisturizers with SPF and BB and CC creams for mature skin if foundation feels like more than the day requires.
For a dressed-up look, keep the lashes separated and add polish elsewhere: a softly placed product from the blush and bronzer guide, a restrained glow from my highlighter roundup, or a defined mouth using the best lip liners for mature lips. A tinted lip balm keeps things casual; one of the best lipsticks for mature skin makes the same lashes feel evening-ready.
Season matters too. Humidity may push you toward waterproof or tubing mascara and a light mist from the setting-spray guide. My summer makeup routine favors thin layers, while the winter makeup guide gives dryness more attention. The mascara motion stays the same; the formula and surrounding textures do the adapting.
Remove mascara without tugging at the lashes
Good application ends at the sink. I saturate a soft pad with a remover suited to the formula, close the eye, press the pad against the lashes and wait. Ordinary mascara may loosen quickly. Waterproof mascara deserves more contact time and an oil-compatible or bi-phase remover. The pad should do quiet dissolving work before it does any moving.


Press, pause and let the remover soften mascara before wiping; the goal is less friction, not a faster swipe.
Then wipe downward and outward with very little pressure. Fold the pad to a clean side and repeat if needed. I avoid rubbing back and forth or pinching the lashes between fingernails. If product remains between the roots, a damp cotton bud can lift it carefully from the outside of the closed lash line.
The American Academy of Ophthalmology advises removing eye makeup before sleep, especially mascara that can remain stuck to lashes. That is not about chasing one last speck until the lid is sore; it is about softening the product thoroughly enough that it releases.
My complete makeup-removal tutorial for mature skin covers full-face technique, and the makeup-remover comparison helps you choose between balm, oil, micellar water and bi-phase eye remover. If cheeks become dry after cleansing, look at the broader skincare-ingredient guide for mature women rather than rubbing harder or adding more eye product the next morning.
If the eyelids are dry, red or irritated, Cleveland Clinic advises taking a temporary break from makeup and most skin products around the area. Sometimes the freshest eye look is a rested eye, and that is perfectly fine.
How often should mascara be replaced?
Write the opening month on the tube if you never remember when it entered your makeup bag. Manufacturers commonly recommend a much shorter life for mascara than for powder products because the wand repeatedly moves between the lashes and the container. The FDA says manufacturers generally recommend discarding mascara two to four months after purchase. Three months is an easy household rule, but odor, texture, irritation or an eye infection can end the relationship sooner.
The American Academy of Dermatology also warns that keeping makeup longer than recommended can contribute to irritation or infection and cites mascara as a short-life product. Do not wait for a tube to become visibly alarming; mascara can look ordinary after it has stopped being a sensible eye-area product.
Close the cap firmly, store the tube away from heat and never share it. Do not use a shop tester directly on the eyes unless a genuinely single-use applicator and hygienic process are provided. And if a favorite is discontinued, mourn briefly, then move on. No mascara deserves a decade-long farewell tour.
Frequently asked questions about mascara on mature lashes
1. Should women over 50 wear mascara on the bottom lashes?
Yes, if you like the effect—but you do not owe your lower lashes equal billing. A little lower mascara can balance the eye, especially when the upper lashes are dark and the lower hairs are pale. On some eye shapes, though, a full coat emphasizes shadows, draws attention downward or transfers into fine lines. That is an aesthetic and practical question, not an age rule.
My softest method is to finish the upper lashes first, step back, then decide. If the eye looks top-heavy, hold the brush vertically and touch the tip to a few lower lashes on the outer half. Use what remains on the wand rather than dipping again. Brown or brown-black can make the effect even quieter. If the eye already looks open and balanced, leave the lower lashes bare and enjoy one less thing to remove tonight.
Under-eye preparation matters. Heavy concealer and too much powder can make mascara transfer more obvious, while no setting at all may leave a slippery surface. Use the smallest amount that solves the problem. My guides to the best concealers for mature skin and setting powders for mature skin explain that balance in more detail.
If lower lashes always smudge, try tubing mascara only on that area, skip the inner half, or use no lower mascara. A beautiful eye does not become unfinished because you made a sensible edit.
2. Is black or brown mascara better for mature eyes?
Neither is universally better. Black gives the strongest contrast and can make pale or sparse lashes look more visible. Brown, brown-black, soft navy or deep plum can create definition with less visual weight. I choose by contrast: dark hair, deeper skin or evening makeup may carry black beautifully; silver, blonde or red hair and a quiet daytime face may feel more harmonious with brown-black.
Also consider the other features. If the brows are filled with cool taupe and the liner is charcoal, a hard jet-black lash can look disconnected. If the lip is strong and the eye is otherwise bare, black mascara may be exactly the clean punctuation the look needs. My eyebrow-pencil guide for older women and eyeliner roundup for mature eyes both include softer shade thinking for the same reason.
When in doubt, compare one eye in black and one in brown in daylight, then stand several feet from the mirror. Up close, brown can seem too subtle; at normal conversation distance, it may be exactly enough. The winning shade is the one that makes the eyes noticeable before the mascara itself.
3. Should I curl my lashes before or after mascara?
Before. Curl clean, dry lashes, then apply mascara. Bare lashes remain flexible and less likely to stick to the curler pad. Once mascara dries, the coating can make hairs more rigid, and squeezing them in a curler may create a sharp bend, pull at the roots or cause breakage.
Open the curler fully, look slightly down, position it near the roots without catching the lid and press lightly. Release completely before moving. If you want a more rounded curve, make a second gentler press at mid-length. Replace a split or flattened pad and clean the tool regularly.
If you forget and apply mascara first, skip curling for the day. You can lift the lashes visually by adding a tiny amount of formula at the roots and brushing the outer corner upward. Next time, put the curler beside the mascara so the order becomes automatic. There is no prize for correcting every missed step after the product has set.
4. Is one coat or two coats better for sparse mature lashes?
One carefully placed coat is my default. It keeps fine lashes separated and lets the spaces between them look natural. The darkness at the roots creates more apparent density than a thick layer on the tips. If one coat leaves a specific area too light, add a partial second coat while the first is still flexible.
Two full coats can work when the formula is thin and the brush separates well. The important part is timing and placement. Do not wait until the first coat is completely hard, and do not automatically reload the wand. Use the remaining product to touch the center for lift or the outer third for a fan. Then stop and inspect from normal distance.
If you repeatedly need three or four coats, the formula may be too sheer for your goal or the brush may not reach your roots. That is a product-fit issue, not proof that your lashes are impossible. Compare formula types in the mature-lash mascara roundup, and remember that a soft line pressed between sparse roots can create fullness without asking mascara to become architecture.
5. How do I stop mascara from clumping on fine lashes?
Start by removing excess from the wand, especially the blob on the tip. Place the brush at the roots, make only a tiny wiggle, then glide cleanly through the lengths. Divide the eye into sections instead of brushing the entire fan at once. Those three changes prevent most clumps before they exist.
If lashes begin to join, stop adding product. Use a clean dry spoolie from the middle through the tips while the mascara is still workable. Do not comb endlessly; a few deliberate passes are enough. If the formula has already dried into hard spikes, trying to separate it aggressively may pull the hairs. It is safer to accept a slightly fuller day or remove and restart if the result is truly uncomfortable.
Old mascara is another common culprit. A drying tube becomes thicker and leaves uneven deposits. Never thin it with water or saliva. Replace it within the maker’s recommended window or sooner if the texture, smell or comfort changes. A narrow brush and a lighter lengthening formula may also suit fine lashes better than a plush volumizing brush.
Finally, check that the lashes are clean and dry before application. Eye cream, cleansing oil residue and yesterday’s mascara all create irregular grip. My gentle makeup-removal routine is the best place to fix that part of tomorrow’s application.
6. Why does my mascara smudge under my eyes or onto hooded lids?
Smudging is usually a meeting of formula, moisture and anatomy. Upper lashes may touch a hooded fold; lower lashes may rest near concealer; tears, humidity, facial oils or rich skincare can soften the mascara. The answer depends on where the mark appears.
For upper-lid transfer, look down while applying, use less on the longest tips and wait for the coat to set before opening the eyes fully. For under-eye transfer, apply less or no mascara to the lower lashes and keep the concealer light. A tubing or waterproof formula can help, but it should still be applied in a thin coat.
If the whole eye area feels slick, give skincare more time and keep rich products away from the mobile lid. Use a tiny amount of powder only where lashes touch. If makeup elsewhere also slides, the broader advice in my foundation-separation guide, matte-versus-dewy makeup guide and setting-spray comparison can help you adjust the entire routine without flattening the skin.
Watery eyes need comfort first. Skip the inner corner, choose a controlled brush and stop using anything that stings. Makeup should adapt to the eye, never the other way around.
7. Can mascara make mature lashes fall out, and when should I worry?
Seeing an occasional lash during removal can be normal because hairs naturally complete a growth cycle. The bigger practical risks are mechanical: curling after mascara, pulling off tubing formulas before they loosen, rubbing waterproof product repeatedly, or sleeping in a stiff coat and then scrubbing it away the next morning. Gentle application and patient removal reduce that avoidable stress.
Use a remover matched to the formula, press it against closed lashes and wait. Let tubing mascara release with warm water according to its directions. Keep the curler pad smooth, stop if it pinches, and never tug at a stubborn clump with fingers. The makeup-remover roundup and my full removal guide show the technique step by step.
A noticeable new patch of missing lashes, persistent itching, crusting, redness, pain or shedding that continues deserves professional attention. Those signs are beyond what a mascara tutorial can diagnose. Bring the products you have been using and explain when the change began. If a product causes a reaction, stop it rather than testing it repeatedly on the same delicate area.
For ordinary prevention, replace mascara regularly, do not share it, remove it every night and give irritated eyelids a makeup break. Those habits are less exciting than a new wand shape, but they protect the lashes we are trying to show off.
The friendly final check
Before you add anything else, put the wand down, move away from the magnifying mirror and look at your whole face. Can you see the eyes? Do the lashes look like hairs rather than a solid strip? Is one side noticeably heavier? If the answer is “they look softly awake,” you are done.
My favorite mature-lash result is not the longest or darkest possible lash. It is a clean root, a gentle lift and visible separation. The eyes look brighter, but the mascara is not shouting for credit. That finish works with a simple daytime face, a richer evening lip, glasses, gray hair and every mood in between.
If you want to keep building the look, start with the 25 mature-makeup tips, then choose the one next step you actually need. Maybe it is softer liner, a better brow shape or a base that feels more like skin. You can compare a drugstore foundation for mature skin with a luxury foundation after 50, or simplify everything and wear only mascara, blush and lip balm. There is no medal for using every product in the drawer.
And tomorrow morning, if one outer lash still points in a direction of its own, welcome to the club. Curl gently, wipe the wand, anchor at the roots, lift slowly, separate once and carry on. That is the whole routine.