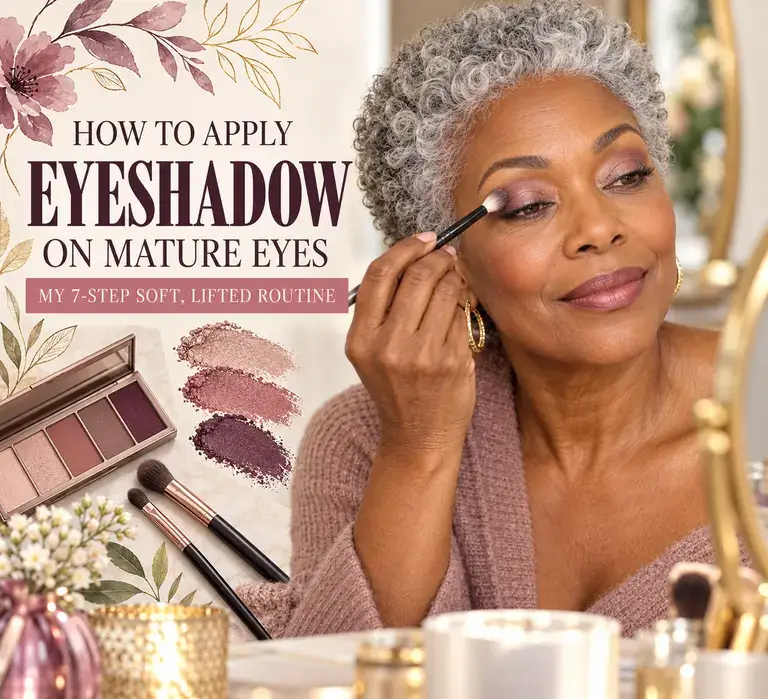

Eyeshadow used to be the easy part of my makeup. I could sweep one color over the lid, add something darker in the crease and leave the house without giving it another thought. Then the shape and texture around my eyes began to change. A crease that was easy to see with my eye closed seemed to disappear when I opened it. Soft shimmer sometimes looked beautiful and sometimes found every tiny fold. Dark color at the outer corner could lift my eye—or pull it down in about ten seconds.
If that sounds familiar, I want to reassure you: your eyes are not suddenly “difficult,” and you do not need to stop wearing color. I simply had to change where I placed it, how much I used and when I looked at the result. Once I stopped copying techniques designed for a perfectly smooth, wide-open lid, eyeshadow became enjoyable again.
My favorite mature-eye routine is built around three ideas: thin layers, soft edges and checking the shape with my eyes open. I use two or three shades rather than six, and I let placement do the lifting instead of relying on a sharp wing or a dark stripe. The result looks polished in real life, not just under a magnifying mirror.
This is a technique guide, not another shopping list. If you need help choosing the actual formula, my comparison of the best cream eyeshadows for mature eyes and my guide to the best eyeshadow primers for mature eyelids are the natural next stops. Here, I am going to show you how I make almost any flattering shadow look softer, smoother and more lifted.


My whole shape is easier to understand as three soft zones: lid, visible crease and a gently lifted outer corner.
Table of Contents
What Changes Around the Eyes After 50?
Not every woman develops the same eye shape or texture, and age does not hand us one compulsory makeup rulebook. Still, several changes are common enough to explain why an old technique may stop behaving as expected.
The eyelid can become drier, thinner or more mobile. The fold may sit lower, which means less of the mobile lid remains visible when the eye is open. The brow bone can look more prominent, while the outer corner may appear a little lower. Lashes and brows can become lighter or sparser, so the shadow suddenly carries more of the visual weight. Some of us also deal with watering, sensitivity or reduced close-up vision.
None of that means I have to disguise my age. It means I need to judge makeup in the position in which people actually see me: upright, relaxed and looking ahead. A beautifully blended crease with the eye shut is not very useful if it vanishes completely when I open it.
I also pay attention to the rest of the face. If my base is thick or my under-eye concealer is very bright, soft eye makeup can look oddly disconnected. A light, flexible complexion usually supports it better. My mature-skin foundation-prep routine, concealer guide for mature skin and matte-versus-dewy makeup guide can help if the eye looks good but the full face still feels a little heavy.
The Small Kit I Actually Use
I do not need a suitcase of brushes for an everyday eye. Most mornings, I use one lid shade, one slightly deeper shade and four basic tools:
- A fingertip or small flat brush to press color onto the mobile lid.
- A small fluffy brush to place and soften the crease color. A huge brush spreads pigment too widely on a smaller visible lid.
- A short, softly tapered brush for the outer corner and lower lash line.
- A clean blending brush or clean fingertip to blur edges without adding more color.
I keep cotton buds and a little micellar water nearby, but I do not treat them as an eraser I must use after every step. The goal is controlled application, not deliberately making a mess and then rubbing at delicate skin.
For color, two shadows are enough: a light-to-medium lid shade and a medium defining shade. A third, slightly deeper shade is optional at the outer corner or lash line. If a stick is easier to hold than a small brush, that is a perfectly good reason to use one. My Julep Eyeshadow 101 review explains why that format can be especially convenient, while the cream-shadow roundup compares several sticks and pots.
Before I touch the eye area, I wash and dry my hands and make sure the brushes are clean. The FDA specifically advises people to wash their hands before applying eye cosmetics because bacteria can be transferred to the eye. That is not the glamorous part of makeup, but it is the part I never skip.
Before the Seven Steps: Set Up the Mirror Properly
I place my mirror at eye level rather than flat on the counter. Looking far down stretches and changes the lid, so I can create a perfect shape in the mirror that looks completely different when I lift my head. Good daylight or a neutral lamp is much kinder than one bright bulb above the face.
If my hand feels unsteady, I sit down, plant both feet and rest my elbow on the table. I can also steady the heel of my hand lightly against my cheek. I avoid pulling the eyelid taut. Stretching can make application feel smoother, but the color compresses into a different shape when I release the skin.
I keep my everyday glasses nearby. A magnifying mirror helps me place product, but it can persuade me to fix details nobody can see. I alternate between close-up work and a normal-distance check. That same “step back before adding more” rule is useful for brows, so readers who struggle with close-up precision may also like my guide to filling sparse brows after 50.
My 7-Step Eyeshadow Routine for Mature Eyes
Step 1: Let Skincare Settle and Prepare the Lid
I begin with a clean lid. If the skin feels comfortable, I do not automatically add eye cream right before makeup. If it feels dry or tight, I tap on the smallest amount of a familiar moisturizer around the orbital area, keeping it out of the eye, and give it several minutes to settle.
What I am looking for is comfort without surface slip. When the lid still feels wet, every layer above it can move. I blot obvious excess with a clean tissue rather than covering grease with powder. This is the same layering logic I use across the face: let one texture settle before asking another to grip. My exact makeup-layering routine explains that sequence in more detail.
I do not place face foundation over the entire lid by habit. Foundation, concealer, primer and several shadows can become a thick stack. If I want to soften visible veins or discoloration, I choose either a thin eye primer or a whisper of flexible concealer—not both at full strength.
Anyone with active irritation, swelling or an eye infection should pause eye makeup. The FDA advises stopping an eye cosmetic immediately if it causes irritation and waiting for an infection or inflamed skin to heal. Its guidance is clear: irritation is a reason to stop, not something to work through.
Step 2: Press on a Very Thin Layer of Primer
Primer is useful when my shadow creases, fades, stamps into a hood or applies unevenly. It is optional when the lid already holds color beautifully. I do not use it because women over 50 are “supposed” to; I use it when it solves a visible problem.
I put a pinhead-to-rice-grain amount on the back of my clean hand for both eyes. Then I pick up a little with my ring finger or a small synthetic brush and press it from the lash line toward the crease. On a hooded lid, I carry the veil slightly above the fold because that is where shadow can transfer. I feather the edge before the brow bone rather than painting an opaque beige sheet all the way to the eyebrow.
Urban Decay’s current primer directions offer a useful three-part reminder: apply a small amount, blend it and let it set for a few seconds. “Small” is the important word for mature texture. A primer should feel like a light grip, not look like an extra layer of makeup.
If you are not sure which texture to use, start with my mature-eyelid primer comparison. For a closer look at one premium option, my Urban Decay Anti-Aging Primer review discusses its strengths, limits and application in a genuinely thin layer.


I press on a whisper of primer and soften the edge; a full wand swipe is usually far more than I need.
Step 3: Choose Two or Three Forgiving Shades
My easiest everyday combination is simple:
- a light or medium satin, soft matte or cream shade for the lid;
- a muted medium matte or low-sheen shade for the crease;
- an optional deeper brown, plum, charcoal or navy for the outer corner and lash line.
I do not insist that every mature woman wear beige. Soft rose, olive, bronze, plum, mushroom, navy and muted teal can be beautiful. What matters more than the shade name is contrast. If the lid, crease and outer color are separated by five dramatic levels of darkness, the eye can look divided into stripes. Shades that sit closer together create depth without obvious boundaries.
I swatch the colors beside one another on my hand before applying. If the deepest shade looks almost black, I test it with the tiniest brush. If a shimmer has coarse particles that sit on top of the skin, I reserve it for a pinpoint at the center of the lid or skip it. My cream-eyeshadow guide includes both luminous and quieter finishes, while my broader mature-makeup tips can help coordinate the eye with the rest of the face.


Taupe and brown are easy, but they are not the only options. Muted rose, plum, bronze and olive can remain soft while giving the eye character.
Step 4: Press the Main Color onto the Mobile Lid
I start at the center of the mobile lid, where I want the most color, then press outward and inward with whatever remains on the brush or fingertip. Pressing gives me more control than sweeping back and forth. It also reduces fallout and friction.
I stop just short of the inner corner if that area waters easily. I keep the layer thin near the lash line and fold. If I am using a cream or stick, I work on one eye at a time because many formulas set quickly. I scribble a stick onto the back of my hand and pick it up with a finger when drawing directly on the lid feels awkward.
A light-to-medium satin is often the easiest lid finish because it reflects enough light to keep the eye open without looking like obvious glitter. A soft matte can be lovely too, especially when it is finely milled and not chalky. With either formula, I would rather add a second whisper at the center than apply one thick, opaque coat.


Starting at the center and pressing outward gives the lid an even veil without dragging the skin.
Step 5: Place the Crease Color with the Eye Open
This is the step that made the biggest difference for me. I look straight ahead with my face relaxed and place the first touch of crease color where it is still visible—often a few millimeters above the anatomical fold. Then I blend in a short windshield-wiper or tiny circular motion, keeping the color within the outer two-thirds of the eye.
If I close the eye and blindly follow the deepest fold, a hood may cover the whole result. Placing color slightly above it creates a visible shadow that suggests depth. I am not painting up to the brow; I am building a soft transition that can still be seen when I open my eye.
I begin at the outer crease because a freshly loaded brush carries the most pigment. I use the remaining color as I move inward. The inner third stays lighter, which helps the eye look open. Every few strokes, I lower the brush and check both eyes from a normal distance.
If one hood sits lower than the other, I do not force mathematical symmetry. I place the color where each open eye needs it. The painted shapes may look slightly different with the eyes closed and more balanced when open—and the open view is the one that matters.


On a hooded eye, I place the transition shade where it remains visible with the eye open, not only inside the hidden fold.
Step 6: Build a Soft, Lifted Outer Corner
I use a smaller brush and place the deeper shade close to the outer lash roots. From there, I blend upward and slightly outward toward the tail of the brow. I imagine a soft comma or a tiny wedge, not a heavy sideways V.
The lower edge is important. If dark shadow drops below an imaginary line from the lower lash line toward the brow tail, it can make the outer corner look lower. I clean that edge with the side of a dry sponge or a cotton bud rather than drawing a sharp piece of tape across delicate skin.
I keep the darkest point near the lashes and diffuse it as it rises. That creates definition where the eye naturally needs it without placing a dark block on the hood. If the outer corner looks obvious, I go back with the crease brush—but without adding product—and soften the join.
For extra definition, I may press the same deep shadow between the upper lashes with a damp or dry angled brush. That can be gentler-looking than a full line. When I do use pencil, I follow the short-stroke placement in my eyeliner tutorial for mature eyes or choose a smoother option from my best eyeliners for mature eyes.
Step 7: Blend Strategically, Then Finish the Eye
“Blend more” is not always good advice. If I keep polishing the whole lid with a big brush, the colors merge into one muddy haze and spread too high. I blend only the boundaries: where the lid meets the crease, where the crease fades toward bare skin and where the outer color joins the transition shade.
I use a clean brush and almost no pressure. One or two passes are often enough. Then I look straight ahead, turn my face slightly left and right, and check whether the two eyes feel balanced. I do not chase identical flecks of pigment.
If the eye needs brightness, I tap a tiny amount of satin at the center of the lid or just inside the inner lid—not deep in a watery tear duct. I usually leave the brow bone mostly bare or use a soft matte close to my skin tone. A frosty stripe under the brow can make the area look more prominent than I intended.
I finish with a thin liner or deep shadow at the upper lashes, curl if that is comfortable, and add mascara from roots to tips. My mature-lash mascara routine shows how I avoid loading the tips, and my waterproof mascara comparison is useful when watering or smudging is the problem. Finally, I soften my brows rather than drawing a dark frame; the best eyebrow pencils for older women guide includes gray- and taupe-friendly options.
Matte, Satin or Shimmer: What Looks Best?
I do not agree with the old rule that mature women must stop wearing shimmer. The finish is only one part of the result. Particle size, placement, formula and amount matter just as much.
Finish | Where I like it | What I watch for |
|---|---|---|
Soft matte | Crease, outer corner and subtle shaping | Very dry or chalky mattes can skip and make the lid look flat |
Satin | Mobile lid and gentle center-lid brightness | Usually the easiest all-round finish; build it thinly |
Fine shimmer | Center lid or a small accent | Keep it away from areas where sparkle exaggerates texture for you |
Metallic or glitter | Occasional focal point in a tiny area | Fallout, coarse particles and eye sensitivity; never use craft glitter |
A satin taupe across the lid can look smoother than a dry matte taupe. A finely milled shimmer pressed over the center can bring life to the eye, while chunky glitter scattered through the crease can emphasize every movement. I decide by looking at the actual product on my actual skin, not by reading one word on the label.
I also check that a color product is intended for the eye area. The FDA warns against using cosmetics near the eyes unless they are specifically intended for that use; for example, a lip pencil should not be repurposed as eye liner. The same common sense applies to loose glitter and pigments.


Soft matte shapes, satin brings quiet light and fine shimmer can be a lovely accent. Placement matters more than an age rule.
Cream, Powder or Stick: Which Is Easiest?
There is no universal winner. I choose the format according to the morning, the eye and how much control I want.
Cream shadow
A thin cream can smooth over the lid and give me a complete one-color look in seconds. It is especially convenient when powder fallout irritates my eyes. I apply a tiny amount, work quickly and keep the fold thin. On a hooded or oily lid, I may add primer only where creasing usually begins.
Powder shadow
Powder gives me the most control over gradual depth. I can pick up almost nothing, tap off the brush and build. The drawback is that a dry, coarse formula can skip and create fallout. A softly pressed, finely milled powder is much easier than one that needs aggressive blending.
Eyeshadow stick
A stick is easy to hold, quick to place and useful for travel. I like it most as a lid color or soft lash-line shade. If the tip is broad, I draw a little on my hand and use a brush for the crease. That gives me the convenience of the stick without trying to fit a crayon into a small fold.
The image below shows why format can change the routine even when the colors are similar. For specific mature-eye picks, use my cream eyeshadow and stick comparison; for one focused example, see the Julep shadow-stick review.


Creams are fast, powders build gradually and sticks are easy to hold. I choose the format that makes the technique simpler.
How I Adapt the Routine for Different Mature Eyes
Dry or crepey eyelids
I make every layer thinner. I allow skincare to settle, use primer only when it solves a wear problem and choose flexible creams, soft satins or finely milled powders. I press rather than buff. Constant brush friction can make a dry lid look rough before the makeup is even finished.
If color catches in one patch, I do not keep loading pigment. I soften the area with a clean finger, then add the smallest amount of color around it. On very dry days, a one-shadow satin look often appears more polished than a complicated matte gradient.
Hooded eyes
I apply the crease shade with the eye open and place it a little above the fold. The mobile lid stays lighter, and the deepest color remains on the outer lash roots rather than filling the whole hood. I also keep liner thin because a broad line can consume the small area of lid that remains visible.
Transfer can come from shadow, liner, mascara or all three. Primer helps, but allowing layers to set and using less product help too. Pair this section with my hooded-eye eyeliner placement if the shadow looks good but the liner still stamps.
Downturned outer corners
I stop the lower lash color before the very outer corner and direct the upper shadow gently toward the brow tail. I avoid dragging a dark crease shade straight down into the natural dip. This is a visual adjustment, not a claim that downturned eyes need correcting; I simply like the open, lifted effect on days when that is my goal.
Deep-set or prominent eyes
On a deep-set eye, too much dark color in the socket can make the eye recede further, so I use a medium transition and keep some light on the lid. On a prominent eye, a soft matte or satin across the lid can create calm dimension without a bright metallic center. These are starting points, not restrictions.
Glasses
I put my glasses on before deciding the eye is finished. Frames can hide the crease, magnify shadow or make the eye appear smaller depending on the prescription. I often need slightly clearer lash definition and less fussy blending—not necessarily darker makeup everywhere.
Unsteady hands or limited close-up vision
I sit, support my elbow, use short-handled brushes and choose textures that remain movable for a few seconds. One cream lid shade plus a powder crease is often easier than three fast-setting sticks. I label similar palettes or keep the everyday shades in the same positions so I do not have to read tiny print.
I use the same practical approach with brows and cheeks. My brow-pencil guide compares broader tips with micro-pencils, and my seven-step blush routine uses supported, repeatable placement rather than perfect freehand artistry.
Watery, Sensitive Eyes and Contact Lenses
Comfort comes first. “Hypoallergenic” on a package is not a guarantee that an individual eye will be happy. The FDA notes that there is no federal definition governing that term in the United States, so I still read labels and stop if a product causes burning, redness or swelling.
I keep loose powder away from the inner corner, choose low-fallout textures and avoid putting shadow directly on the waterline. Contact-lens wearers should follow the instructions from their own eye-care professional. The American Optometric Association says soft lenses are generally put in before makeup and advises removing lenses before removing makeup; its full guidance on contact lenses and cosmetics is worth reading.
If my eyes are watering because of wind, allergy or irritation, I simplify rather than trying to seal every product in place. A satin cream shade on the upper lid, soft liner at the outer lash roots and a suitable mascara can look complete. My Clinique waterproof mascara review and broader waterproof mascara guide may help if the lashes are the main source of smudging.
Should I Wear Eyeshadow Under the Lower Lashes?
You can, but I treat the lower lash line as seasoning rather than the main course. I use whatever remains on a small brush and place it beneath the outer third or outer half of the lashes. Then I connect it softly to the upper outer corner.
I avoid a thick, dark stripe from tear duct to outer corner because it can close the eye and emphasize shadows underneath. A muted taupe, soft plum or gray-brown is usually easier than black. If the under-eye area already looks dark, I may use only upper-lid color and mascara.
Concealer placement matters here. Bringing a very pale, heavy triangle right up to a smoky lower lash line can create a sharp border and more creasing. My best concealers for mature skin and no-creasing concealer guide explain why targeted coverage usually looks fresher.
A Simple Day Look and a Five-Minute Evening Update
My soft daytime eye
- Thin primer only if I need it.
- Satin taupe, muted rose or soft bronze pressed over the mobile lid.
- Medium matte brown, plum or mushroom placed just above the outer crease.
- The crease shade pressed lightly into the upper lash roots.
- One controlled coat of mascara and softly brushed brows.
This works particularly well with a fresh complexion and cream cheek color. If you want the rest of the face to stay equally natural, my lifted blush routine, mature-skin highlighter guide and tinted lip balms for mature lips make easy companions.
My five-minute evening update
I do not remove and rebuild the eye. I press a little more satin or fine shimmer at the center of the lid, deepen the outer lash roots with plum-brown or charcoal and strengthen the upper mascara only if the first coat is still flexible enough. I tidy fallout before touching the under-eye with more concealer.
A softly defined lip can balance the stronger eye. My lip liners for mature lips and best lipsticks for mature skin focus on comfortable definition rather than a hard outline.
The Eyeshadow Mistakes I See Most Often
Using too much primer
A thick base is not a stronger base. Excess primer can collect before shadow reaches it. I use a transparent veil and add only where movement happens.
Following the closed-eye crease
This is the classic hooded-eye problem. I place the transition with my eye open, then close it only to soften the edge.
Starting with the darkest shade
Dark pigment is much easier to add than remove. I build from light to medium, reserve the deepest color for a small brush and keep a clean brush ready.
Blending with a brush that is too large
A large fluffy brush can place shadow from lashes to brow bone in two strokes. I size the brush to the visible area, not to whatever tool is trending.
Pulling the outer color downward
I check the lower edge and keep the shadow above the upward extension of the lower lash line. If it drops, I lift the edge with a clean sponge rather than adding concealer over a pile of fallout.
Trying to make both eyes identical
Most faces are naturally asymmetrical. I aim for visual balance with the eyes open, even if one crease color sits slightly higher.
Adding more products to fix a texture problem
Primer, concealer, face powder, lid color, crease color and glitter topper can become a lot of layers. When an eye looks heavy, I remove or thin something. The same restraint prevents caking elsewhere; see my guide to common foundation mistakes on mature skin and my routine for stopping foundation from separating.
Judging everything through a magnifying mirror
A magnifying mirror shows application, not the social view of my face. I step back before I correct a normal line or add another layer. Makeup should look good at conversation distance.
How I Remove Eyeshadow Without Rubbing
I remove contact lenses according to my eye-care professional’s instructions, wash my hands and saturate a soft pad with a suitable eye-makeup remover or micellar water. I close the eye, hold the pad against the lid for several seconds and let the remover dissolve the makeup. Then I wipe gently downward and outward. I use a fresh area of the pad rather than rubbing old pigment back across the lid.
Long-wear cream, primer and waterproof mascara may need a bi-phase remover or an emulsifying balm, but I keep cleansers out of the eye itself and follow the product directions. My full gentle makeup-removal routine for mature skin explains contact time and double cleansing, while the best makeup removers for mature skin guide compares balms, oils, micellar waters and eye removers.


I give remover time to work. Gentle contact is far kinder than repeated dry wiping.
I never share eye makeup or brushes. The FDA warns that another person’s bacteria may be hazardous and advises, do not share cosmetics. If I develop an eye infection, I stop eye makeup and discard the products I was using when it began, following the agency’s advice.
I also pay attention to age, smell, texture and storage. Eye-area cosmetics tend to have shorter useful lives than many other products because applicators and repeated use can introduce microorganisms. The FDA’s shelf-life guidance explains that eye-area cosmetics tend to have shorter shelf lives. I date products when I open them and replace anything that smells odd, changes texture or has been used during an infection.
My Quick Routine Recap
- Let skincare settle so the lid feels comfortable, not slippery.
- Press on the thinnest layer of primer only where it is useful.
- Choose two or three related shades and forgiving finishes.
- Press the main color onto the mobile lid.
- Place the transition slightly above the fold with the eye open.
- Keep the deepest color at the outer lash roots and blend it upward.
- Soften only the boundaries, check from a normal distance and finish the lashes and brows.
That is the whole routine. It sounds detailed on paper because I want you to understand the reason behind each move, but in practice it can take five minutes. Once I know where my visible crease sits, I do not need to rediscover it every morning.
For a complete eye routine, I would pair this tutorial with the cream-eyeshadow roundup, the eyeshadow-primer comparison, my soft eyeliner routine and my mascara routine for mature lashes. Together, they create a softly defined eye without asking any one product to do all the work.
Frequently Asked Questions
What is the best eyeshadow finish for mature eyes?
A soft satin is the easiest all-round finish for many mature lids because it reflects a little light without the obvious particles of glitter or the flatness of a very dry matte. I like satin on the mobile lid and a softly milled matte or low-sheen shade through the crease and outer corner. That combination creates dimension while keeping the surface comfortable-looking.
The best finish still depends on the formula and your texture. A silky matte can be more flattering than a chunky satin, and a fine cream shimmer can look smoother than a powder matte that skips. I swatch before deciding. If the particles sit visibly on top of the skin or scatter with one touch, I know the product will require more work.
I also think about the rest of the face. A softly luminous eye can look lovely with fresh skin, while a satin cheek and lip may mean the eye needs less shine. My matte-versus-dewy guide helps balance finishes without making the entire face one texture.
Should women over 50 stop wearing shimmer eyeshadow?
No. There is no birthday at which shimmer becomes forbidden. The more useful question is whether a particular shimmer, in a particular place, creates the effect you want. I often like a fine pearl or satin at the center of the lid because it makes the eye look awake. I am more cautious with coarse glitter through the crease, where movement can make particles scatter and emphasize texture.
If you love shine, press it on rather than sweeping it everywhere. Use a fingertip or flat brush, keep it within the mobile lid and begin with less than you think. A tiny reflective accent surrounded by soft matte depth can look sophisticated at any age.
Sensitive or contact-lens-wearing eyes may prefer cream sheen or firmly pressed shimmer with less fallout. Always check that the product is intended for the eye area, and stop if it irritates. Makeup should be fun; discomfort is never the price of admission.
Where should I put crease color on hooded mature eyes?
Look straight into an eye-level mirror and place the transition shade where it remains visible, usually slightly above the natural fold. Begin on the outer two-thirds, where depth is most useful, and blend inward with whatever remains on the brush. Keep the inner eye lighter.
When the eye is closed, that placement can look higher than the crease tutorials you learned years ago. With the eye open, it reads as a natural shadow and restores visible dimension. I make small adjustments for each eye because hoods are rarely perfectly symmetrical.
Keep the brush small enough for the available space and use a medium shade rather than jumping straight to black or espresso. Then place the deepest color closer to the outer lashes. That separation—medium above, depth below—is what keeps the hood from becoming one dark block.
How can I stop eyeshadow creasing on mature eyelids?
First identify the cause. Excess eye cream, foundation over the lid, too much primer, a thick cream shadow, oily folds and skin-to-skin contact can all create creasing. Adding more powder without knowing the cause may simply make the eye look drier.
I start with a clean, settled lid, apply a transparent veil of primer and let it set briefly. Then I use thin shadow layers. On an oily or hooded crease, I may place a tiny amount of neutral powder shadow only in the fold before applying the rest. I keep cream shadow thin there even if I build it on the center of the lid.
If creasing appears during the day, I tap the line flat with a clean fingertip before adding anything. That redistributes the existing product. For product comparisons and more troubleshooting, see my primer guide for mature eyelids and the more detailed Urban Decay primer review.
Which eyeshadow colors look good with gray or silver hair?
Taupe, mushroom, cool brown, pewter, muted plum, soft navy, rose-brown and olive are useful starting points. Gray hair can make overly orange browns look more obvious, but that does not mean every color must be cool. Skin undertone, eye color, glasses and personal style matter too.
I usually choose contrast rather than trying to “match” silver hair. Blue and gray eyes can look clear beside plum, bronze or charcoal. Brown eyes often come alive with olive, navy, rose and coppery taupe. Green eyes can look beautiful with plum, soft burgundy and warm mushroom. These are invitations, not rules.
I keep the brow color in the same visual family so it does not fight the shadow. A soft gray-brown or taupe pencil can be more harmonious than a warm auburn beside silver hair. My eyebrow-pencil guide compares several cooler options.
Should I put eyeshadow below mature eyes?
Only if it helps the shape you want. I like a small amount beneath the outer third because it connects the upper and lower eye. I use a soft shade and a small brush, then blur the edge so it looks like a shadow rather than a drawn stripe.
I skip lower shadow when my eyes are watering, the under-eye is irritated or darkness already feels prominent. I may define only the upper lashes instead. There is no rule that a “complete” eye must be outlined on all sides.
If lower color makes the eye look tired, try moving it closer to the lash roots, shortening it, switching from black to taupe or plum, or removing it entirely. Freshness matters more than following a diagram.
Is cream or powder eyeshadow better for crepey eyelids?
A thin cream is often the fastest and smoothest-looking option, especially as a one-color lid shade. It can move with the skin and avoids powder fallout. But a heavy or very emollient cream may crease, particularly on a hooded or oily eye.
A finely milled powder offers more control and is often better for shaping the crease. The problem is not “powder” as a category; it is a dry, coarse formula combined with too much product and too much buffing. I frequently use cream on the lid and a small amount of powder in the crease because each format does the job it handles best.
If you want the simplest route, choose one flattering cream or stick, keep the layer thin and softly lift the outer edge. My cream-eyeshadow roundup for mature eyes compares easy sticks, pots and finishes.
How can I make mature eyes look more lifted with eyeshadow?
Keep the inner eye and mobile lid relatively light, place the transition where it is visible with the eye open, and direct the outer color slightly upward toward the brow tail. Concentrate depth near the upper outer lashes and stop lower-lash color before it pulls the corner down.
Soft brows and curled, defined lashes strengthen the effect. A thick strip of black liner can undo it by hiding the lid, so I keep the line fine and the darkest part on the outer third. My mature-eye eyeliner guide and mascara guide for women over 50 complete that lifted shape.
Most importantly, lift does not require a sharp, theatrical angle. A slight upward diffusion is enough. I want people to notice an open, softly defined eye—not the geometry of my technique.
Final Thoughts
The best eyeshadow technique for mature eyes is not one that tries to recreate a twenty-year-old lid. It is one that notices where the lid folds today, where color remains visible and how much texture the formula can comfortably carry.
I start with a settled surface, use the thinnest useful primer, press a forgiving shade onto the lid and build the crease with my eyes open. I keep the deepest color close to the outer lashes, blend the edges rather than the whole eye and step away from the magnifying mirror before deciding I need more. Those small changes give me a softer, more lifted result than any complicated palette diagram ever did.
Use the seven steps as a starting point, then make them yours. Wear the shimmer if it makes you happy. Skip the lower lash line if it does not. Choose a stick when your hand wants a stick and a powder when you enjoy the ritual. Mature makeup should feel more personal, not more restrictive.